
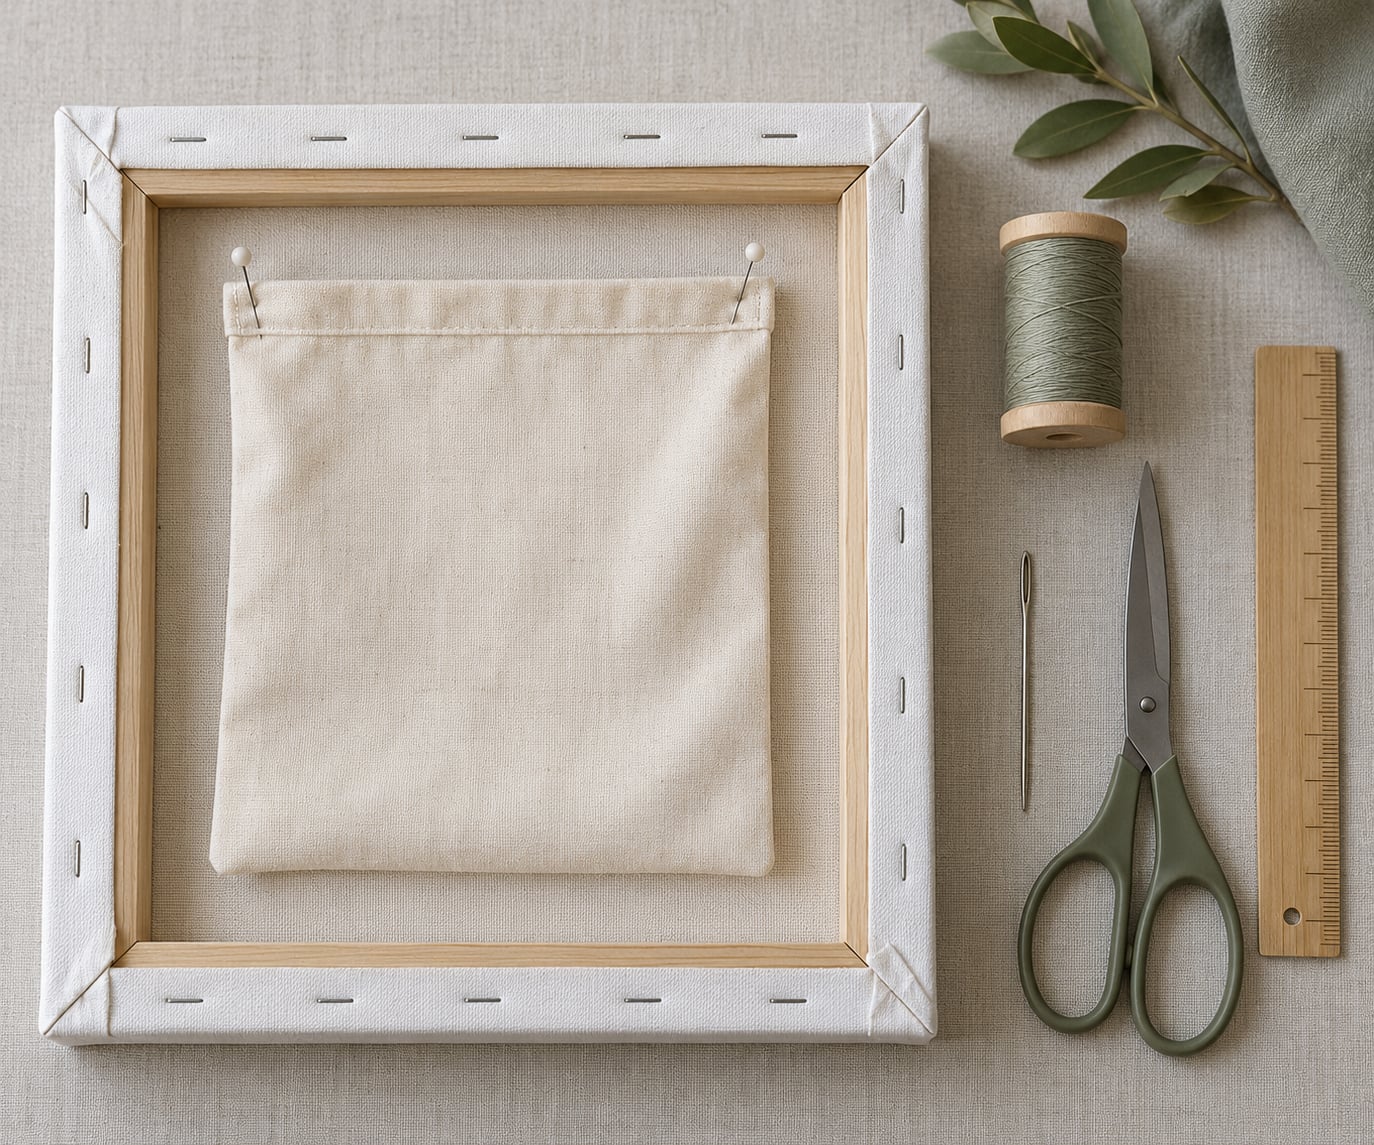
A hidden pocket on an artwork is a fabric pocket sewn to the back of a stretched canvas, cradled panel, or board so it stores flat items without adding a single visible stitch or shape to the painted, collaged, or stitched front.
To sew a hidden pocket into an artwork, you cut a pocket bag slightly larger than what it needs to hold, fold and press its top edge down, then stitch only the sides and bottom so the opening stays clear. On a stretched canvas you can sew through the canvas back or tack the pocket onto the wooden stretcher bars, which is stronger and comes away later without touching the fabric.
It takes about 45 minutes on a canvas and almost no skill beyond straight stitching. Here is the short version before the detail.
- Turn the artwork over and look at the back before anything else.
- Choose a spot away from the corner joins and the hanging hardware.
- Cut a paper template for the pocket and test it on the back.
- Cut the pocket bag from a stable fabric, adding half an inch on three sides.
- Press the top edge down and run stay tape or fusible interfacing along it.
- Pin the pocket in place with the fold on top.
- Stitch the two sides and the bottom, leaving the top edge open.
- Trim or fold the seam allowance so nothing frays against the wall.
- Press flat with a cloth, then slide in a flat test object to check clearance.
- Refill sparingly and check that the piece still hangs square.
What the pocket is really for matters as much as how it goes on. On work you sell, it carries business cards, a printed price list, a condition note, or the studio stamp that travels with the piece. On a piece you exhibit, it holds the collector’s card or a folded note. On a personal work, it becomes the place a pressed leaf, a train ticket, or a note from the person who bought it ends up.
One scope note. Most of what ranks for this phrase is garment sewing, where a secret pocket sits between a facing and a pocket bag in a jacket or a dress side seam. That is a different construction on a different surface. This guide is for artwork, and it treats the back of the piece as a surface that already carries tension, weight, and a finished face worth protecting.
Table of Contents
- What You Need
- Step-by-Step: How to Sew a Hidden Pocket Into an Artwork
- How to Sew a Hidden Pocket Into an Artwork: Plan the Opening
- Prepare and Test the Pocket
- Create the Hidden Pocket Opening
- Sew the Pocket in Place
- Check the Pocket and Finish the Edges
- Traps to Avoid While You Stitch
- Final Inspection and Display Check
- Common Mistakes
- Frequently Asked Questions
- What is the easiest way to sew a hidden pocket into an artwork?
- Can I add a pocket to a finished quilt or textile piece?
- How wide should the hidden pocket opening be?
- Which fabric is best for a pocket in mixed-media artwork?
- Will a hidden pocket make the artwork hang unevenly?
- Conclusion
What You Need
The list is short, and the specifics matter more than usual because every item touches the back of a piece you have already finished.
| Item | What it is for | Pick this, not that |
|---|---|---|
| Needle | Piercing canvas weave and thick quilting cotton | A sharp tapestry needle or a large Piecemaker-style embroidery needle. A ballpoint needle slides between fibres and can split threads in the canvas. |
| Thread | Securing the pocket under real load | Cotton perlé No. 8 for anything structural. Clear monofilament where you want the thread to vanish against a pale weave. |
| Pocket fabric | The bag itself | Cotton quilting weight or a light canvas. Avoid silk, which abrades, and anything loosely woven. |
| Stay or interfacing | Stopping the mouth from gaping open | Light fusible interfacing or narrow stay tape along the top fold. Skip heavy interfacing, which makes a lump you can feel through the front. |
| Acid-free board | An optional backing layer that the pocket stitches to | Acid-free foam board or two-ply conservation board. Never regular chipboard against paper you care about. |
| Pins | Holding the pocket square while you stitch | Quilting pins, pushed in from the back edge so the point stays out of the fabric face. |
| Pressing tools | Flattening the seam allowance without crushing the texture | A domestic iron set low with a pressing cloth and a wooden clapper for the fold. |
| Small tools | Marking, cutting, rescuing | Chalk pencil, sharp scissors, small seam allowance, pinking shears, and a seam ripper in case you change your mind. |
On thread, two answers worth being decisive about. Cotton perlé No. 8 is strong, knots well, and takes a needle through canvas without fuss, so it is the right default for a pocket that will be loaded and handled. Monofilament, sold as MonoPoly or as clear fishing-line thread, is the choice when the back of the piece is pale and you refuse to have a visible stitch line, though it knots poorly and needs a double pass through each hole.
On needle, use a tapestry needle or a large sharp embroidery needle for canvas and heavier cloth, and a finer embroidery needle only if the pocket fabric is light. If the needle bends or the eye snags on the way out, it is the wrong size.
Hand stitching is the right call here. Machine stitching pulls hard enough on a tensioned surface to pucker canvas and can drag a piece out of square, and the access around stretcher bars is tight for a presser foot. Machine is acceptable only where the pocket is stitched to a separate flat backing board before that board is attached to the piece.
Step-by-Step: How to Sew a Hidden Pocket Into an Artwork
How to Sew a Hidden Pocket Into an Artwork: Plan the Opening
Start by reading the back. On a stretched canvas you have a plain woven back, the wooden stretcher bars, and the corner joins where the canvas is most likely to already be under strain. A pocket that spans a corner join will amplify any loosening there over time.
Keep the pocket in the middle of a bar span, clear of the corner joins by a good few inches, and below any D-rings, sawtooth hangers, or wire. On a gallery-wrapped piece the sides are wrapped board, so the only sewing surface is the flat back panel. On a cradled panel the back is sealed wood and the pocket has to be attached to a separate board or to a fabric wrap on the edge.
Size the pocket to what actually goes in it. A postcard is five by seven inches, so a pocket bag of six by eight with half an inch of seam allowance on three sides is the working minimum. Make it deeper than the object by about an inch so your fingers can get in.
Mark with a chalk pencil, which lifts off canvas and paper. Never cut or pierce in the planning stage, and never mark anything within an inch of a corner join or a hanger.
Prepare and Test the Pocket

Make a paper mockup first. It costs a minute and it tells you whether the mouth is wide enough for the thing you want to store before you commit fabric. A pocket you designed from above on the table often turns out too tight when the piece is standing on a wall.
Cut the pocket bag fabric, adding a half inch seam allowance on the sides and bottom and nothing at the top. Press the top edge down by half an inch, run stay tape or a strip of light fusible interfacing inside the fold, and press again so the mouth has some body.
Test the whole thing on scrap of similar weight before it touches the finished piece. Pin it to the back, look at the piece from an arm’s length at an angle, and check that the fold reads as a line rather than as a shape.
If the artwork has a textured, painted, or collaged face, lay a pressing cloth or a layer of acid-free tissue between any heat and the surface whenever you press, and never press directly on the front.
Create the Hidden Pocket Opening
A hidden pocket does not need a hole cut through the artwork. On a stretched canvas you stitch the pocket’s sides and bottom directly onto the canvas back, leaving the top edge open, which is what most people mean by a hidden pocket. The opening is simply the gap between the top of the pocket and the surface it sits on.
Where a genuine inset opening suits the piece, work on the back layer rather than the face. Cut along an existing seam line where one exists, snip the backing open with small scissor snips rather than one long cut, and stop well short of any edge. An inset opening is worth the extra work on a piece where you want a defined lip, and it is not worth it on a gallery-wrapped canvas where the opening would sit over wrapped board.
Reinforce anything you cut. A narrow strip of fusible interfacing or a run of couching stitches around the opening stops the weave from fraying, and it is the difference between a pocket that ages well and one that ends up with a ragged mouth. Pink the raw edge if the fabric frays easily, then trim it neat.
Sew the Pocket in Place

Pin the pocket with its pressed top edge toward the top of the piece, the side pins through the pocket only, and the bottom pin angled so you can see it while you work. Check the pocket hangs square in the frame, because a pocket that leans looks careless even from the back.
Baste first with long loose running stitches, then remove the pins as you go. Basting lets you correct the whole layout after one pass instead of unpicking finished stitching.
Stitch the two sides and the bottom with a running stitch at roughly three to four stitches per inch, or a backstitch on the outer edge if you want the seam stronger. Keep the top fold open. If you are sewing straight to the canvas back, stay at least a half inch in from the canvas edge so you never work near the corner join or the wrap.
On uneven or bulky surfaces, shorten the stitch, stop at the thick point, and lift the needle rather than forcing it. Where you want the pocket anchored to the stretcher bars instead of the canvas, tack through the pocket fabric and wrap the stitch once around the bar on the far side, which spreads the load across wood rather than cloth and lets the whole pocket lift off later without leaving holes.
Backstitch at both bottom corners. They take the weight, and without reinforcement they are the first thing to pull loose.
Check the Pocket and Finish the Edges
Slide a flat test object in. If it cannot go in without forcing, the mouth is too tight or the interfacing is too stiff, and both are easier to fix now than after the piece is on a wall.
Confirm three things: the pocket clears the ground when the piece stands upright, the bottom seam has slack so the pocket does not act as a hinge, and the mouth stays closed on its own. A mouth that gapes wants a second line of stay or a catch stitch worked into the facing from the inside.
Trim the seam allowance to a neat quarter inch, fold it toward the pocket on all three sewn edges, and slip stitch it down by hand so the allowance is enclosed. Enclosing it matters more here than on a garment, because a raw allowance rubbing against a wall will abrade and can leave a mark on the back of the piece over time.
Press everything flat with a pressing cloth, working from the centre outward, then let the piece rest on a flat surface overnight before it is hung or wrapped.
Traps to Avoid While You Stitch
A few things go wrong reliably enough to name them in advance.
- Stitching across a corner join, which transfers every load into the most strained part of the canvas.
- Placing the pocket where a hanger, wire, or sawtooth will press into it.
- Forcing a needle through a thick spot instead of rotating it, which is how a canvas weave splits.
- Using a doubled heavy thread on a small pocket, where the extra bulk causes the puckering people blame on the canvas.
- Skipping the top stay, then wondering why the mouth opens itself.
- Filling the pocket fully. Cards and receipts add up faster than you expect.
Final Inspection and Display Check
Look at the piece from the front, then from the side, then from the back. From the front there should be no new shadow, ridge, or thread. From the side the pocket should add well under a quarter inch. From the back the stitches should run straight and even.
Test the load with something representative. If the intended contents are a stack of postcards, test with a stack of postcards, not with a single card.
Then hang it and step back. A loaded pocket pulls gently on the back, and on a large stretched canvas enough of that pull over months will take the piece out of square. Keep the total contents light, keep the pocket centred, and check the corners after a few weeks of hanging.
For shipping, empty the pocket and protect the back with a rigid board so nothing presses against the mouth. If the pocket has to be removed, stitch straight through the canvas back with a threaded needle snipped flush at the surface; a small puncture in the back weave does not affect the face.
Common Mistakes
Here are the problems that actually come up, each with the fix that resolved it.
The opening is too small. The mouth folds under or the object has to be folded to go in. Widen the pocket bag by half an inch on each side and re-press, or soften the interfacing to a lighter weight.
The pocket strains at the seams and gapes open. Usually an unstayed top edge. Add stay tape or a second layer of light interfacing in the fold, then run a catch stitch along the inside of the top seam.
The canvas puckers around the stitching. The thread is too heavy or the tension too tight. Cut the stitches out, press the canvas flat under weight, and re-sew with perlé No. 8 at a longer stitch length.
Thread shows from the front or at an angle. Switch to clear monofilament, use a smaller needle hole, and keep stitches closer together so no single hole reads as a dot.
The corner joins look loose afterward. That means the pocket load is transferring into the corners. Move the pocket to the centre of a bar span, lighten what goes in it, and consider a separate backing board so the weight never sits on the canvas.
Fabric pilling or a colour halo appears over time. The pocket fabric is too dark or too loosely woven for the piece. Use a light-coloured, tightly woven cotton and avoid anything with a strong dye.
The piece no longer hangs flat. The pocket is pressing against the wall. Hang the piece on a stand or a corner support, or offset it a few millimetres from the wall with a small bump, so the pocket keeps its shape.
For long-term care, use acid-free lining and board if the artwork includes paper, keep the pocket from holding anything acidic such as a rubber-banded invoice, and pull it out for cleaning or transport rather than letting it stay loaded. Review the stitches once a year, the same way you check the corners and the hanging hardware.
Frequently Asked Questions
What is the easiest way to sew a hidden pocket into an artwork?
The easiest method needs no cutting at all. Cut a fabric pocket bag with a half inch seam allowance on the sides and bottom, press the top edge down by half an inch, then hand stitch only the sides and bottom onto the back of the piece with a running stitch. Leave the top fold open and the mouth is the gap between it and the surface. Cotton perle thread and a sharp tapestry needle handle canvas without puckering it.
Can I add a pocket to a finished quilt or textile piece?
Yes, as long as the back is a stable woven surface and you stay clear of the batting edges and any existing binding. Stitch through the backing only where it is firm, and never near a quilted line, where a needle will pop the batting. A separate piece of fabric laid across the backing, then stitched to itself and lightly to the quilt, gives you a pocket without putting a needle through the quilt itself.
How wide should the hidden pocket opening be?
Make the finished opening at least a quarter inch wider than the widest thing you want to store, and one inch deeper than that thing is tall, so your fingers can reach in. For business cards or postcards, a finished pocket around six by eight inches works well. Test the size in paper first. A pocket measured on a flat table is usually too tight once the fabric and the folded top edge are added.
Which fabric is best for a pocket in mixed-media artwork?
A light cotton quilting weight or a fine canvas works best because it is stable, presses cleanly, and carries load without stretching. Always run a strip of stay tape or light fusible interfacing along the top fold, otherwise the mouth sags open under its own weight. Avoid silk, which abrades against a textured back, and avoid anything loosely woven or heavily dyed, since both can mark the surrounding surface over time.
Will a hidden pocket make the artwork hang unevenly?
It can, if the pocket is loaded heavily or positioned near a corner join, because the weight pulls on a surface that is already under tension. Keep the pocket centred between the stretcher bars, away from the corners, and keep the contents light. On a larger canvas, sew the pocket to a separate piece of acid-free board so the weight sits on the board rather than on the canvas, and check the corners again after a few weeks of hanging.
Conclusion
Start with a paper mockup on the back of the piece and confirm the finished dimensions before you cut cloth. Half an hour of measuring saves a pocket that is too tight to use.
Then the sequence is straightforward: reinforce anything you cut, open the backing only where you need to, install the pocket on the sides and bottom, test it with a real object, and finish the raw edges so nothing abrades against the wall. If you sew a hidden pocket into an artwork with a stayed top edge, a stable cotton, and a load light enough to keep the piece hanging square, nothing new will show on the front.
Last updated: October 2026


