Yes, you can sew a quilt without a sewing machine, and the work is not harder than machine quilting, only slower. There are three honest routes: hand-piece the top and hand-run the sandwich, tie the layers with knots, or make a no-sew fleece blanket. Most beginners who want a quilt that lasts pick the first one and start small.
A hand-sewn quilt takes anywhere from a weekend for a small lap quilt to several months for a large one. That is the part nobody tells you up front, so I have put honest time estimates against each method below rather than letting you find out halfway through.
Plenty of quilters choose hand sewing on purpose. It removes the cost, the space and the setup of a machine, and the slightly irregular stitch is the look that heirloom quilts have always had. Our version: this guide follows the whole process from cutting fabric to finishing the binding, with nothing assumed about your machine-free setup.
Here is the short version of the three methods side by side:
| Method | What you actually do | Skill level | Time for a small lap quilt | Best for |
|---|---|---|---|---|
| Full hand sewing | Piece the top by hand, then run a stitch through all three layers | Intermediate | 60 to 100 hours | A quilt you intend to use for decades |
| Tie or ravel quilt | Layer the three fabrics and knot thread at regular intervals | Beginner | 8 to 15 hours | A first project and a fast result |
| No-sew fleece blanket | Cut fringe slits and double-knot the edges together | Beginner | 3 to 5 hours | A child, a travel blanket, a weekend |
Table of Contents
- What You Need
- Step-by-Step
- 1. Choose a Simple Quilt Design
- 2. Wash, Press, and Cut Your Fabric
- 3. Assemble the Quilt Top
- 4. Create the Quilt Sandwich
- 5. Baste the Three Layers
- 6. Sew the Quilt by Hand: How to Sew a Quilt Without a Sewing Machine
- 7. Add and Finish the Binding
- How Long Each Method Takes
- Common Mistakes
- Puckering and bunching
- Layers shifting as you sew
- Pulled or wandering seams
- Uneven stitch spacing
- Crooked binding
- You sewed through only two layers
- Broken thread and sore fingers
- Frequently Asked Questions
- What is the best stitch for sewing a quilt without a sewing machine?
- What size needle and thread should I use for hand sewing a quilt?
- How long does it take to sew a quilt by hand?
- What is the easiest quilt pattern for beginners sewing by hand?
- Is a hand-sewn quilt as durable as a machine-sewn quilt?
- Conclusion
What You Need
Hand sewing needs fewer tools than machine quilting, not more. The list below covers everything for the full hand-sewn method.
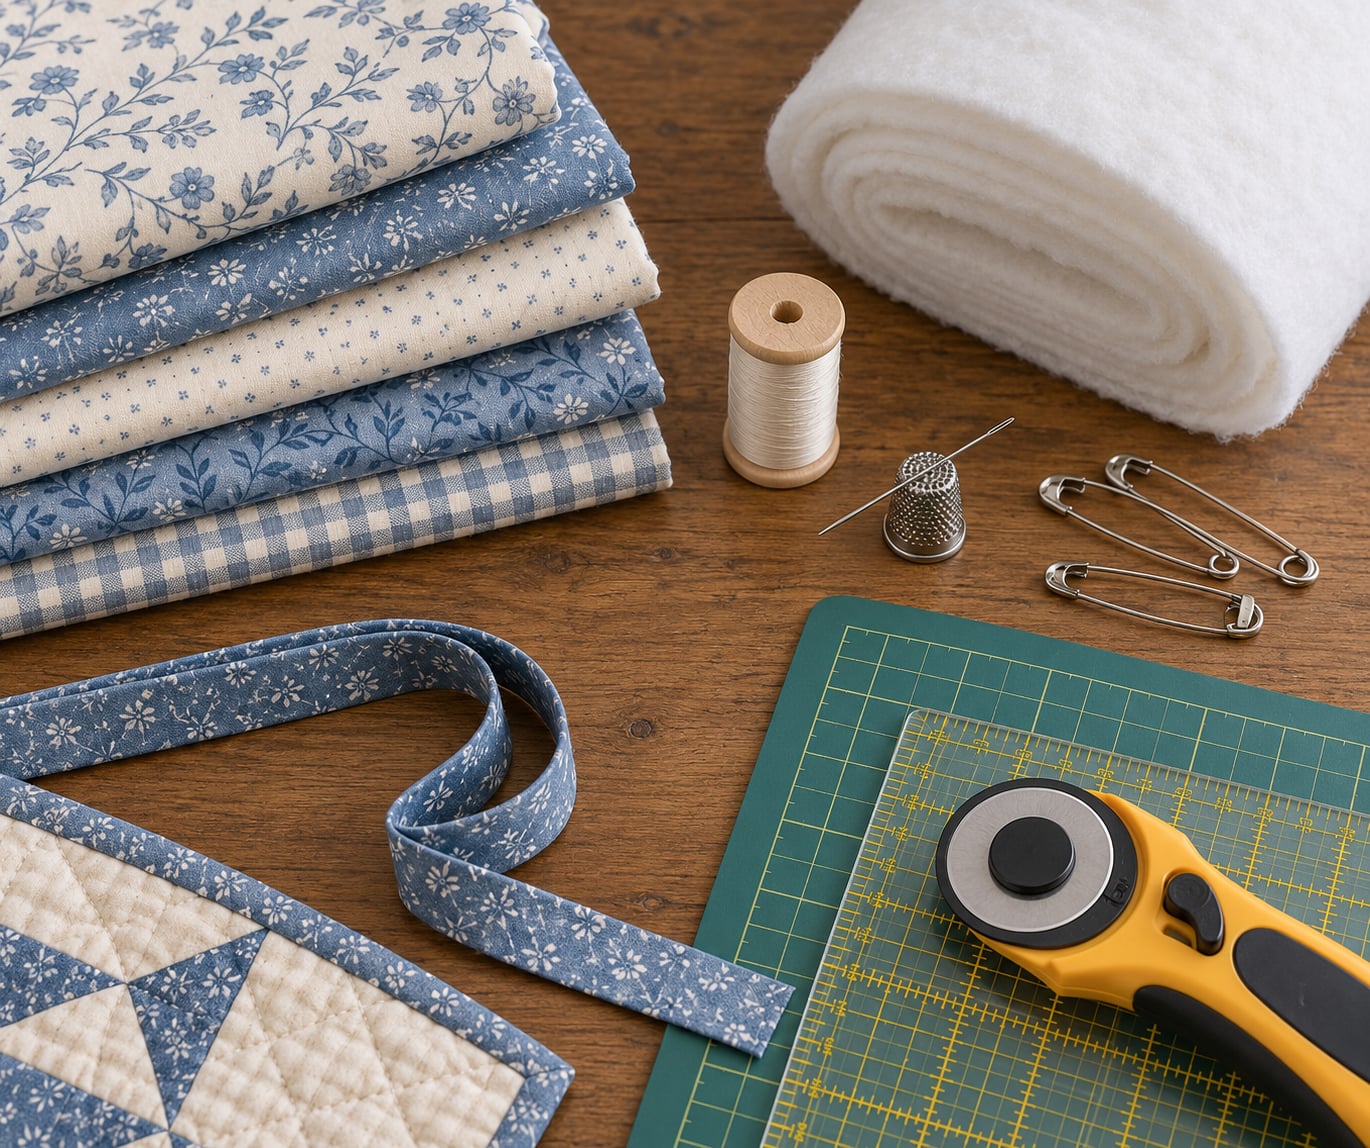
- Needles: blunt sharps in sizes 8 to 12 for piecing and quilting, plus a sharp size 10 for binding. Blunt needles glide through the batting layers instead of catching and tearing them. Keep several in a pincushion so you are not threading one every ten minutes.
- Thread: all-purpose cotton thread for piecing, a heavier quilting thread in cotton or cotton-poly for the sandwich, and embroidery floss or a doubled yarn for tie quilts. Cotton is kinder to cotton fabric than polyester thread over the years.
- Thimble: optional in theory, essential in practice once you quilt more than an hour. It sits on the middle finger of your pushing hand and takes the abuse instead of your skin.
- Basting supplies: curved safety pins for pin basting, or a spool of hand-sewing thread and a blunt needle for a real hand baste. Curved pins open easily without poking you.
- Cutting tools: a rotary cutter, a self-healing cutting mat and an acrylic ruler make straight, even pieces far easier. Sharp fabric scissors work fine, but cut against a marked line rather than by eye.
- Fabric and batting: medium-weight cotton for the top, a backing fabric, and batting in cotton or cotton-poly. Pre-cut charm squares or a layer cake skip the cutting stage entirely.
- Binding strips or bias tape: around 2.5 inches wide, cut on the straight grain or bias. Double-fold binding sold ready-made saves time.
- Cloth clips: a cheap alternative to pins that will not pierce batting.
A quilting hoop or frame is optional. It holds the work taut and saves your back on a sofa quilt, but many hand quilters work flat on a table with the excess fabric rolled onto a broom handle or dowel.
One reassurance for beginners: pattern weight, colour and quilting design have nothing to do with your machine. A heavy contemporary quilt and a light heirloom quilt follow the same hand path. You can copy a pattern’s shape and colour scheme with nothing but a needle and a thimble.
Step-by-Step
1. Choose a Simple Quilt Design
Start with straight seams and large pieces. Blocks of 4 to 6 inches, or rows of plain squares, are forgiving because a small error disappears inside the block once it is quilted.
Avoid curves, triangles at odd angles and anything under 1 inch for a first attempt. Small pieces mean short seams, and short hand seams are where hand sewing picks up bulk and shows every wobble.
Estimate honestly. A small lap quilt around 50 by 60 inches takes 60 to 100 hours hand-sewn. A crib quilt is closer to 35 hours. Cutting and pressing add a few hours on top of that, and you will work faster after the first ten.
2. Wash, Press, and Cut Your Fabric
Wash and dry your fabrics the way you will care for the finished quilt, then press them flat. Cotton shrinks, and if it shrinks after you cut, your seams ripple and the border stops matching.
Measure twice, cut once, and cut against the grain whenever the pattern allows. A rotary cutter and ruler give you a straight edge in one pass; with scissors, mark the full line first and cut slowly.
Cut every piece of one colour together, stack them, and cut across the stack. Identical pieces matter more than perfect measurements, because the top has to lie flat without being stretched or gathered.
3. Assemble the Quilt Top
Lay pieces right side up in the arrangement you want and photograph it. Pinning the layout before you sew removes most of the dithering.
Piece pairs right sides together with a quarter-inch seam allowance. That number comes from your finger: normally the width of your little fingernail, or the gap left by the printed line on a cardboard template. Mark it with a pen on the ruler rather than trusting the eye.
Backstitch at the start and end of each seam so it holds, then run the rest in even stitches. Pin the intersection points of two seams before sewing them, match them on the pin, and sew through both layers to keep the seam from shifting.
Press every seam as you go, either open or to one side, consistently across the whole quilt. Pressing is what makes a hand-pieced top lie flat instead of rumpling, and it costs nothing but an iron.
Work in sections of about six blocks, press the section, then join the sections. Finishing the whole top in one sitting is how beginners end up with a top that no longer matches its own border.
4. Create the Quilt Sandwich
Iron the backing first if it is wrinkled, then lay it flat with the wrong side up. Batting goes on next, and the quilt top goes on that, right side up.
The backing needs to be several inches larger than the top on every side so you have something to grip for binding. Once all three layers are stacked, smooth from the centre outward with your hands and check that the three layers measure exactly the same in the middle.
Any wrinkle you leave here becomes a ridge you quilt straight through. Fix them now with your hands, not later with your needle.
5. Baste the Three Layers
Pin baste first if you want the fastest route: curved safety pins through all three layers every 4 to 6 inches, working from the centre outward in a grid. A 50 by 60 inch quilt needs roughly 60 to 70 pins.
A hand baste costs more time but holds the layers far better for long-term sewing, which is why it is the better choice for a quilt you plan to keep. Use a blunt needle and the same cotton you will quilt with, taking loose running stitches about a quarter inch long and a quarter inch apart. Stitch in rows from the centre out, and keep the tension slack so the fabric is not gathered.
Pull the basting out section by section as you quilt over it. Basting left in a finished quilt feels lumpy and can wear through.
6. Sew the Quilt by Hand: How to Sew a Quilt Without a Sewing Machine
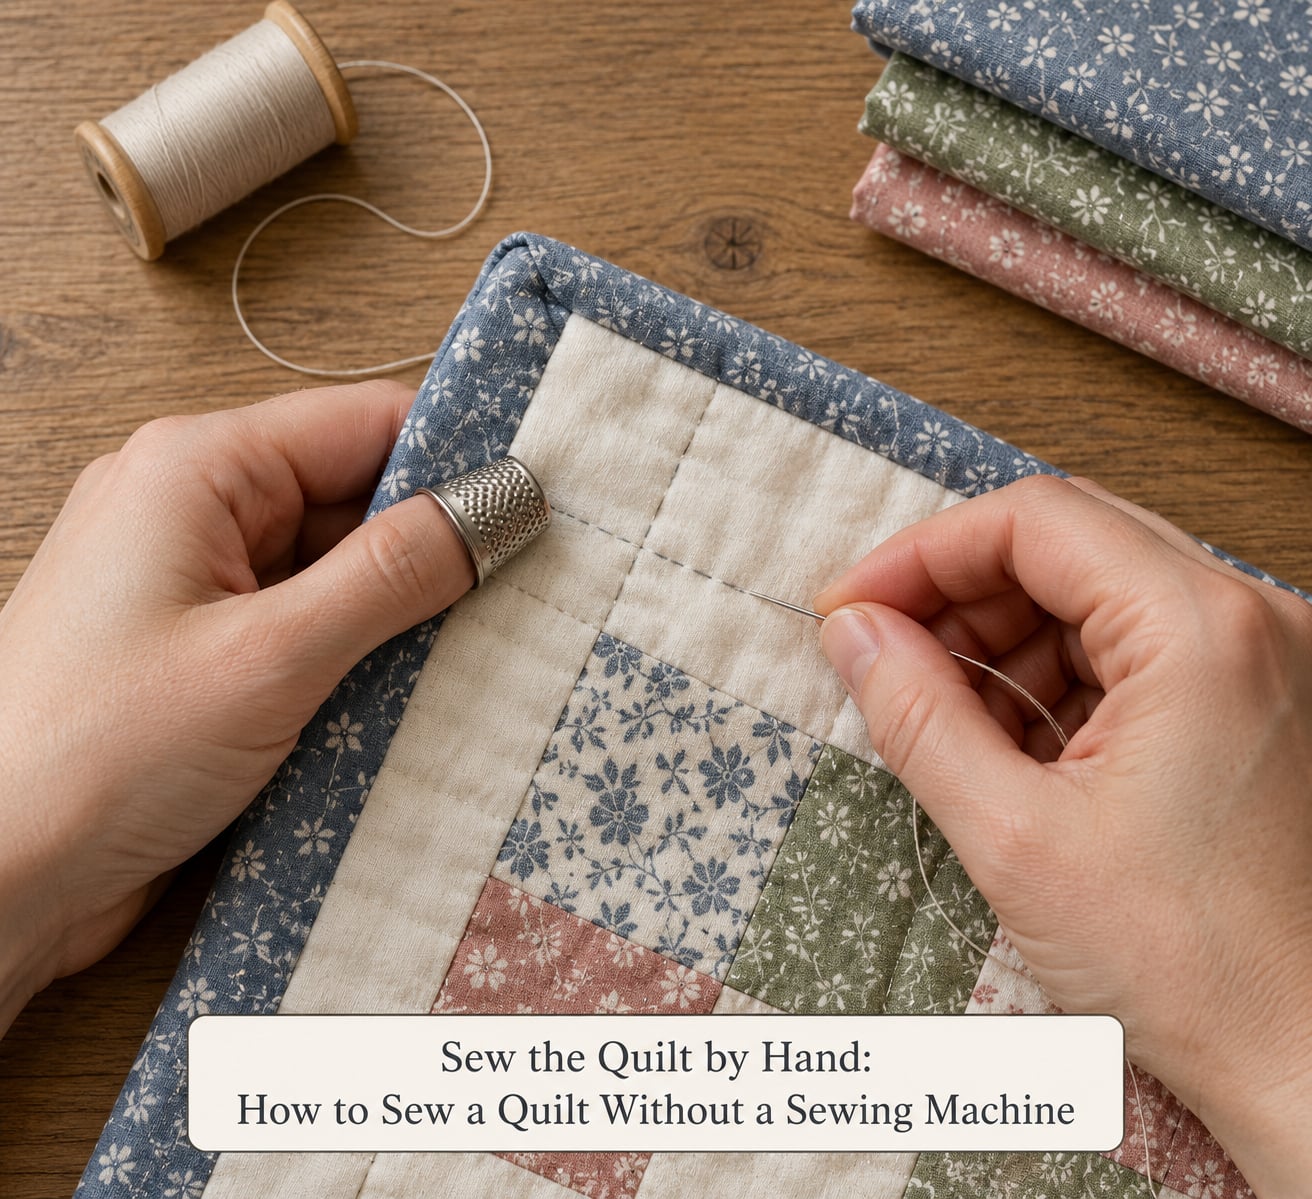
Use a running stitch for the quilted layers. Pick the needle up and down through the same spot each time so you get an even, separate stitch, aim for a stitch length of four to six stitches per inch, and keep the thread loose enough that the fabric stays flat.
The rocking stitch looks decorative and is a bad choice here: it pries the fibres apart as it travels and can tear the fabric over years of washing. Sashiko, the traditional Japanese running stitch, is the same basic move, just worked in straight rows with an even rhythm.
Backstitch any seam you load heavily, such as a border. Whip stitch is for the final binding edge, where you need a nearly invisible stitch on the front.
Thread control matters more than speed. Keep a short length of thread on the needle, take one stitch at a time, and never pull hard enough to pucker the batting. If the top buckles, your tension is too tight.
Quilt in sections you can finish in a sitting, then press that section flat before moving on. On a small quilt, long straight rows with a few diagonal lines crossing them is plenty of design and far less work.
7. Add and Finish the Binding
Measure the finished quilt top and multiply by two, then add roughly 10 inches for the corners and joins. Cut your binding strips and sew them end to end into one long strip, pressing each join open so the strip lies flat.
Fold one short end to the wrong side, place it at the middle of the first quilt edge, and pin about a quarter inch from the raw edge, right sides together. Sew the full length, then fold the strip over the raw edge and crease it with your fingers as you go.
At each corner, fold the binding up at a 45-degree angle, press it flat with your fingers, fold it down over the corner, and crease hard. It should make a neat mitre on the front. Keep going around all four edges.
Trim the batting and backing edges even with the seam allowance so nothing peeks out, then fold the raw edge of the binding over itself and hand-sew it to the back with a whip stitch, picking up a stitch or two of quilt backing each time. Leave a 3 inch tail to tuck in and hand-sew closed.
Skip glue-applied binding. It turns stiff, shows a hard ridge, and is miserable to remove later. Press the finished binding with a warm iron and let the quilt cool flat.
How Long Each Method Takes
Hand sewing speed settles at roughly 300 to 600 stitches per hour for most people, and a 50 by 60 inch lap quilt needs somewhere around 12,000 to 18,000 stitches to quilt at that density.
| Quilt size | Tie or ravel method | No-sew fleece blanket | Full hand sewing |
|---|---|---|---|
| Crib or baby quilt, about 30 by 40 inches | 5 to 8 hours | 2 to 3 hours | 35 to 45 hours |
| Small lap quilt, about 50 by 60 inches | 8 to 15 hours | 3 to 5 hours | 60 to 100 hours |
| Throw quilt, about 60 by 70 inches | 15 to 25 hours | 4 to 6 hours | 100 to 160 hours |
Quilters report that hand-sewn quilts hold up to normal machine washing, and a heavily hand-quilted quilt in daily use for a decade or more is a common report rather than an exception. Wash it cool, dry it flat, and expect the surface to soften over time the way any quilt does.
Common Mistakes
Puckering and bunching
The three layers were sewn under tension, usually from basting too tight or a quilt top that was stretched during piecing. Remove the quilting in that section with a seam ripper, relax the fabric, and re-sew with looser stitches.
Layers shifting as you sew
The basting was too sparse. Add pins or basting stitches every 4 to 6 inches, and work from the centre outward so the fabric cannot slide toward the edges.
Pulled or wandering seams
You are pulling the thread tight at the end of each row. Take slack out of the thread before you set the stitch, and let the fabric lie flat without tugging.
Uneven stitch spacing
The thread is too short and you are stitching by feel rather than by sight. Mark guidelines with a ruler and pencil every inch, or keep a longer thread so several stitches fit in one pass.
Crooked binding
The reveal is not measured. Measure 3 inches of binding at every point along the first edge and mark the positions before you start, so the corners and sides match.
You sewed through only two layers
Basting stitches are loose and easy to miss. Before each pass, run a finger along the line and feel for the third layer, or sew over the pin holes.
Broken thread and sore fingers
A sharp needle is barbs instead of riding through the layers. Switch to a blunt sharps, keep a thimble on, and stop after 30 minutes to rest your hand. A sore hand is how beginners quit, not boredom.
Two habits keep hand sewing comfortable: work on a clear table with the light coming from behind you, and stretch your hands every half hour. If your quilt is large, roll the finished section onto a dowel and unroll a new section, the way quilters do when there is no machine and no floor space.
Frequently Asked Questions
What is the best stitch for sewing a quilt without a sewing machine?
A running stitch is the best all-round choice for hand quilting a sandwich, and a sashiko running stitch is the same motion worked in even rows. Use a backstitch for seams that carry weight, such as a border, and a whip stitch for hand-sewn binding. Avoid the rocking stitch for quilting because it pries fibres apart and can tear fabric.
What size needle and thread should I use for hand sewing a quilt?
Blunt hand-sewing needles in size 8 to 12 work for piecing and quilting, with size 10 the safest default, and a sharp size 10 for binding. Use all-purpose cotton thread for seams, a heavier cotton or cotton-poly quilting thread for the sandwich, and doubled embroidery floss or yarn for tie quilts. Change the needle every few hours.
How long does it take to sew a quilt by hand?
Plan on 35 to 45 hours for a crib quilt and 60 to 100 hours for a small lap quilt around 50 by 60 inches, spread over as many weeks as your evenings allow. The tie method takes 8 to 15 hours on the same lap quilt, and a no-sew fleece blanket takes 3 to 5 hours. Most beginners get faster after the first ten hours.
What is the easiest quilt pattern for beginners sewing by hand?
Large simple squares in a row pattern is the easiest choice for hand sewing, because the seams are straight, long and forgiving. Blocks between 4 and 6 inches work well. Skip curves, small pieces and sharp triangles in a first project. Pre-cut charm squares or a layer cake remove the cutting stage, which saves both time and the most common beginner mistakes.
Is a hand-sewn quilt as durable as a machine-sewn quilt?
A well-basted hand-sewn quilt holds up to normal machine washing, and quilters report hand-quilted quilts still in daily use after a decade. Durability comes from basting well, keeping stitches even without pulling the thread tight, and securing every layer with each stitch. Wash it cool and dry it flat to protect both the fabric and the thread.
Conclusion
Hand sewing a quilt is slow work, not difficult work, and the sequence stays the same whether you quilt over three days or three months.
Start with a small design built from large, straight-seamed pieces. Wash and press every fabric before cutting, cut the pieces together for consistency, and press each seam as you piece so the top lies flat. Assemble the sandwich with the backing larger than the top, baste from the centre outward every 4 to 6 inches, quilt it with a loose running stitch in sections, and finish with a hand-mitred binding.
That is how to sew a quilt without a sewing machine, start to finish. If you want a first project you can finish this month, pick the tie method and move up to full hand sewing when you are ready.