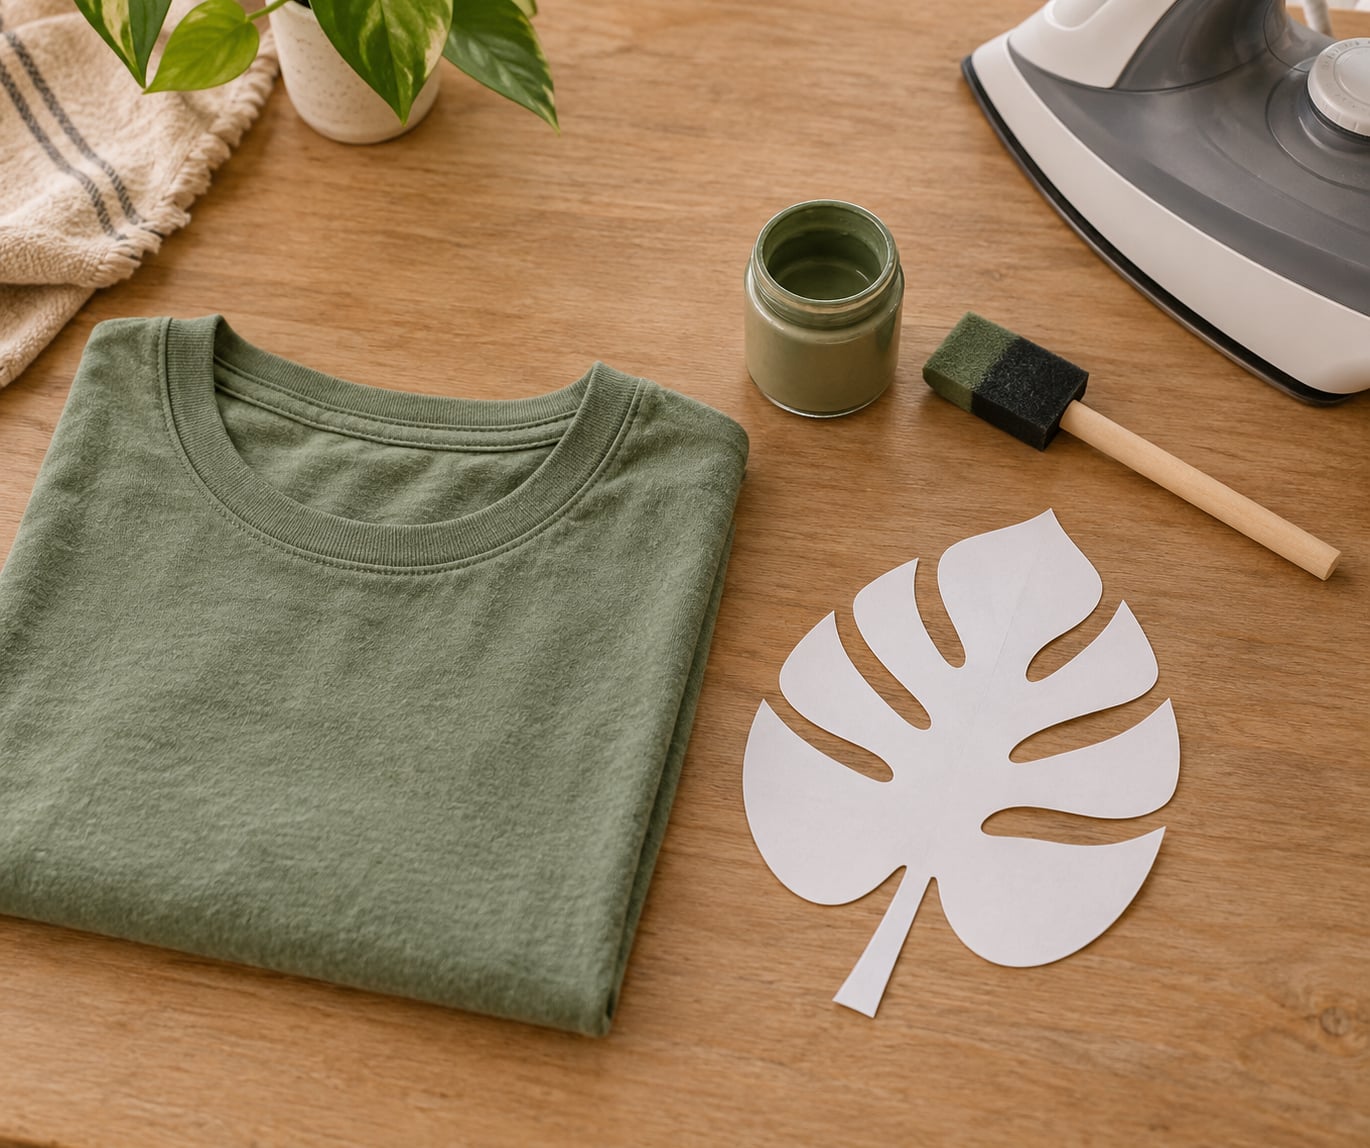
To use freezer paper stencils on fabric, draw your design on the matte side of the paper, cut away the space you don’t want printed, iron the sheet onto the cloth with the waxy side down, dab paint or spray bleach over the openings, then peel the paper off once the design is dry. Active work takes about 20 minutes per item, plus drying time you can walk away from.
Freezer paper earns its spot in a craft room because the coating melts under a hot iron and seals itself to the fibres. No tape, no clamps, no registration frame. The paper becomes a barrier that keeps colour from creeping underneath and wicking up into a fuzzy edge.
Last tested in October 2026 on cotton jersey, canvas and denim, using a plain household iron and water-based fabric paint.
Table of Contents
- What You Need
- How to Use Freezer Paper Stencils on Fabric: Step by Step
- Prepare the Fabric and Stencil
- Position and Secure the Stencil
- Apply the Fabric Medium
- Peel, Dry, and Finish
- How to Use Freezer Paper Stencils on Fabric for Best Results
- Common Mistakes
- Frequently Asked Questions
- What type of fabric works best with freezer paper stencils?
- Can I use fabric paint or textile ink with a freezer paper stencil?
- How long should I wait before removing the freezer paper?
- Will the stencil design wash off after the fabric is laundered?
- Can I reuse the same freezer paper stencil more than once?
- Can I iron the fabric before or after stenciling it?
- Conclusion
What You Need
Almost everything is already in the drawer. The list below is what the process actually touches, not a shopping list.
- Freezer paper — a roll beats the narrow shelf-stable sheet, because a wider sheet gives you a frame of paper around your design that stays flat while you work.
- Self-healing mat and craft knife with a fresh blade. Scissors are fine for large, simple shapes.
- An iron with a dry soleplate. Steam is the enemy here; you’ll use the steam setting for exactly one other part of this process.
- A fabric medium — water-based textile ink for the crispest edge, fabric paint for thicker coverage, bleach spray for the tie-dye crowd.
- A sponge brush or foam dauber, plus a spare for each colour you plan to use.
- Plain brown paper or parchment to slip under the fabric as a backing sheet.
- Cardboard roughly the size of the fabric, and a scrap of plain newsprint or a press cloth for the heat-set.
Fabric choice changes how the result behaves more than the paper does. Woven cottons — poplin, canvas, muslin, tea towel cotton — hold a stencil best because the surface stays put. Knits stretch, and the print stretches with them, which is fine on a tote and frustrating on a fitted tee. Dark garments need opaque paint; a thin ink that looks right on white looks grey on navy.
Prewash and dry the fabric, then press it flat on the reverse. Every wrinkle under a stencil is somewhere the iron can’t press the paper down evenly, and those spots lift first.
Test the coating before you commit a good piece. Press a small scrap of freezer paper onto a scrap of your fabric with a hot dry iron, let it cool, and peel. If the paper doesn’t cling in a thin layer, either the iron was too cool or the roll isn’t the waxed kind. Substitute wrappers are unreliable — some bond to the iron instead of the cloth, and printed text on the wrapper can transfer onto your fabric.
How to Use Freezer Paper Stencils on Fabric: Step by Step
The whole process in one line: prepare and press the fabric, draw and cut on the matte side, iron the waxy side down for 15 to 20 seconds per pass in two passes, dab a thin coat of colour, let it dry fully, peel, then heat-set.
Prepare the Fabric and Stencil
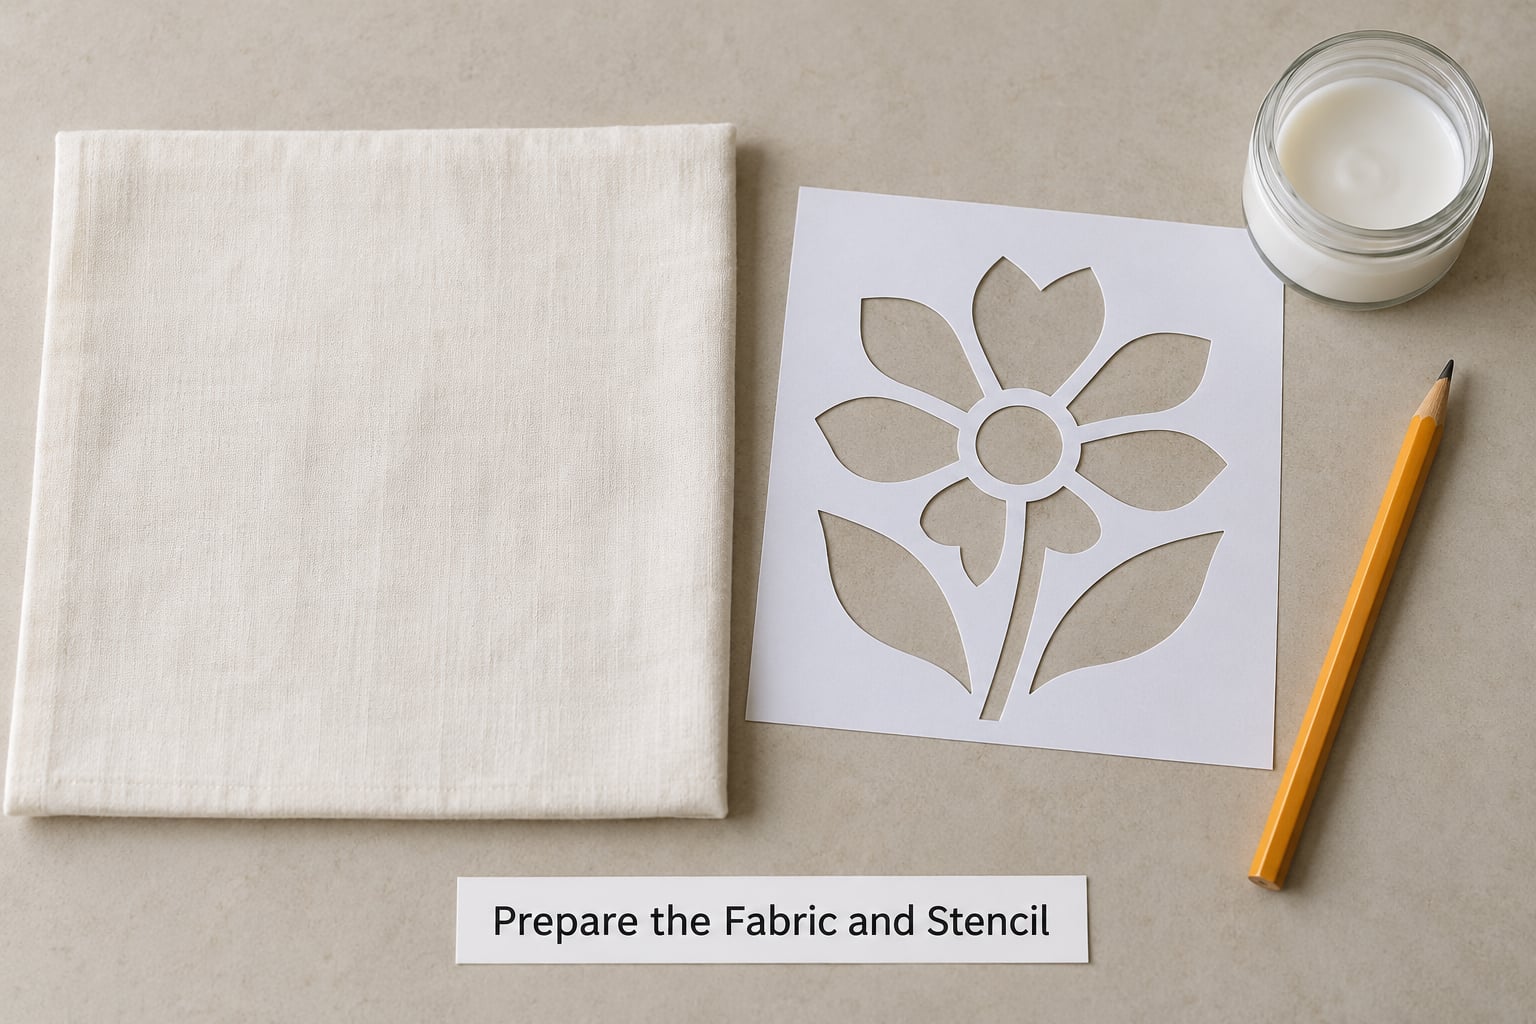
With the fabric pressed and dry, draw your design on the matte, dull side of the freezer paper. That side grips a pencil or ballpoint and stays readable while you cut. Any marker with a solvent base will melt or stain, so skip it.
Cut away what you don’t want to print and leave the surrounding sheet intact. That surrounding paper is the frame that holds the stencil flat and stops your knuckles dragging it sideways. Cut on the mat, turning the mat rather than the paper, so you aren’t dragging the blade sideways through the coating.
Keep the openings generous. Details under a quarter inch trap fabric fibres and paint, so they print as pale specks rather than solid shapes. Simple silhouettes survive this method; a mountain range with six peaks does not.
Position and Secure the Stencil
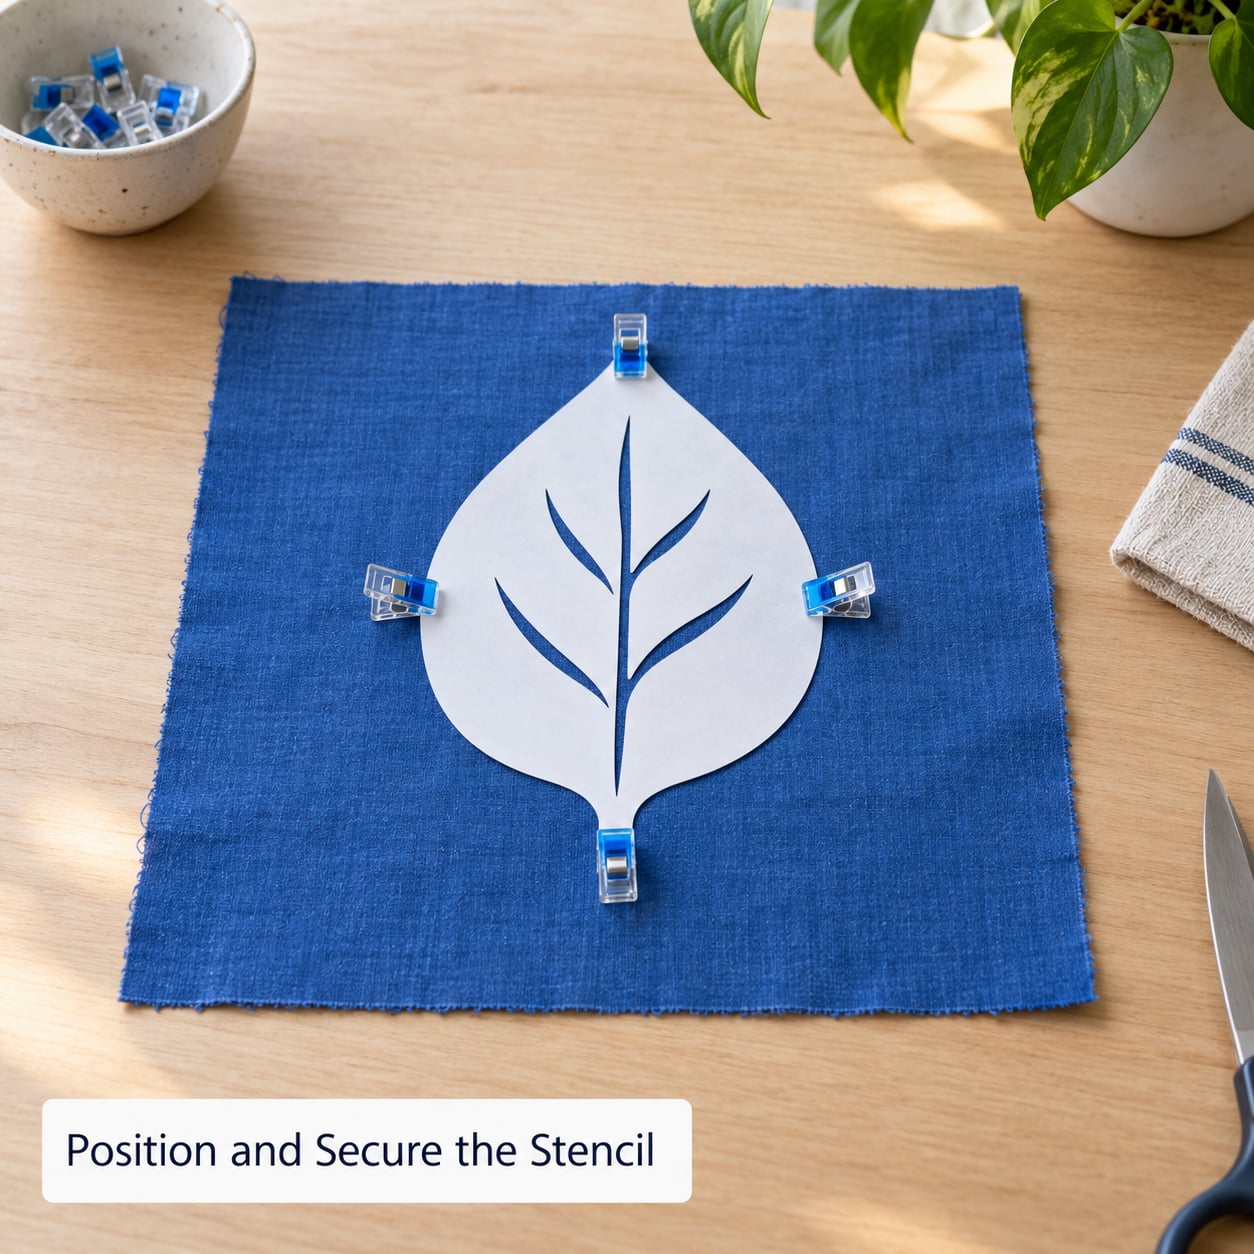
Slide the backing sheet under the fabric first, then lay the stencil on top with the shiny, waxy, plastic-coated side facing down against the cloth. This is the one step people get backwards, and the failure is immediate: paint runs under a sheet that isn’t sealed.
Set the iron to cotton, dry, no steam. Press for 15 to 20 seconds over the middle, lift, then work outward in overlapping passes and repeat the whole thing once more. Two passes give you a much better seal than one long press. If you can press the back of the ironing board to the fabric with the stencil under it, that is the strongest bond available.
Let it cool about 30 seconds, then run a finger along every cut edge. Any corner that lifts goes back on the iron for another short press. If the stencil still creeps, weight it down while you work — readers on r/bleachshirts lay the stencil flat and hold it with nuts and bolts rather than trust pressure alone.
A common community workflow is to iron the garment thoroughly first, position the stencil, then iron the area again once it’s where you want it. That extra pass costs ten seconds and fixes most shifting.
Apply the Fabric Medium
Dab, don’t stroke. Load the sponge lightly and bounce it across the opening from the centre outward. Stroking pushes colour toward the edge, where it seeps under the coating and gives you exactly the fuzz you’re trying to avoid.
For an even film, a thin strip of cardboard scraped across the stencil beats more brushing. Push the medium into the corners of the opening where a dabber tends to skip, then lift the sponge away from the edge rather than toward it.
Two or three light coats beat one heavy coat. Thick paint applied at once stays flexible for a while, then cracks along every bend in the fabric after washing. Let each coat dry before the next. For multiple colours, lay the darker shade down first and use a separate sponge for each one — carrying colour across in the sponge is what muddies a second colour.
Bleach behaves differently. Spray close to the stencil and dab rather than soak, because a wet mist finds its way under edges. Several light sprays with pauses between them give graduated shades instead of one flat patch.
Peel, Dry, and Finish
Wait for the design to dry completely before peeling. A hair dryer on low for 25 to 30 minutes speeds it up, and air drying takes two to three hours. Peeling while damp lifts the colour with the paper, which is the most common way people ruin a good stencil.
Peel from one corner at a shallow angle, holding the fabric steady with your other hand. The paper comes away and the design stays on the cloth.
Heat-set the print with the iron on the reverse, through a layer of newsprint or a press cloth, for 2 to 3 minutes. A quick alternative is 15 to 30 seconds per side. Paint and ink that aren’t heat-set will eventually crack or wash out, and this is the step that decides how the shirt looks after a year of wear.
Wash inside out, cold, and dry on low. That’s the whole care routine.
How to Use Freezer Paper Stencils on Fabric for Best Results
Several habits separate a crisp print from a soft one, and none of them require better supplies.
- Simplify the design — one bold shape or a couple of large repeats gives you a cleaner result than six thin lines.
- Keep pressure even — iron the whole stencil twice rather than scorching one spot.
- Always run a scrap test for a new fabric, a new paper roll, or a new medium.
- Match opacity to the fabric — opaque paint on dark cloth, thinned ink on light woven cotton.
- Let the paper cool before peeling, and peel slowly rather than snapping it back.
The same sheet is worth keeping in one specific way. As a paint stencil it is single use; peeling it after a coat of colour usually takes the coating with it. As a cutting template it is reusable many times: iron the paper to the wrong side of the fabric, cut your shape through both layers, peel the shape away, and iron the remaining template back down for the next piece. That is the method for cutting felt, appliqué shapes and English paper piecing bases, and it also works as an embroidery or thread-sketching template.
You can machine-cut the stencil instead of cutting by hand on a Cricut, Silhouette Cameo or Glowforge — set the material to Paper, fit a fresh blade, and cut a test square first to confirm the coating hasn’t been scored through. Hand cutting still gives the cleanest seal, which is the preference people in the Glowforge community keep coming back to.
Common Mistakes
Every failure below is one somebody has already had, with the fix that resolved it.
- Colour bleeds under the edges. Either the stencil lifted while you worked or you sprayed or brushed from too far away. Re-iron the stencil flat, cool it, and dab from close range. Adding a backing sheet under the fabric stops seep-through on the reverse side.
- The stencil lifts mid-application. The fabric was wrinkled or damp. Press the garment first, then iron the stencil again after positioning rather than trying to hold it down with more pressure.
- The coating puckers and ruins the sheet. The iron was too hot or you used steam. Use the cotton setting, dry, and accept two moderate passes over one aggressive one.
- Waxy residue on the iron plate or the fabric. The plastic transferred because the paper was too hot or pressed too long. Wipe the soleplate with a dry cloth while it’s warm, and let the fabric cool before peeling.
- Small openings print pale or not at all. Fibres and paint are physically trapped in a narrow slot. Enlarge the detail, or accept it and add the shape later with a fine brush once the base coat is heat-set.
- The print cracks after washing. Too much colour in one coat. Use thinner layers with drying between them, and heat-set.
- The stencil refuses to bond to the fabric. Wrong side up, iron too cool, or a wrapper substitute that was never meant for it. Waxed baking paper does not work; wrapper brands vary wildly.
Frequently Asked Questions
What type of fabric works best with freezer paper stencils?
Woven cottons work best, including poplin, canvas, muslin and tea towel cloth, because the surface stays flat under the iron. Knits also work, but the print stretches with the fabric, so avoid tight silhouettes on fitted tees. Dark garments need opaque paint, since thinner ink reads as grey on navy or black. Always prewash and press the fabric before you position the stencil.
Can I use fabric paint or textile ink with a freezer paper stencil?
Both work, and they behave differently. Water-based textile ink gives the crispest edge because it flows less. Fabric paint gives thicker, more opaque coverage on dark fabric but leaves a stiffer finish that can crack if applied heavily. Thin thick acrylics with a textile medium if you want the coverage of paint with a softer hand. Use a separate sponge brush per colour.
How long should I wait before removing the freezer paper?
Wait until the design is completely dry to the touch. A hair dryer on low usually takes 25 to 30 minutes. Air drying takes two to three hours depending on how heavy the coats are and how absorbent the fabric is. Peeling while any moisture remains lifts the colour with the paper, and the stencil edge that looked sharp a minute ago will leave a smear.
Will the stencil design wash off after the fabric is laundered?
It should not, once the print is heat-set. Iron the dried design on the reverse through newsprint or a press cloth for 2 to 3 minutes, or 15 to 30 seconds per side. Then wash inside out in cold water and dry on low. A print that was never heat-set will crack along the seams and fade long before the shirt wears out.
Can I reuse the same freezer paper stencil more than once?
As a paint stencil, no. The coating lifts with the paper when you peel it, so it is single use for colour. As a cutting template it is reusable as often as you like. Iron it to the wrong side of the fabric, cut through both layers, peel the cut shape away, then iron the remaining template back down for the next piece. That is how most people cut felt and appliqué shapes with it.
Can I iron the fabric before or after stenciling it?
Before, always, and again after positioning the stencil. A pressed, wrinkle-free garment is what lets the iron seal the paper evenly across the whole sheet. Wrinkles leave gaps where the coating never touches the fibres, and those gaps are exactly where bleed starts. After the paint is dry and peeled, iron the reverse for 2 to 3 minutes to heat-set the print.
Conclusion
Press the fabric, iron the stencil on waxy side down for 15 to 20 seconds, and most of the rest is patience. The bond is what keeps colour out from under the edge, so give it two full passes and let it cool before you paint.
Run one small test first — a single leaf on a scrap of the same cloth, same paper, same medium. Fifteen minutes tells you everything you need to know about how this particular combination behaves, and it costs you one scrap instead of a whole shirt. Once the test peels clean, scale up to something simple: a bold shape centred on a tote, or a row of repeated marks down a tea towel.