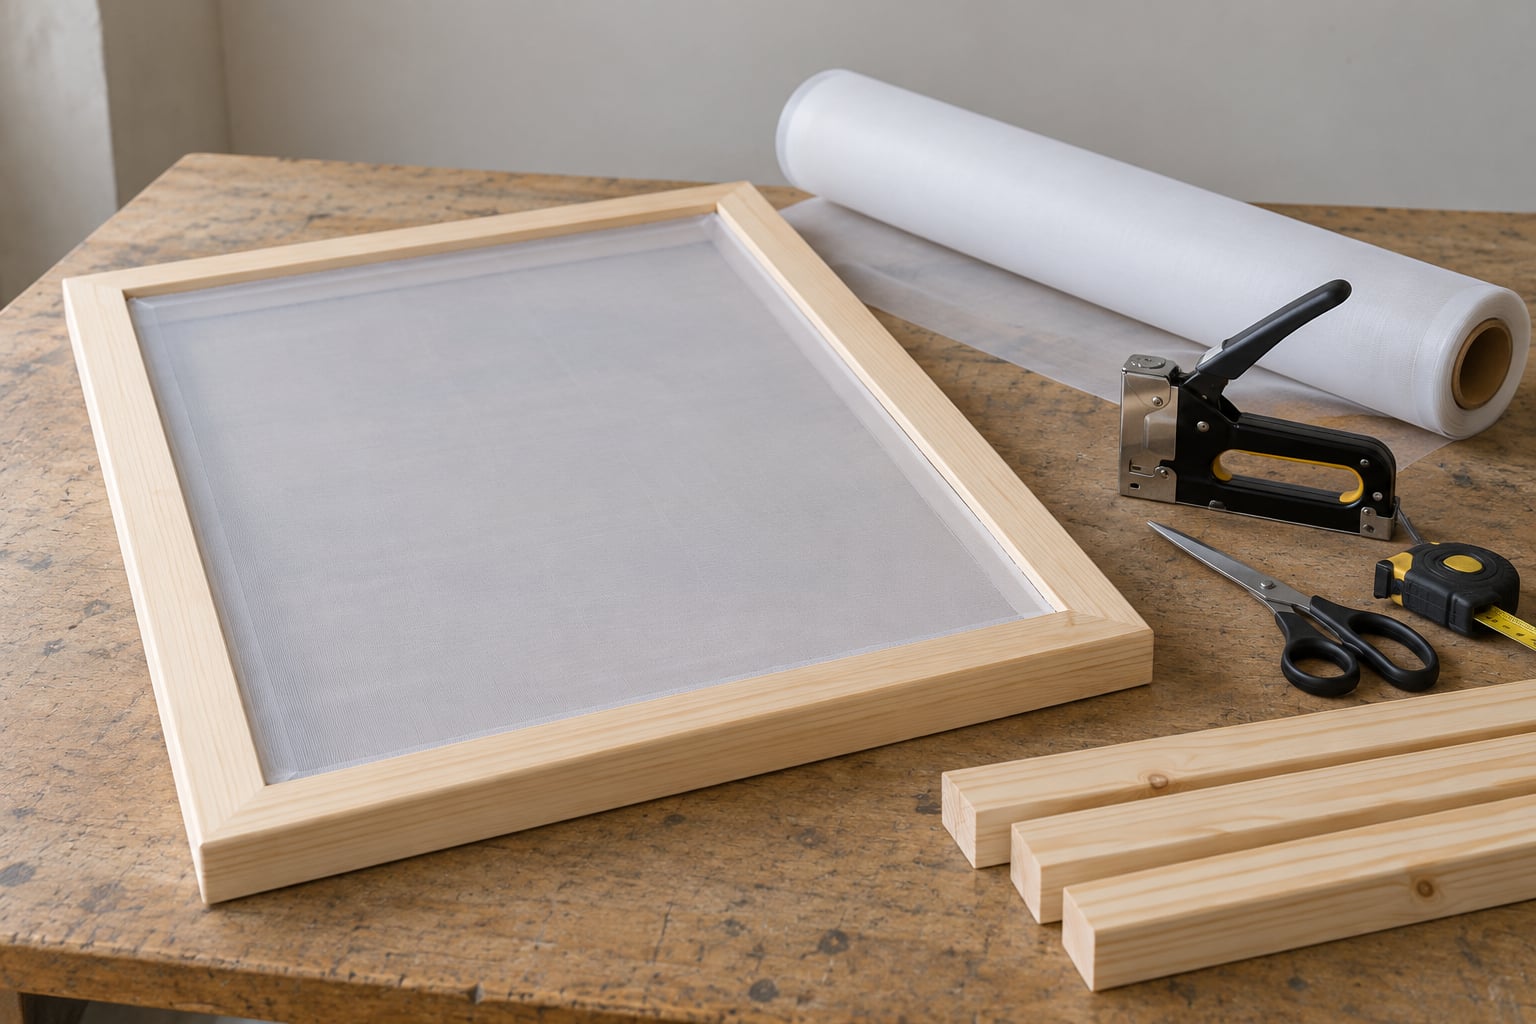
Yes, you can absolutely make a screen printing frame at home, and most first-time printers manage it in an afternoon with a saw, some flat lumber, a staple gun, and a roll of mesh. The whole job is really about one thing: getting the mesh flat and even, because tension is what decides whether your prints come out sharp or patchy.
The build below uses a wooden frame, which is the route most home makers take since it costs the least and lets you pick any size you want. I work in fabric and mixed media, so the sizing math and the tension check are the parts I come back to every time.
Work in a ventilated area, wear eye protection when you staple, and follow the manufacturer directions on any finish, adhesive, or solvent you use.
Table of Contents
- What You Need
- Frame size and mesh count are the two decisions that shape everything
- Step-by-Step
- 1. Measure Your Artwork and Plan the Frame
- 2. Cut the Frame and Add Corner Joints
- 3. Attach the Screen-Printing Mesh
- 4. Stretch and Secure the Mesh on Your Screen Printing Frame
- 5. Dry, Inspect, and Prepare the Frame
- 6. Maintain and Reuse the Frame
- Common Mistakes When You Make a Screen Printing Frame at Home
- Tension that is too tight or too uneven
- Corners that are out of square
- Not enough margin for registration
- Stretching before the frame is properly assembled
- Poor cleaning and storage between sessions
- Frequently Asked Questions
- What mesh count should I use for a screen-printing frame?
- Can I make a screen-printing frame from plywood?
- How do I keep the mesh from sagging after installation?
- What is the best way to attach mesh without a staple gun?
- Can I reuse a DIY screen-printing frame after printing?
- How do I make a screen-printing frame rigid enough for large prints?
- Start With a Small Test Frame
What You Need
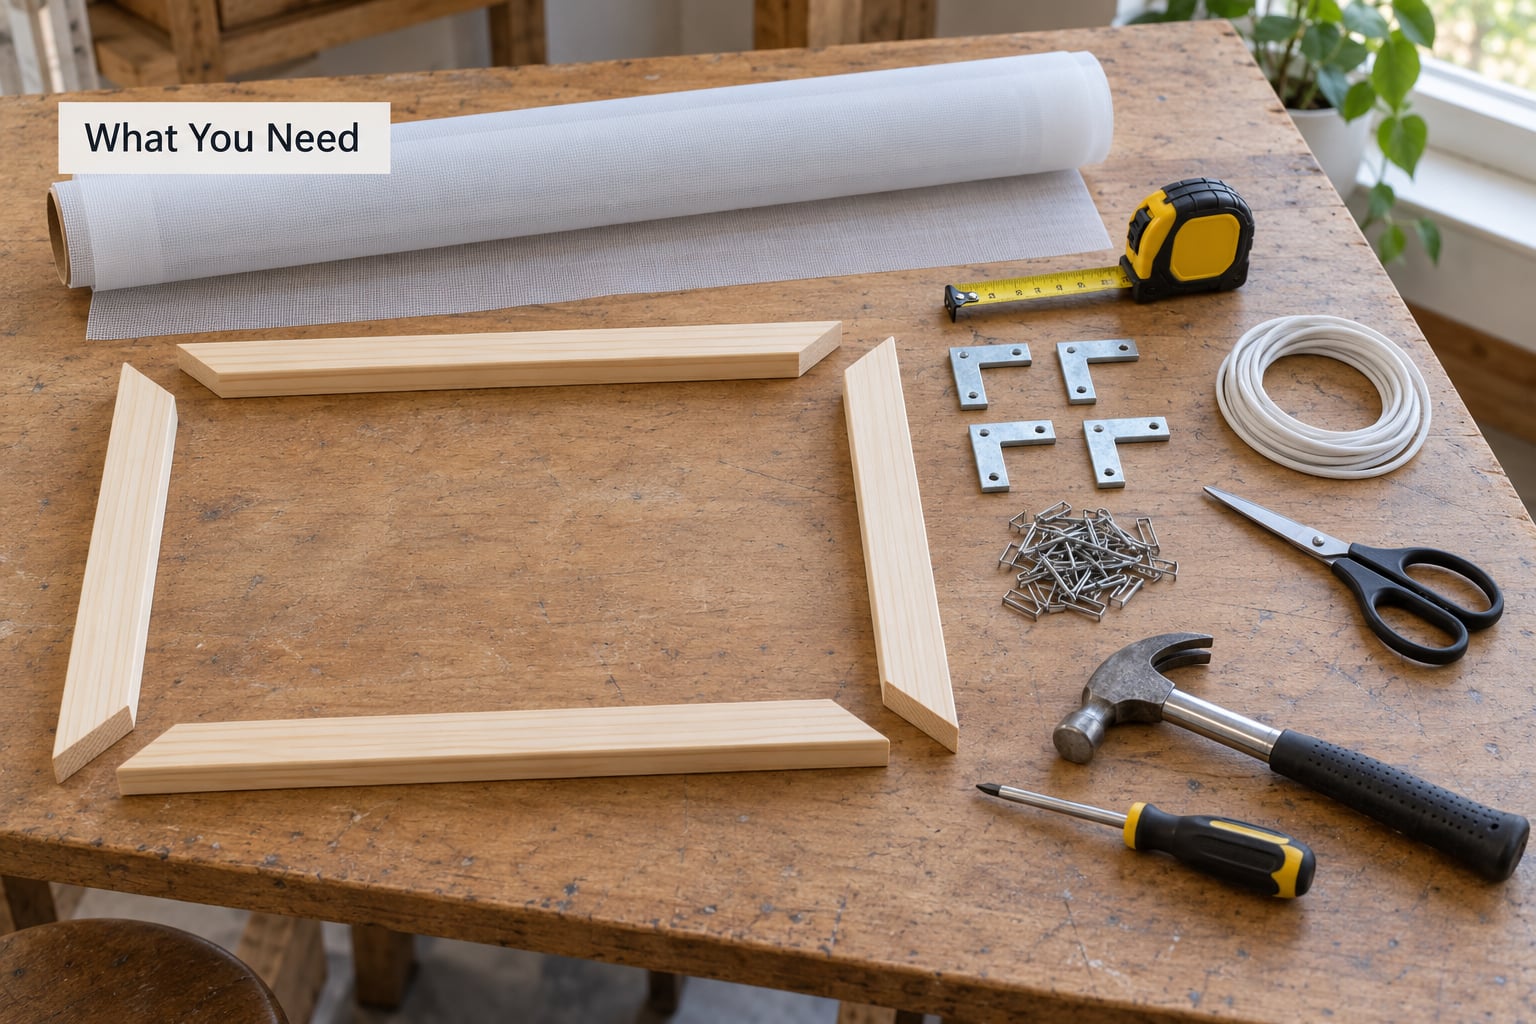
Here is the working list. Gather it all before you cut anything, because halfway through a build is the worst time to discover you are short of fasteners.
- Flat lumber for the rails — 1×3 pine or poplar works well for small frames, and 1×4 gives you more rigidity for larger prints. Pick straight boards with no big knots.
- Screen-printing mesh — polyester monofil mesh is the usual choice at home because it stretches predictably and does not absorb water-based ink the way nylon does.
- Corner hardware — L-brackets with screws and dowels, or wooden corner blocks screwed and glued. Anything that holds the corners rigid without bending.
- Staples — 3/8 inch heavy-duty staples for a staple gun, or a manual staple gun if you do not own an electric one.
- Cord or a screen stretcher tool — as an alternative to staples, if you would rather pull the mesh tight with a winding method.
- Measuring tools — a tape measure, a straightedge, and a carpenter square.
- Optional clamps — bar clamps or C-clamps hold the rails square while you fasten the corners.
- Optional shims — cardboard or thin plywood strips to set a slight curve in the finished screen.
Frame size and mesh count are the two decisions that shape everything
Screen size starts with your printable area plus the image placement area, plus registration margins on each side. If you want a 12 by 12 inch image with one inch of movement room on every edge, you are planning a 14 by 14 inch print zone, and the frame itself needs to sit just outside that.
As a rule of thumb, add roughly 1 to 2 inches of extra rail length on each side for the overlap, so two 16 inch rails and two 14 inch rails give you a frame that holds a 14 by 14 inch zone. Bigger than that and you should brace the frame with a centre rail, because a wide unsupported rectangle will rack.
Mesh count is simply the number of threads per inch. It controls two things at once: how much ink sits on the print, and how fine your stencil detail can be. Coarse mesh lays down heavy ink with soft edges, fine mesh gives you crisp detail and a thinner deposit.
| Mesh count | Ink it suits | Detail and finish |
|---|---|---|
| 80 | Thick, opaque inks and underbase whites | Heaviest deposit, no fine lines |
| 110 | Standard water-based fabric ink on cotton | Solid coverage, slightly soft edges |
| 156 or 160 | Standard fabric ink with more detail | Good all-round balance |
| 200 | Thinner inks, halftones | Cleaner edges, lighter deposit |
| 230 | Watery inks, illustration work | Very fine lines, thin soft hand |
| 305 | Delicate detail and shading | Finest stencil retention, least ink |
For a first shirt print, 110 to 156 mesh is the sweet spot. Beginners usually reach for the highest count they can find and then wonder why their colour looks thin and washed out.
Step-by-Step
The process runs in six steps, from measuring your artwork to storing the finished screen. Set up somewhere with a flat, hard surface you can climb over if needed, because tensioning by hand is far easier when the frame can lie down and you can stand on one side.
1. Measure Your Artwork and Plan the Frame
Measure the printable area, the image placement area, and the margins you need for registration before you cut a single rail. Registration margins are the gap between where the ink lands and the edge of the frame, and they are what let you line a shirt up without guessing.
Ask yourself what you are printing on. A tote bag takes a smaller screen than a back-of-shirt print, and a paper print for an art journal can be a completely different proportion again.
Small, medium, and large is worth thinking about before the first cut. Small means up to about 12 by 12 inches and works with hand tension alone. Medium runs to roughly 18 by 24 inches and benefits from a brace. Large frames need bracing, clamps, and usually a helper.
2. Cut the Frame and Add Corner Joints
Cut the rails square and slightly longer than your final dimensions. Sand the ends flat, then mark the joints with a carpenter square before any cutting so every corner gets the same treatment.
Check each corner with a diagonal measurement. A frame whose two diagonals measure the same is square, and that single check is what stops a print from printing crooked later.
Assemble with corner brackets, dowels, or screwed corner blocks. Clamp the rails, fasten the hardware, then re-measure both diagonals before tightening everything down.
Keep the corners from warping by keeping the end grain on the rails and pushing the fasteners across the joint in alternating directions rather than driving every screw from one side. Rushing the wood at the corner is what makes a frame go out of square in a week.
3. Attach the Screen-Printing Mesh
Cut the mesh so it overhangs the frame by roughly 1 to 2 inches on every side. That overhang is what you staple or fasten onto the back of the frame, and it is the number people forget most often.
Lay the mesh over the frame so it sits centred and aligned with the grain of the wood. If the mesh has a visible weave direction, keep it consistent across every frame you build, because a rotated weave changes ink release.
Do not pull the mesh tight in one direction first. Anchor the centre of each side in turn, alternating around the frame, so the fabric has no chance to bias toward one edge.
4. Stretch and Secure the Mesh on Your Screen Printing Frame
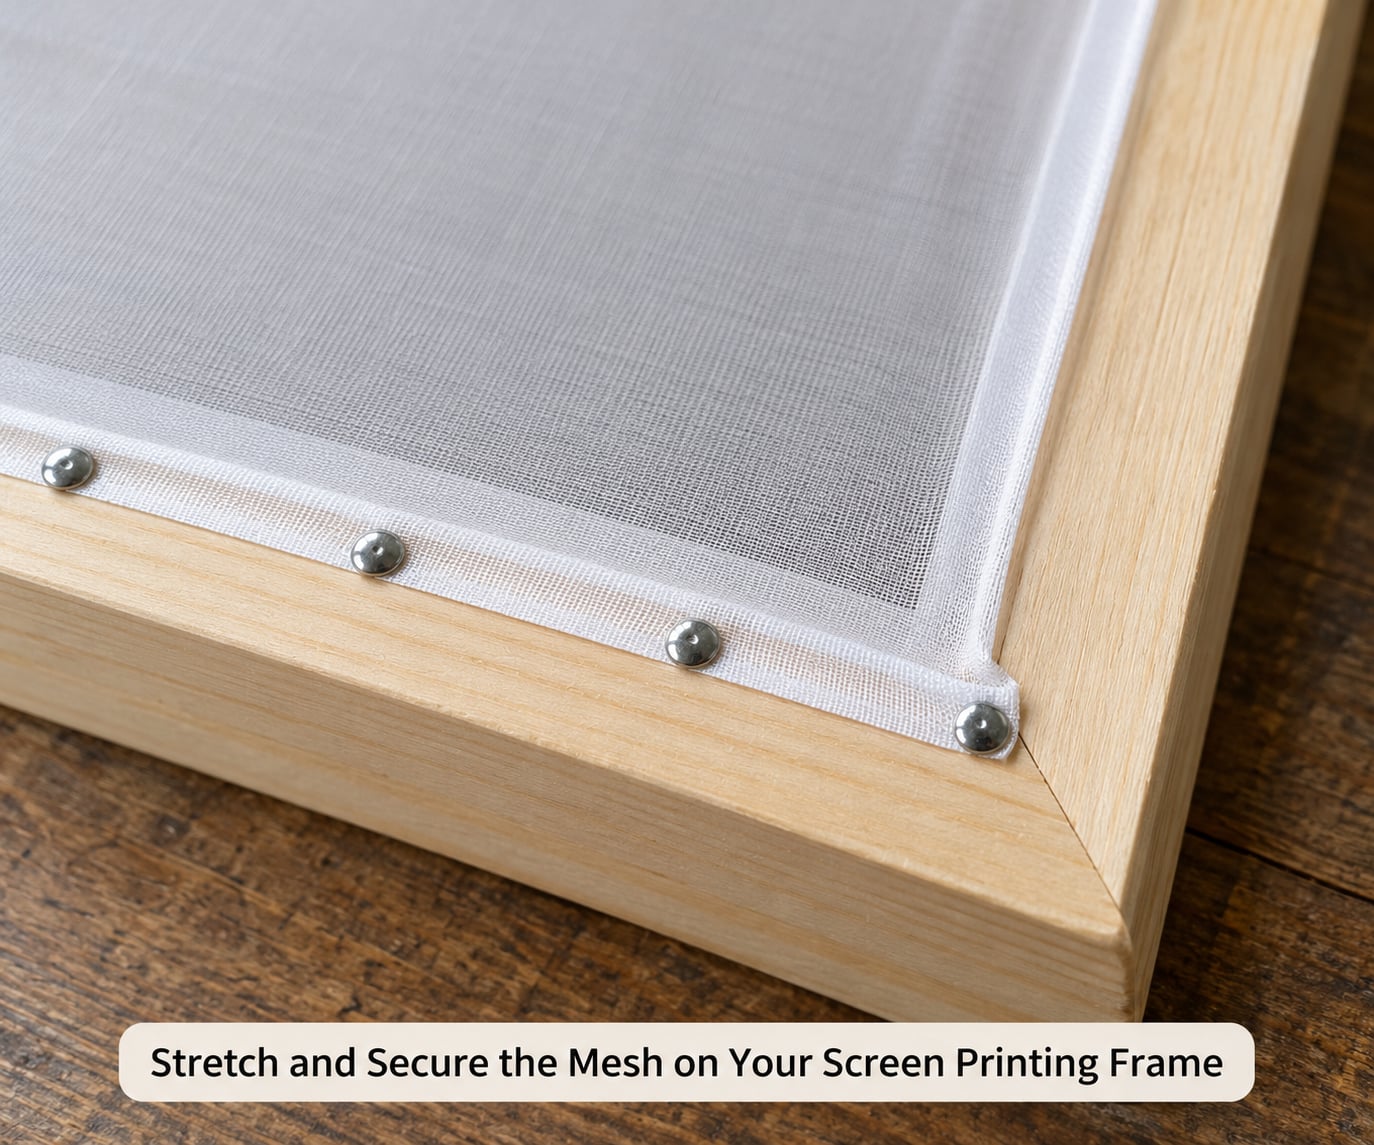
Work from the centre of each side outward, one staple every inch or so, and alternate sides on every pass. Crossing back and forth keeps the tension balanced and is the difference between an even screen and one that pulls tight on two sides and slack on the other two.
Check the tension by flicking the mesh with a finger. An evenly stretched screen rings like a snare drum. A dull thud means slack, and slack will not come back later on its own.
Add a second row of fasteners along the back edge to lock the mesh down, since the first row is what sets the tension and the second row is what holds it.
Even tension is what produces consistent ink coverage and a flat printing surface. Ripples push ink sideways and leave voids, and slack spots print lighter than tight ones because the mesh springs away from the shirt.
If you prefer not to staple, pull the mesh with cord laced around the frame or use a screen stretcher tool that winds the mesh onto the frame under tension. Hand tensioning is free and works fine on small frames, but it is slower and easier to rush.
5. Dry, Inspect, and Prepare the Frame
Let the mesh dry somewhere out of direct sun and away from dust and direct heat. Polyester mesh that is hung up wet can creep slightly as it dries, so check tension again once it is dry rather than trusting your last staple pass.
Check each corner and each side for a loose section or a lifted edge. Pinch the mesh near the corner and look for any bounce, and press down on the centre of each side to spot low spots.
Fix problem areas by adding fasteners rather than pulling harder. If a whole section has sagged, you will need to release that side and restretch it properly.
Proof the screen before you count on it. A small ink pull on a scrap of fabric or paper tells you whether the stencil is sealed and whether tension is even, and it takes two minutes compared with discovering a leak after twenty shirts.
Once the screen is proven, block out the areas you will not print on, attach your stencil to the mesh with water-based adhesive, and keep paper backing on the exposed screen until printing day.
6. Maintain and Reuse the Frame
Wet print ink lifts fastest while it is still warm. Push the ink out of the mesh with a squeegee or scraper, then rinse the screen under cool water with a little dish soap worked through it by hand.
Dry the screen open to the air, away from direct heat, then store it flat with light pressure so the mesh does not take a set. Leaning a screen against a wall for months is how mesh develops a bow.
Protect the wood with a light finish if you built it from raw lumber, and keep wood sealer off the mesh itself, since residue in the mesh blocks ink.
For extra screens, build the new frame to the same outer dimensions and swap the mesh while the design is still fresh. When a screen wears out, pull the staples, remove the mesh, and reuse the frame with fresh mesh instead of buying a new one.
Common Mistakes When You Make a Screen Printing Frame at Home
Nearly every disappointing first print traces back to one of five things.
Tension that is too tight or too uneven
Over-tensioned mesh can tear during installation and behaves like a stiff drumhead. Under-tensioned mesh sags in the middle and prints patchy. The fix is the alternate-sides stapling order, plus the finger-flick ring test before you call it finished.
Corners that are out of square
A frame that drifts out of square prints off-register every single pull. Measure both diagonals before tightening, and again after the frame has been stretched. If the diagonals disagree, loosen the corner hardware and reset it.
Not enough margin for registration
If the mesh is stretched right up to the inside edge of the rail, you have no room to position the garment. Leave a clear margin inside the frame so you can nudge the shirt until the image lands where you want it.
Stretching before the frame is properly assembled
Tension on a loose or unbraced frame pulls the joints out of alignment. Assemble, square, and brace the frame completely before the mesh goes on. Remeshing a warped frame is more work than starting over.
Poor cleaning and storage between sessions
Ink left drying in the mesh blocks openings and ruins the stencil. Clean while the ink is warm and slightly wet, dry the screen fully, and store it flat with light pressure. A screen stored damp in a bag will stay damaged.
A few quality tips worth keeping. Use a cardboard shim inside the shirt so ink does not bleed through to the back, cure prints properly rather than just air-drying them, and always pull the squeegee at the same angle and speed across every garment so coverage stays consistent.
On safety, ventilate the room when you handle inks and any solvent-based product, wash water-based ink and your hands before eating, and keep solvents and flash-dryer equipment away from flammable material.
Frequently Asked Questions
What mesh count should I use for a screen-printing frame?
For most home fabric printing, 110 to 156 mesh is the practical range. It holds enough ink for solid coverage on cotton while still retaining reasonable stencil detail. Use 80 mesh for thick opaque inks and underbase, 200 mesh for cleaner edges and halftones, and 230 or 305 only when your design has genuinely fine linework and you are willing to lay down a thinner ink deposit.
Can I make a screen-printing frame from plywood?
You can, but solid softwood rails work better for most home builds. Plywood is stable and easy to cut square, which helps, but its layered edge splinters if you staple directly into it and it has less grip than a solid rail. If you use plywood, glue a thin solid batten around each outside edge so the mesh is stapled into wood rather than into the sheet edge.
How do I keep the mesh from sagging after installation?
Sag usually comes from uneven tension rather than weak mesh. Staple the centre of each side first, work outward an inch at a time, and alternate sides on every pass so no edge takes all the stretch. Keep the frame flat on a hard surface while you work, and let the mesh dry before judging it, since polyester can creep slightly as it dries.
What is the best way to attach mesh without a staple gun?
Two home methods work well. Lace cord through drilled holes around the frame and pull each run tight in sequence, or use a screen stretcher tool that grips the mesh edge and winds it onto the frame under steady tension. Both give even results on small and medium frames. Whichever you choose, check tension with a finger flick and add a second hold near each corner.
Can I reuse a DIY screen-printing frame after printing?
Yes, and reuse is the main reason to build your own. Clean the ink out while it is still warm, rinse with cool water and dish soap, dry the screen open to the air, and store it flat under light pressure. The wooden frame can be remeshed later by pulling the staples and fitting fresh mesh, which costs far less than replacing the frame.
How do I make a screen-printing frame rigid enough for large prints?
Add a centre rail across the longer span so the frame becomes two braced rectangles instead of one unsupported opening, and use wider rails as the print grows. Brace at the diagonal too if the frame is square and very large. On anything over roughly 18 by 24 inches, add corner braces and use clamps while fastening, because hand tension alone will not keep it square.
Start With a Small Test Frame
If you only do one thing from this guide, build a small test frame first and proof it before scaling up. A 12 by 12 inch frame teaches you everything about how to make a screen printing frame at home that matters — even tension, rigid corners, correct margins — without the risk of a warped rail or a ruined sheet of mesh.
Two habits carry over to every larger build. Check tension with the finger flick before you attach any stencil, and pull one small proof print so you can see problems on scrap fabric instead of on finished work.
Once that small screen prints cleanly, you already know the method that scales to totes, tees, and paper. Build the next frame bigger, keep the mesh count matched to your ink, and the process gets routine fast.