Oil pastel sits on a wood panel beautifully, but only after that panel is sealed and primed: sand it flat, block the sap and resin, lay down gesso, then work hard sticks to soft. If you have searched how to use oil pastel on wood panel, the whole method is that preparation plus a light hand with blending. Prep takes about 30 to 45 minutes with two drying gaps in it.
Raw wood is the problem. It is porous and slightly oily, so the mineral oil in the pastel sinks straight in instead of gripping. The colour stains the timber, flakes off in patches, and never blends properly. A primed ground gives the pastel a tooth to bite into.
The panel is also a different beast from paper. Rigid, heavy, and unforgiving of fingerprints. What you gain is a surface that takes scraping, impasto, and heavy layering without buckling, and a piece you can hang without a mat or a mount.
Table of Contents
- What You Need
- The Panel
- Preparation Supplies
- Drawing and Blending Tools
- Dust Protection and Finishing
- Choosing an Archival Sealant
- How to Use Oil Pastel on Wood Panel: Step by Step
- 1. Inspect and Prepare the Wood Panel
- 2. Prime and Test the Pastel on the Surface
- 3. Tone the Panel and Draw the Composition
- 4. Block In the Main Shapes
- 5. Layer and Blend the Colour
- 6. Refine Details and Correct Mistakes
- 7. Seal the Finished Artwork
- 8. Frame It for Hanging or Sale
- Common Mistakes
- Tips for Better Results
- Frequently Asked Questions
- Do I need to prime a wood panel before using oil pastel?
- How do I stop oil pastel from lifting or smudging?
- Can I use oil pastel on an already painted wood panel?
- How do I fix shiny or uneven areas on wood with oil pastel?
- How long should I leave oil pastel on wood before sealing it?
- Conclusion
What You Need
A wood panel, some pastels, and a few preparation supplies. Nothing here is exotic, but two items do most of the work: a sealer for the wood and gesso for the tooth.
The Panel
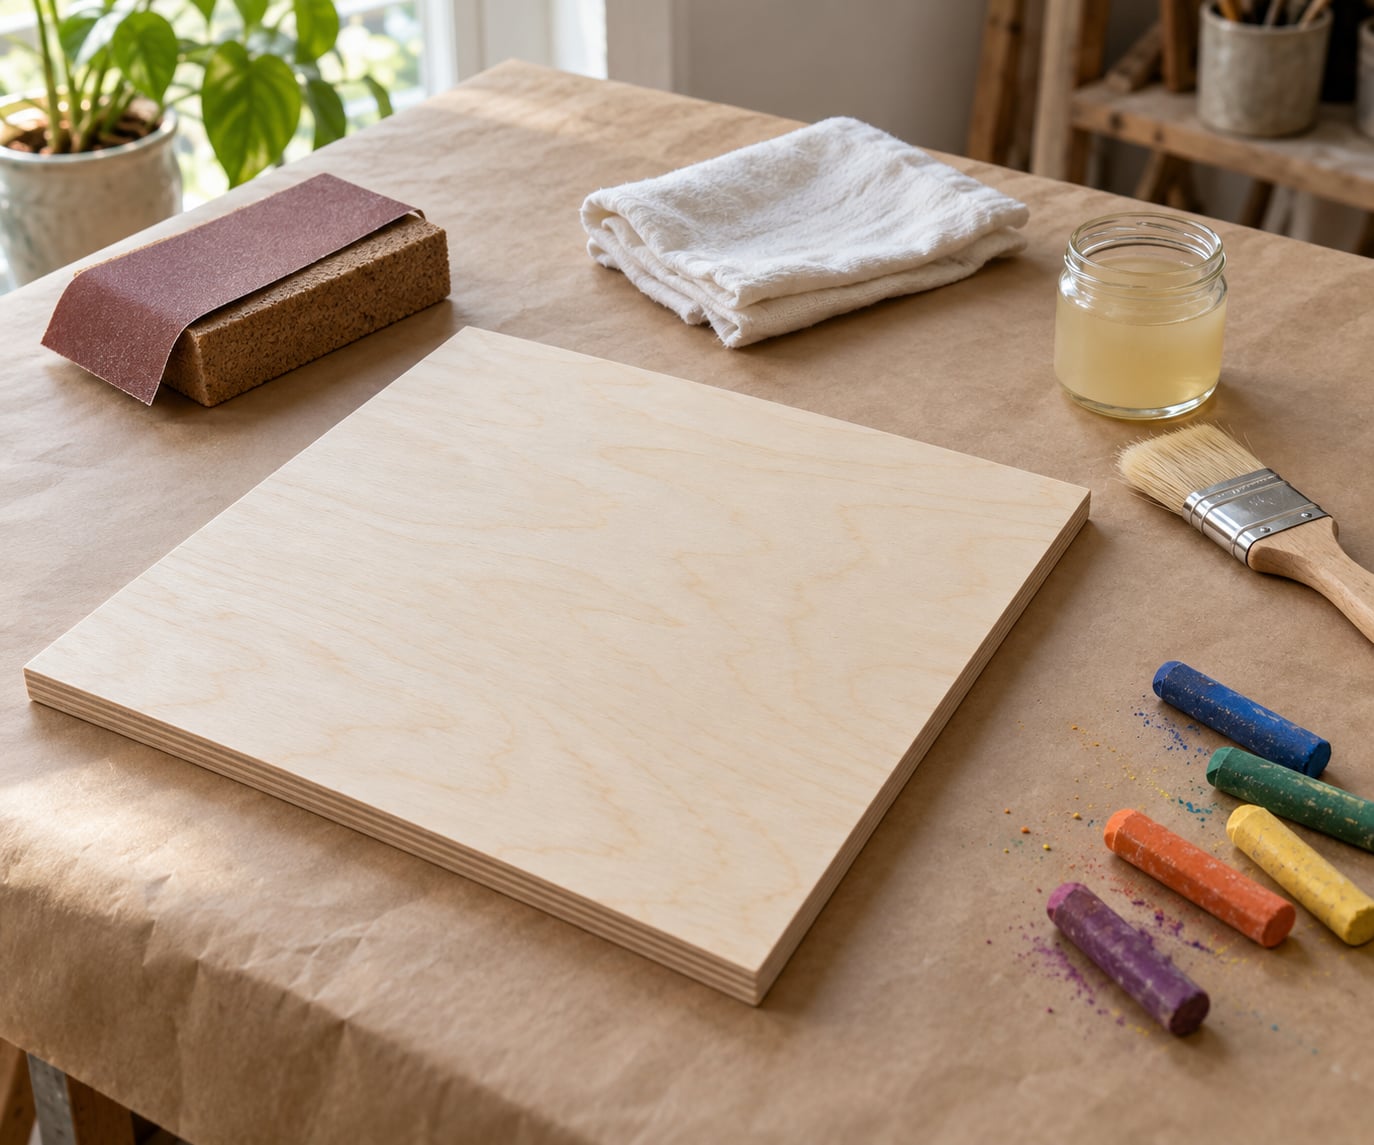
Look for a flat, smooth face that has already been sanded by the manufacturer. Birch plywood and MDF or hardboard are the two I reach for most, and they behave differently. Birch plywood takes sanding and scraping well and has visible ply edges when framed. MDF and hardboard are dead flat, need a sealer because they are porous like chipboard, and are the easiest surface to get truly smooth colour on.
A live-edge slab or wood slice works too, and the natural edge looks good. Expect more filling work on those, because knots and gaps soak up sealer and show up later as pale halos under the colour.
Skip anything with a textured, grooved or glossy face. A raised grain pattern is not tooth, and pastel slides off it.
Preparation Supplies
- Sandpaper in 220 and 400 grit, plus a cork sanding block
- PVA glue and water mixed 50/50, or a shellac-based sanding sealer
- Acrylic gesso. Clear gesso for maximum grip, white gesso for a bright ground, textured matte gesso if you plan to build thick layers
- A wide flat brush for the sealer and a smaller one for the gesso
- A clean scrap cloth and a clean cup of water
Drawing and Blending Tools
A tortillon or blending stump for soft gradients, a clay colour shaper for controlled smudging, a palette knife for scraping and impasto, and a fresh razor blade for sgraffito and lifting mistakes. A soft hog-bristle brush is for dust, not for painting.
Dust Protection and Finishing
Pastel dust is waxy and it sticks to everything. Wear an apron, keep a soft brush and a low-suction vacuum within reach, and never sweep crumbs with a brush. You will only spread the wax further. On the sealing side, have a workable fixative spray for locking down finished areas and a matte or satin varnish for the final surface, plus a frame with glass and a deep mat if you want the safest long-term protection.
Choosing an Archival Sealant
For a piece you plan to sell, use a UV-stable varnish over an archival fixative, and keep the glass off the surface with a mat airspace of a few millimetres. That combination stops fingerprints, blocks light and handles shipping. For a study or a piece on your own wall, a couple of coats of workable fixative is enough, and you keep the option of scraping and correcting later.
How to Use Oil Pastel on Wood Panel: Step by Step
Here is the full process in order: sand, seal, gesso, tone, sketch, block in, layer, blend, seal again. Most of the failures I see happen in the first three stages, so give them the time they need.
1. Inspect and Prepare the Wood Panel
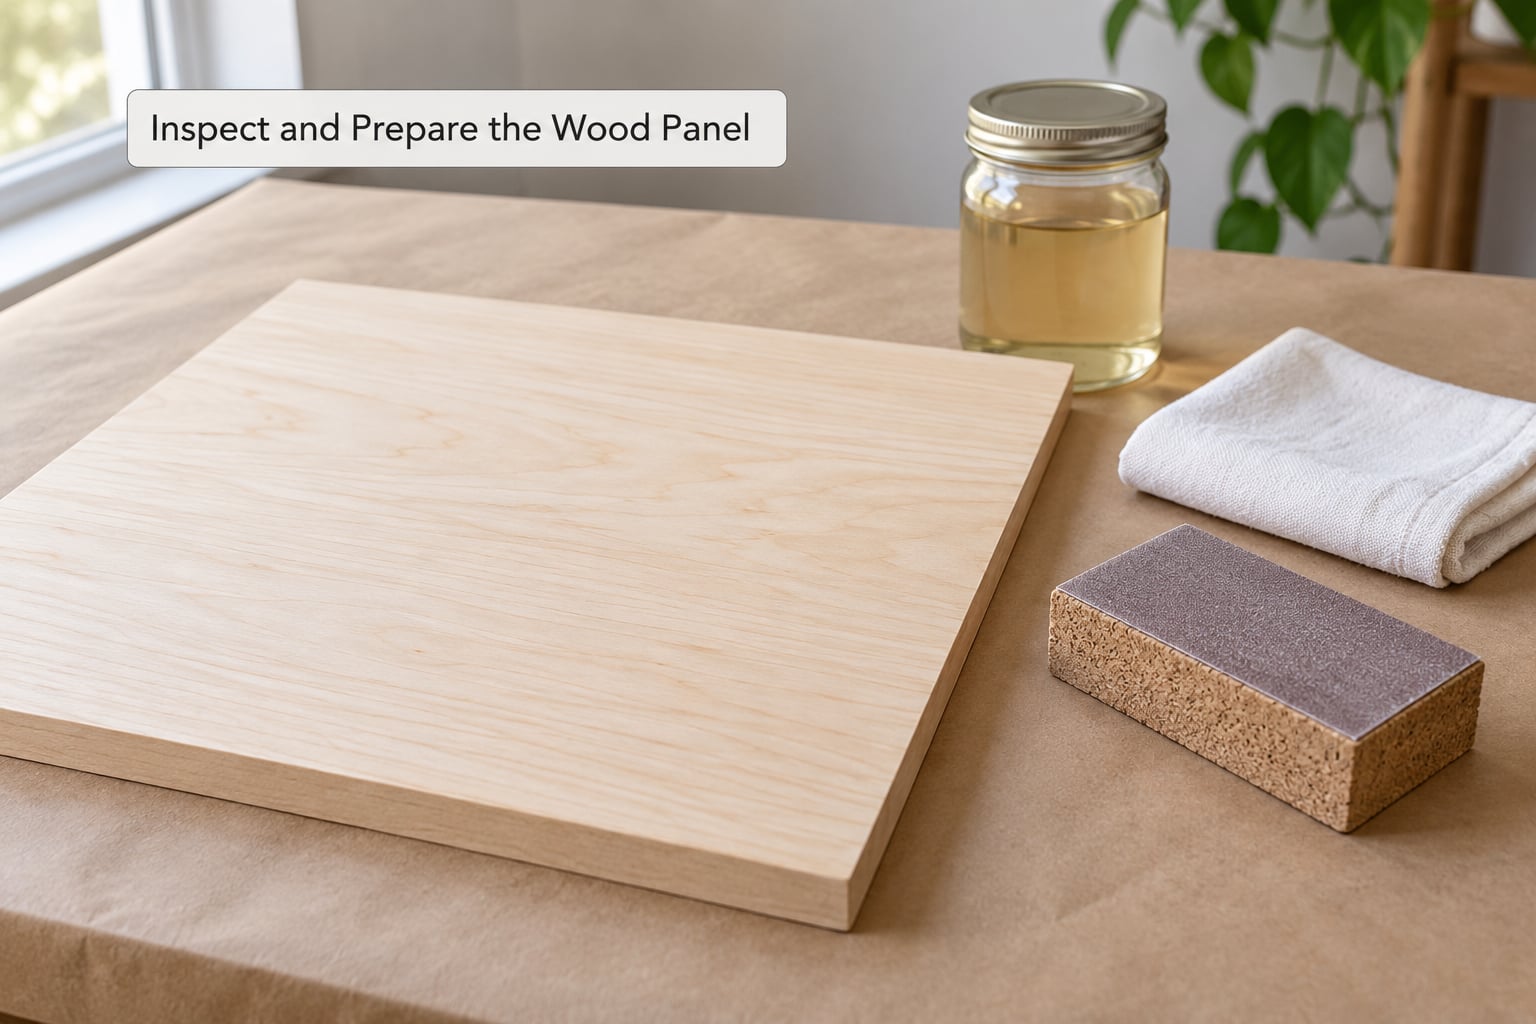
Run a fingertip across the face. Raise grain feels like fine grit; take it down with 220 grit, working in the direction of the fibres, then knock the dust off with 400 grit. Wipe with a damp cloth and let it dry fully.
Next, seal the wood. Mix PVA glue with water 50/50 and brush it on thin, letting it sink rather than sit on top. Two thin coats beat one thick one, because thick glue cracks when the panel moves with humidity. Give each coat the drying time printed on the bottle, then sand the dry sealer lightly with 400 grit to knock off the sheen.
For MDF or hardboard, use a shellac-based sanding sealer instead. It does the same job faster and does not raise the grain as much.
The panel is ready for paint when it looks uniformly matte, feels smooth but not glassy, and has no loose powder under your fingernail.
2. Prime and Test the Pastel on the Surface
Apply two thin coats of gesso with the flat brush, letting the first dry before the second. The primer looks thinner than you expect going on and often looks more matte when dry, which is what you want. Prime edges too. A bare edge is the first place a painting starts to look unfinished.
Before you commit, make two or three test marks in a bottom corner. Rub a hard stick over the gesso and see whether it catches and leaves a matte deposit, or whether it slides and shines. Then try the same with a soft stick. This tells you which pressure the surface needs and whether you want textured gesso for a second coat.
While the mark is still there, check one more thing. Wood grain shows through light, transparent colours, so test a thin yellow over the white ground. If it greys out, add an acrylic underpainting later to give those passages something opaque to sit on.
The test is finished when you can point to the stick grade and the pressure that gave you an even, non-shiny layer.
3. Tone the Panel and Draw the Composition
The stark white of gesso fights every colour you lay on it, so tone the panel first. Brush a thin wash of burnt umber, raw sienna or a dilute acrylic over the whole surface, then wipe it back with a cloth until the white only ghosts through. This is a stain, not a coat. Let it dry.
Draw your composition lightly in soft graphite or charcoal. Keep the underdrawing faint. Graphite showing through a pale passage is the most common complaint on pastel panels, and it is much easier to prevent than to fix.
If you want a beginner-friendly first layer, mix a thin acrylic wash of your local colour and paint it in over the drawing. Oil pastel sticks sit on acrylic far better than most beginners expect, and it fixes your values before you commit to a hard stick.
4. Block In the Main Shapes
Take the hard sticks first and lay in the big masses with light, side-of-the-stick marks rather than drawn lines. Work from your lightest local colour toward the darkest, keeping the whole image readable from two metres away.
Two rules save most beginners. Always put yellows straight onto the primed surface, because yellow over other colours turns green and muddy. And always put white on top, since white is the most opaque colour in the box and will only turn the layer beneath it grey.
The base layer is done when you can name the three or four main shapes without pointing, and none of them depend on an outline to read.
5. Layer and Blend the Colour
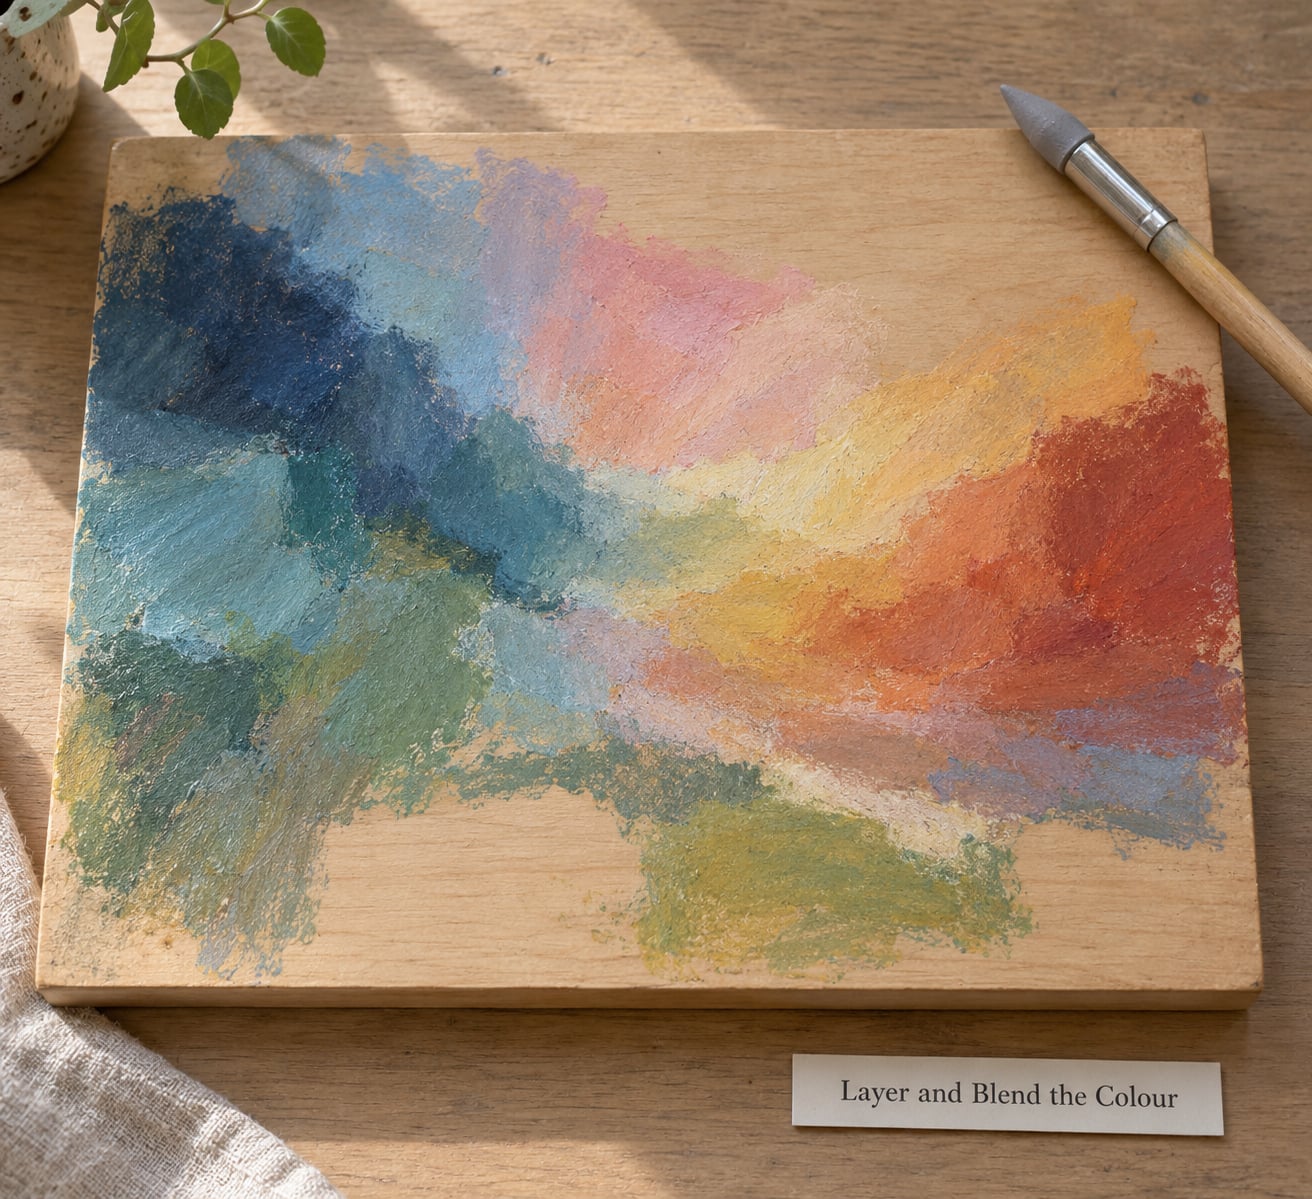
Each new layer should be the same hardness as the last or softer. A hard stick over a soft layer catches and drags it; that is what pulls the mixture into mud. Take a light scumble of the next colour across, then blend.
Blending has four useful levels on a panel. A fingertip gives the softest result but leaves oil on your skin, so use the side of your hand and keep a cloth nearby. A colour shaper gives a controlled, slightly textured blend and is my default. A tortillon gives the smoothest gradients. A palette knife gives a flat, sharp blend that holds tooth.
Where you want grain to read through, blend less, not more. Reserving some bare wood in a passage of a colour field is usually stronger than filling it in.
And sand lightly with 400 grit between major layers if the surface starts to look greasy. One pass takes the shine off the oil film so the next layer grips. The colour stage is complete when transitions are smooth in the places you meant them to be and rough where the texture of the panel should show.
6. Refine Details and Correct Mistakes
Details come last, with the softer sticks, and only after the big shapes have stopped moving. Sharpen edges by drawing into the hardened colour with a light stroke rather than pressing harder.
For a lifted or greasy area, scrape with a fresh razor blade held almost flat, at a shallow angle so the blade skims the surface instead of gouging the gesso. Follow the direction of the tooth. The lift leaves a pale scar, and you refill it with a thin layer of fresh colour rather than more pressure.
To restore a highlight you lost, press a new stick of white straight onto the primed ground or onto bare wood, not over the colour around it. Wax needs somewhere to grip. The refinement stage is finished when every small adjustment is holding the whole image together rather than announcing itself.
7. Seal the Finished Artwork
Leave the work unfixed if you still want to rework it, and know that this means you also accept fingerprints and a piece that stays vulnerable. The moment the painting is done, decide.
A workable fixative spray locks the wax in and keeps the surface re-workable. Hold the can 30 centimetres away, use short passes, and spray outdoors or in a well-ventilated room. Clear coats of a matte varnish give a more even finish; a satin or gloss varnish adds depth to darks, and a UV varnish slows fading where daylight hits the piece.
Test first. Spray a patch in a hidden corner and let it cure, because most varnishes darken and flatten slightly. If that shift bothers you, stick with fixative. Wait the cure time on the can before you touch the surface, and always frame behind glass with a deep mat so the glazing never sits on the artwork.
8. Frame It for Hanging or Sale
Because oil pastels never truly dry, the frame is part of the protection. Fit a spacer or deep mat so there is a few millimetres between the artwork and the glass, seal the edges of that mat so no acid touches the panel, and use UV-filtering glazing for anything in daylight.
Cradled panels can be hung directly with a French cleat. Unframed panels can be boxed with a shadow gap border if you like the cleaner look, and that look is why many artists work on wood at all.
Common Mistakes
Most of these are preparation problems wearing a disguise. Here is what each one looks like and what fixes it.
- The pastel will not grip. The ground is too smooth or glossy. Add a second coat of textured matte gesso and lightly scuff it with 220 grit before painting.
- Colour sinks in and leaves a stain. The wood was not sealed. Remove the affected colour with a blade and mineral spirits, then start again with PVA sealer and gesso.
- Blending goes patchy and streaky. Not enough tooth, or you blended before the layer was thick enough to move. Use a colour shaper and add more colour before more blending.
- Colours turn to mud. You are going soft over hard. Switch to sticks that are the same hardness or softer than the layer underneath.
- Greasy shine and fingerprints. Too much blending oil on the surface. Sand with 400 grit, then wipe your hands on a cloth before touching the panel.
- Wax residue on everything. Sweeping dust spreads it. Vacuum with a brush head, never blow or sweep, and keep the panel face-up on a clean board while you work.
- The whole image shifted darker after sealing. The varnish is doing what varnishes do. Test patches first, or use fixative only.
- Pastel lifts off when you try to correct it. You went at it too early or too hard. Wait until the area has skinned over, then scrape flat and refill thinly.
Tips for Better Results
A few habits pay off more than any single technique on this list.
- Work light to dark, with two exceptions. Yellows go straight to the surface and whites always go on top.
- Test colours in a small patch every time you mix, not just once at the start. Pastel mixtures drift as layers build.
- Rotate the panel as you work. A rigid surface meets your hand at one angle, and the side that feels awkward is where the marks get weak. Turning it a quarter turn fixes that in seconds.
- Keep the grain readable. Bare or lightly toned wood is a texture in the composition, so leave it rather than covering it.
- Sand between layers, not just at the start. One light 400 grit pass knocks off the oil film that stops the next layer sticking.
- Match the fixative to the finish you want. Matte keeps a drawing-like surface, satin adds depth, glass with a deep mat buys you the most protection.
- Store soft sticks somewhere cool. They soften and slump in a hot studio, and a deformed stick gives you uneven pressure for weeks.
And keep a cloth in your non-painting hand. Most of the damage to a pastel panel comes from the palm resting on a finished passage while you work on the next one.
Frequently Asked Questions
Do I need to prime a wood panel before using oil pastel?
Yes. Bare wood is porous and resinous, so the oil binder sinks in instead of gripping, and the colour stains, flakes and refuses to blend. Sand the panel, seal it with PVA glue and water mixed 50/50, then apply two thin coats of acrylic gesso. Clear gesso gives the most grip, white gesso gives you a bright ground, and textured matte gesso suits heavy layering.
How do I stop oil pastel from lifting or smudging?
Let each area skin over before you touch it, keep pressure light, and blend with a colour shaper instead of your fingers where you can. Sand lightly with 400 grit between layers to remove the greasy oil film that makes the next layer slide. Once the painting is finished, seal it with a workable fixative spray and frame behind glass with a few millimetres of mat airspace between the two.
Can I use oil pastel on an already painted wood panel?
You can, but you need a matte surface to work with. An existing acrylic or oil painting that is glossy will not hold pastel. Sand the surface, wipe off dust, then cover it with one or two coats of gesso or a matte ground so the pastel has tooth. If the old painting is thick, sand it level first and expect the ground to need several coats to cover the old colour and any texture.
How do I fix shiny or uneven areas on wood with oil pastel?
Shine means oil film, and unevenness means buildup. Run 400 grit sandpaper over the shiny passage in the direction of the tooth until the gloss disappears, then wipe with a cloth and lay down a thin, fresh layer of colour rather than adding more pressure. For raised areas, hold a fresh razor blade almost flat and skim the surface, which flattens the buildup without cutting into the gesso underneath.
How long should I leave oil pastel on wood before sealing it?
Oil pastels never fully dry, so there is no curing wait before sealing. You seal when the painting is finished and the surface has skinned over, usually the next day at the earliest so the top layer has set. After spraying, follow the cure time printed on the fixative or varnish before handling. Leave longer if you live somewhere humid, and never frame the piece without glass and mat airspace.
Conclusion
Start small and cheap. Make a test corner on the panel you already own, or buy a small birch plywood piece and run the whole preparation sequence on it once: sand at 220 and 400, seal with PVA and water, two coats of gesso, tone it, block in, layer, seal.
Once that panel tells you how hard to press, work larger. Establish your lightest base shapes, layer each pass a little softer than the last, and keep the grain showing where you want texture. Seal only after the last detail is placed and the surface has skinned over, then frame behind glass.