Learning how to couch yarn with a sewing machine takes about ten minutes to set up and about an hour for a cushion panel. Couching means laying yarn on top of fabric and tacking it down with a zigzag stitch that crosses over it at regular intervals. Any machine that can make a zigzag can do it, and the specialty foot is optional.
The name comes from the old French word for a bracket, which described the bent fibers of medieval bishops’ croziers. English embroiderers borrowed the word, then spelled it two ways. Couching and couching are both correct, which trips up people searching for a technique they already know by sight.
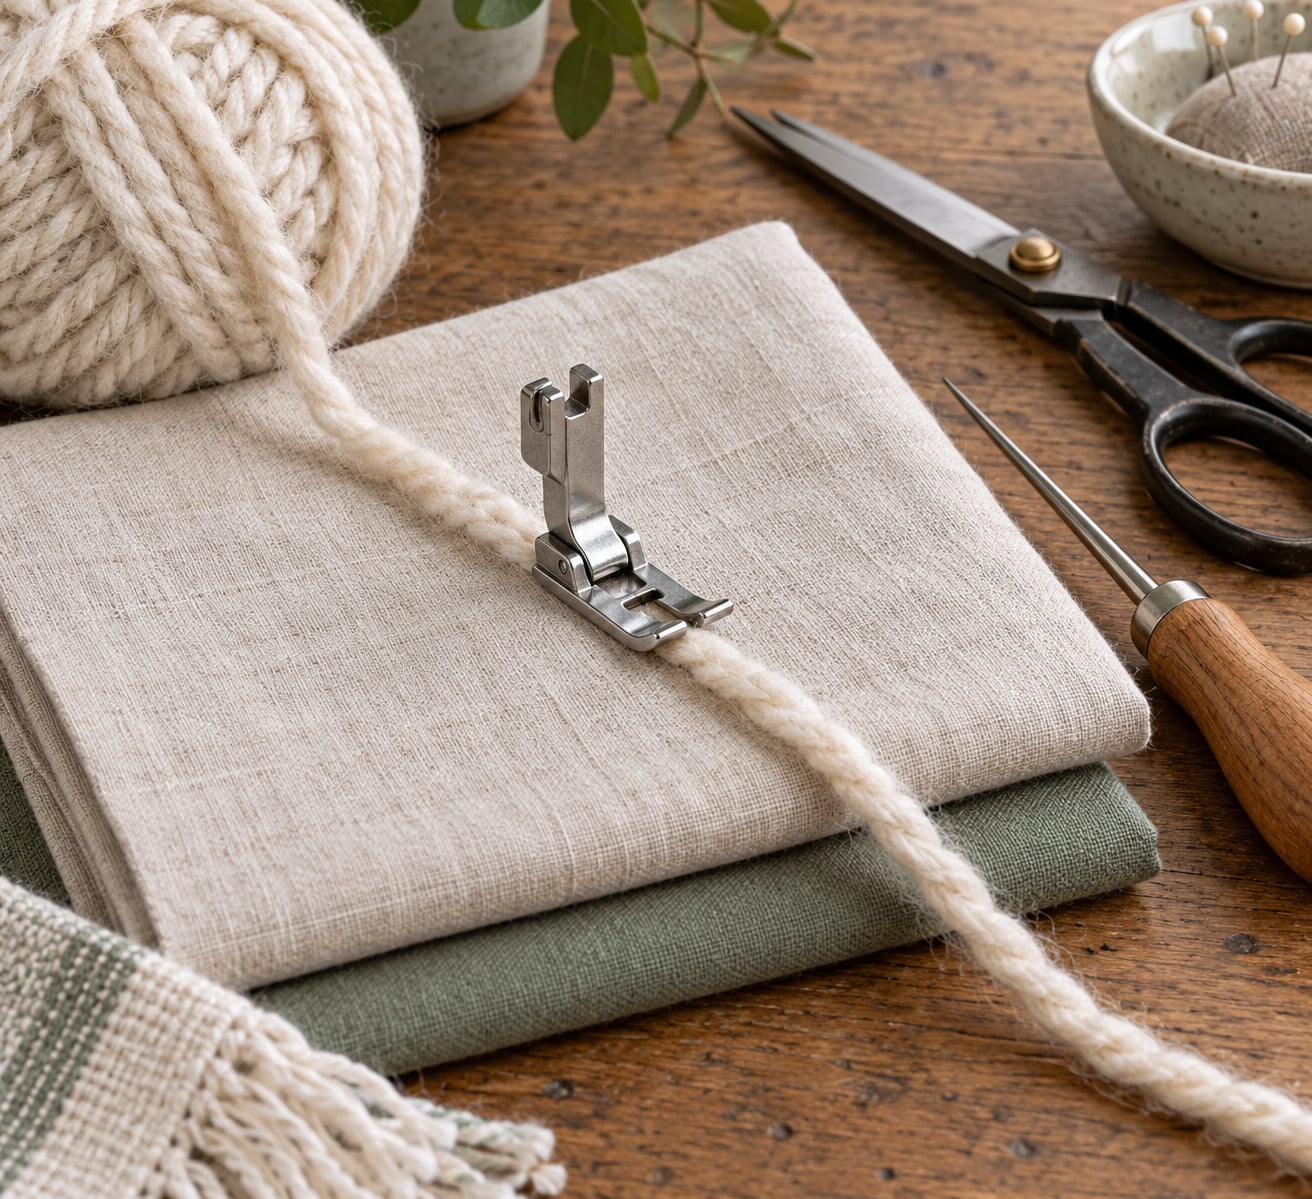
You need four things: yarn, a machine with a zigzag, something to guide the yarn, and a thread to tack it with. Skip the specialty foot and you can still couch by holding the yarn in front of the needle. Machine settings and foot names below hold for modern machines and for older domestic and vintage models.
Table of Contents
- What You Need
- The four essentials
- Which presser foot to use
- Optional extras
- Yarn to avoid at first
- How to Couch Yarn Step by Step
- Choosing the Right Stitch
- Preparing the Machine and Fabric
- Positioning and Sewing the Yarn
- Turning Corners and Changing Yarn
- Finishing the Couched Surface
- Common Mistakes
- Frequently Asked Questions
- Can I couch yarn with any sewing machine?
- What type of yarn is easiest to couch with a sewing machine?
- What presser foot should I use for couching yarn?
- How do I keep the yarn from snapping or tangling while sewing?
- How do I keep the couch stitch even across the fabric?
- What stitch should I use to secure yarn at the end?
- What to Do First
What You Need
The machine is the easy part. Any domestic machine with a zigzag stitch, and most vintage straight-stitch-only machines can manage it with the basting stitch and slow, careful work. There is no requirement for a hoop, digitizing software, or an embroidery unit.
The four essentials
- A zigzag-capable sewing machine with a working presser foot and a clean feed dog.
- Yarn in a medium or worsted weight, roughly 2 to 3 mm thick. That is about 9 to 11 wraps per inch when you wrap it around your fingers.
- A tack thread that blends with the fabric. Embroidery floss, fine rayon, or a 50 weight thread in a colour close to the ground fabric all work.
- A way to feed the yarn to the foot, either through the foot itself or from a spool stand and telescopic thread guide.
Which presser foot to use
Here is the rule that clears up most of the confusion about couching feet. A couching foot with a groove or channel running front to back underneath takes a zigzag stitch. A foot with a piercing eye or hole below the needle takes a straight stitch, and the yarn has to fill that hole snugly.
That second kind behaves like a braiding foot, and it is stricter than it looks. If the yarn sits loose in the hole it slips out of position and the straight stitches sail right past it. Experienced users on the Quiltingboard forums describe keeping the yarn loose ahead of the foot while the stitch still catches it at the needle, which is a counter-intuitive combination that takes practice.
A standard zigzag foot will get you through a first project, though thick material can bunch under it. A rolled hem foot with a zigzag is a popular middle ground and works well for narrower yarn. If your machine has a cording or braiding attachment, use it.
Optional extras
- A spool stand or a second spool holder, which stops the yarn twisting as it comes off the cone.
- A telescopic thread guide set above and behind the needle so the yarn feeds down at an angle instead of dragging sideways.
- An 80/12 or 90/14 sharp needle, plus a heavier 100/16 if you are couching something thick.
- Scissors, an awl or tapestry needle for weaving in tails, and a pin to hold the yarn in place while you start.
- A stabilizer if the ground fabric is knit, silk, or loosely woven and you want the piece washable.
Yarn to avoid at first
Skip novelty yarn, boucle, multi-ply yarns, and anything chenille on your first run. Manufacturers warn that these can break, shed badly, or jam, and loose fibre wraps around the needle and the bobbin. Yarn you can break cleanly with your hands behaves well under a presser foot.
Cord and trim work too. Rattail cord is a common choice for quilt borders, and experienced couchers also use embroidery floss, blind cord, and even an old charging cable. Anything small enough to travel under the foot without dragging the fabric will do.
How to Couch Yarn Step by Step
Ten steps covers a complete line from a folded edge to a finished tail. Read it through once, then work it slowly on a scrap of the same fabric before you touch the panel you care about.
- Test the machine with a plain zigzag on a scrap of your fabric to confirm the width and length dials move freely.
- Fit the foot and drop the foot height lever by one increment so the foot sits lower over thick material.
- Change the needle to a fresh 80/12 or 90/14 sharp, because a dull needle deflects and snags yarn.
- Thread the upper path with your tack thread and wind the bobbin as usual.
- Set the stitch to a narrow zigzag, roughly 1.5 to 2.0 on most machines and 6 to 6.5 on a Pfaff, with stitch length around 1.5 to 2 mm.
- Place the yarn on top of the fabric where you want the line to land, not on the edge itself.
- Route the yarn through the foot or from the telescopic guide, keeping it slack rather than taut.
- Lower the presser foot gently so the yarn compresses instead of springing away.
- Sew slowly with your fingers resting ahead of the foot, steering without pulling.
- Secure the end with a few straight stitches across the tail, then weave or trim it.
Choosing the Right Stitch
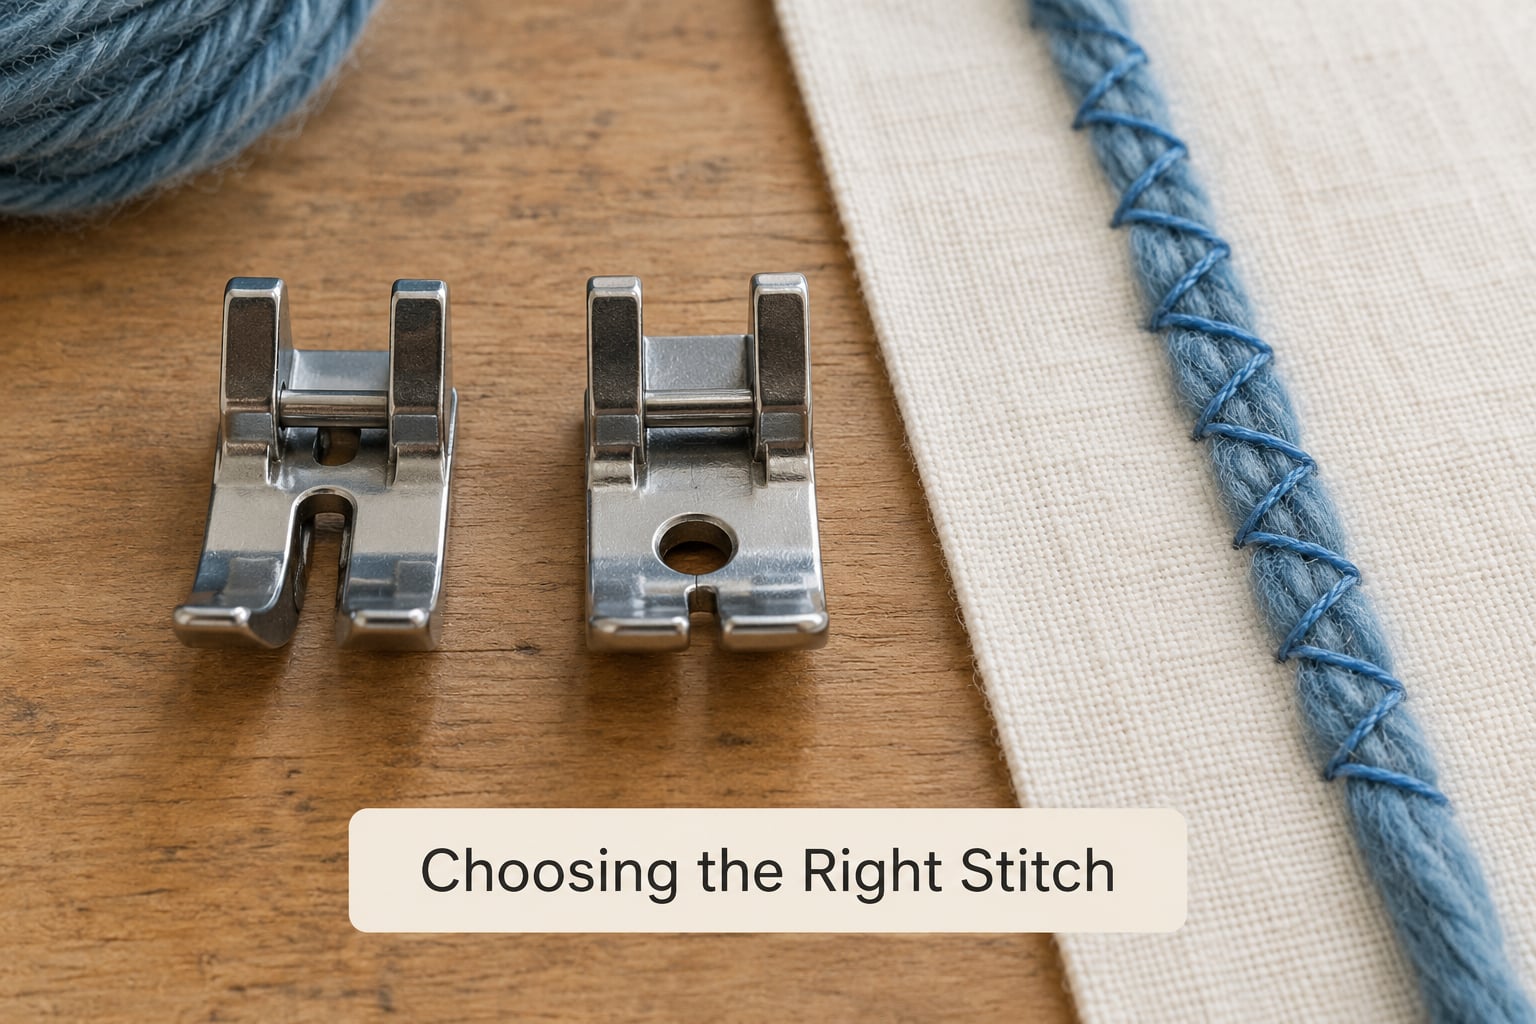
A narrow zigzag is the default because it lands stitches on both sides of the yarn and traps it between them. Wide is fine on some machines for a different look, but the couching advice circulating in quilting groups converges on 1.5 to 2.0, with a 6 to 6.5 setting on a Pfaff, which is a comparable physical width on that machine’s scale.
Stitch length matters more than most beginners expect. Experienced couchers report working at 14 stitches per inch or higher, which in a zigzag means short stitches with high density. The result is a firm hold that survives washing and handling. A long stitch looks decorative on appliqué edges, but it lets the yarn lift between tacks.
Use a straight stitch only with a piercing-eye foot, or when you are finishing a tail across the yarn by hand-guiding. A blind hem stitch is a genuine option at edges where you want the tack hidden on the underside of the fabric, and it needs no foot change at all if your machine offers it. On Bernina machines, users pair cording feet numbered 12C and 22 through 25 with the couching thread path; Brother and Baby Lock machines use a foot commonly labelled Y, and Husqvarna Viking and Janome machines have their own cording feet.
Preparing the Machine and Fabric
Put the fabric right side up on a flat surface, not stretched in a hoop. Hoops are for embroidery units, and tensioning fabric for couching gives you a lumpy line and stretched areas between the tacks.
Raise the presser foot height by one notch if your machine has that lever, so the foot presses down over the thickness of the yarn rather than riding over it. On machines with an embroidery unit, make sure the unit is switched off or the needle can strike the foot, which is a documented warning in manufacturer instructions.
Set the upper thread tension to the middle of its range rather than cranking it tight. Dense yarn already adds resistance, and forcing the tension to compensate is the most common reason bobbin thread shows on top and stitches look uneven underneath.
Sew a test line about 4 inches long on a scrap of the same fabric. Check three things: the yarn stayed centred in the foot, the stitches crossed over it rather than beside it, and nothing bunched under the foot. If the test fails, change one setting and sew another test line before touching the real fabric.
Positioning and Sewing the Yarn
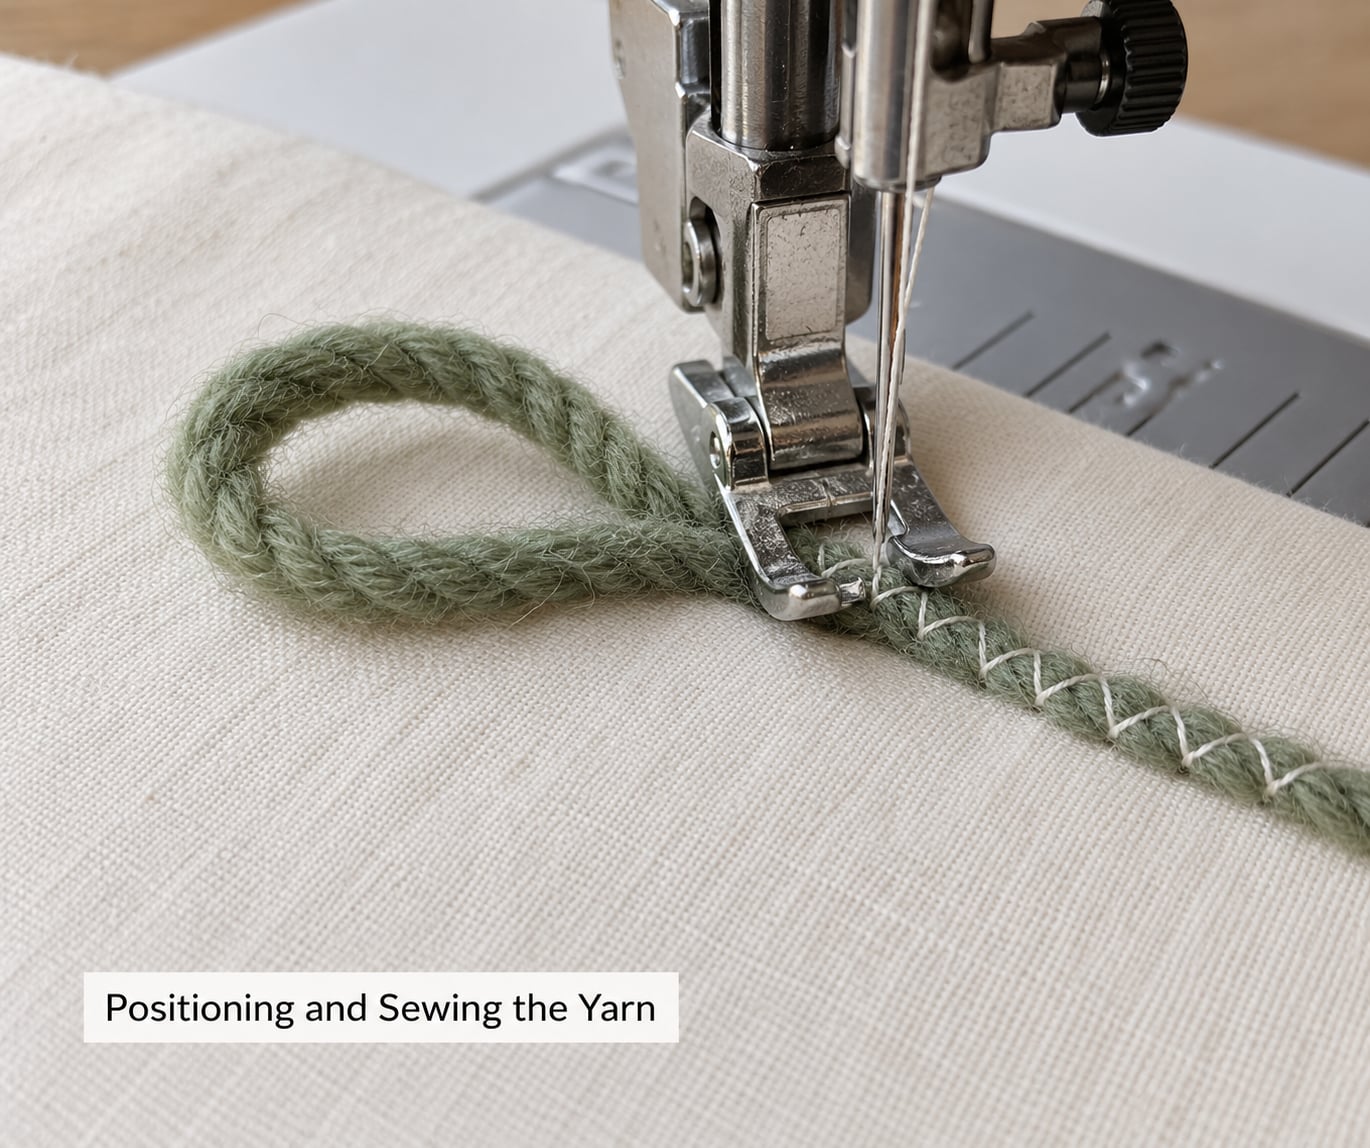
Lay the yarn on top of the fabric, about 1/8 inch in from a quilt edge if you are following a seam line, and let the zigzag pull it inward. The stitch does the positioning, not your hands. Pull the yarn taut and the foot will drag it out of line or the yarn will slide under the foot instead of being caught.
Keep a loop of slack between the foot and the spool or the guide. If that loop disappears, the yarn is under tension and you are asking the machine to sew through resistance. Slack is not sloppiness here; it is the mechanism that lets the yarn sit flat under the foot.
Run the machine at a slower speed than feels natural. Most couchers describe sewing at half speed or below and stopping every few inches to reposition their guiding hand. Your fingers rest a couple of inches ahead of the foot, floating over the fabric, and you steer the line by nudging rather than dragging.
For the no-foot version, hold the yarn directly in front of the needle and zigzagging over it by hand. On a machine with free motion you can drop the feed dogs, lower the feed, and squiggle short zigzag strokes over the yarn to fill an area. Experienced users rely on this for raw-edge appliqué work and get a clean result with no attachment at all.
Turning Corners and Changing Yarn
Slow to walking pace before a curve and rotate the fabric, not the yarn. Turning the fabric keeps the yarn in a relaxed arc ahead of the foot and gives you control without stretching the strand. Sharp corners need a decision before you sew: either stitch straight into the corner, round it slightly, or stop and couch the line in two passes that meet at the corner.
Plan joins before you reach them. Leave a tail of about 4 inches at the end of each length, start the new length a few inches before the old one ends, lay the new yarn on top of the old tail, and keep sewing. The zigzag crosses both strands, so the join needs no knot and no extra stitching.
Do not knot yarn ends for couching. Knots create bumps the needle cannot penetrate and tend to break later. Overlap is the reliable method.
One caution applies throughout: never pull the yarn upward toward the needle. If it catches, stop the machine with the foot down before you free it. Yanking it up can break the needle, and a broken needle fragment can fly.
Finishing the Couched Surface
When you reach the end of a line, keep the yarn tail loose behind the foot so the final stitches cross over it. Sew two or three extra passes, then stop, raise the foot, and pull the tail out before trimming.
Weave tails into the wrong side with an awl or tapestry needle, or knot them once against a thread that is already securing them. Trim flush. If the line is decorative and you want a solid stop, add a small tack pattern over the yarn by switching to a straight stitch and sewing a short bar across it, or drop a bead or knot on top deliberately as part of the design.
Remove temporary materials one at a time. Pull basting thread before the final trimming, and check that no yarn tail is hiding under a fold. A couched piece with cording along a border gains real weight, which is useful for making a border lie flat but worth knowing before you plan to wash the quilt or send it through a longarm.
Common Mistakes
Almost every couching problem traces back to tension, foot choice, or a needle that has gone dull. Work through the list in order and change one thing at a time.
- Yarn pulls out from under the foot or slides sideways. Let out more slack ahead of the foot and re-centre the yarn in the channel before lowering the foot. If the groove is too wide for your yarn, double the strand or use a finer yarn rather than guessing at the stitch.
- Stitches miss the yarn entirely. With a piercing-eye foot the yarn has to fill the hole snugly. Looseness there means the straight stitches pass beside it. Switch to a zigzag over a plain foot, which is far more forgiving.
- Yarn breaks or frays fast. Change to a fresh needle first, then drop to a lighter yarn. Then check that the spool is not spinning fast enough to unwind and tangle, and move the telescopic guide closer to the needle so there is less yarn in play.
- Fabric puckers along the line. Loosen the upper thread tension toward the middle of the range and add a layer of stabilizer under light or knit fabrics. Shorten the stitch length so there is less thread pulling sideways.
- Uneven spacing between tacks. Your guiding hand is probably doing the steering at an uneven pace. Rest your hand further ahead and let the foot run straight, then correct the line by eye instead of fighting it under tension.
- Material bunches under the presser foot. Switch from a plain zigzag foot to a rolled hem foot or a couching foot, and check that the feed dogs are not set too low for the thickness you are feeding.
- Bobbin thread shows on top. Tighten the bobbin case by a fraction and loosen the upper tension slightly. Thick yarn changes the drag on the thread path, and the two sides need to be balanced rather than strained.
- Yarn snags under the foot or wraps around the needle. Lower the presser foot height one notch, and keep the yarn sitting on top of the fabric rather than tucking it under the foot edge. Snagging that continues usually means a burr on the needle plate or a blunt needle.
Practice on scraps of the same fabric with the same yarn for ten minutes before a project. Couching rewards patience early and punishes rushing, because every correction you make on a scrap costs nothing.
Frequently Asked Questions
Can I couch yarn with any sewing machine?
Yes, if it can make a zigzag and has a presser foot. Vintage and basic domestic machines manage couching fine, and a straight-stitch-only machine still works using the basting stitch with slow, careful passes. You do not need a hoop, a digitizing program, or an embroidery unit. Check that your machine’s zigzag foot allows enough width to span the yarn on both sides.
What type of yarn is easiest to couch with a sewing machine?
Medium or worsted weight yarn about 2 to 3 mm thick works best, roughly 9 to 11 wraps per inch. Rattail cord and embroidery floss are both good couching materials too. Avoid novelty, boucle, chenille, and multi-ply yarns on your first pass. They shed into the bobbin and wrap around the needle, and manufacturer instructions warn they can damage the machine.
What presser foot should I use for couching yarn?
A couching foot with a groove or channel underneath works with a zigzag stitch. A foot with a piercing eye below the needle is designed for a straight stitch and needs the yarn to fill the hole snugly or the stitches will miss it. A plain zigzag foot works for a first project, and a rolled hem foot handles thicker material without bunching. A couching foot is optional, not required.
How do I keep the yarn from snapping or tangling while sewing?
Keep a loop of slack between the foot and the spool at all times, and never pull the yarn upward toward the needle. Move the telescopic thread guide closer to the machine so less yarn is free to swing. If it still tangles, slow the machine down and use a fresh needle. A dull needle deflects off the yarn and frays it. Stop the machine before freeing anything that has caught.
How do I keep the couch stitch even across the fabric?
Rest your guiding hand a couple of inches ahead of the presser foot and steer by nudging rather than dragging. Run the machine at half speed or slower, and set the stitch length around 1.5 to 2 mm for a dense, even tack. Many couchers work at 14 stitches per inch or higher. If the line wanders, correct it by eye with the machine stopped instead of fighting it under tension.
What stitch should I use to secure yarn at the end?
Sew two or three extra passes with the yarn tail lying loose behind the foot so the final stitches cross over it, then weave the tail into the wrong side with an awl or tapestry needle and trim flush. Avoid knots, which create bumps the needle cannot penetrate. For a visible finish, switch to a straight stitch and sew a short bar across the yarn as a decorative tack.
What to Do First
Start with a narrow zigzag at 1.5 to 2.0, a fresh 90/14 needle, and a worsted weight yarn laid on a scrap of the fabric you plan to use. Keep the yarn slack, sew four inches, and check whether the stitches crossed the yarn. Fix anything that went wrong on the scrap, then repeat the same settings on the real panel without changing them.