Learning how to make shaped panels for paintings opens up sizes and outlines that no store sells, an oval, an arch, a circle, a hexagonal abstract surface, all built in your own studio. A shaped panel is a rigid or semi-rigid painting support cut or built in a non-rectangular outline, then sealed, primed and painted like any other surface. The basic method takes an afternoon for a small piece, and the first one is worth making before you commit to a commission size.
I build most of my own panels, and the process has not changed much in years: draw the shape, transfer it, cut the substrate, glue or stretch the covering, seal the edge, prime. What changes with every project is the substrate, because a 12 inch oval and a 48 inch arch put completely different demands on a panel’s stiffness. Updated for 2026, this guide walks through the whole method with the thicknesses, tool alternatives and drying times that usually get left out.
One note on terminology first, because the search results mix these up constantly. A canvas panel is canvas glued down onto a solid board. A stretched canvas is canvas pulled over a hollow frame with a lip. A shaped panel describes the outline, not the construction, so it can be either. When this article says glue-and-weight, it means the first; when it says stretch, it means the second.
Table of Contents
- What You Need
- Step-by-Step: How to Make Shaped Panels for Paintings
- How to Choose the Right Panel Shape
- How to Make and Transfer a Template
- How to Cut the Support Shape
- How to Reinforce and Cover the Panel
- How to Finish and Display the Shaped Panel
- Common Mistakes
- Frequently Asked Questions
- Do I need a stretcher frame to make shaped panels for paintings?
- Can I paint directly on a wood panel without priming?
- What are the best staples for stretching canvas?
- Which is better, back stapled or splined canvas?
- What is the best wood for making my own painting panels?
- How do I frame odd-shaped artwork?
- Conclusion
What You Need
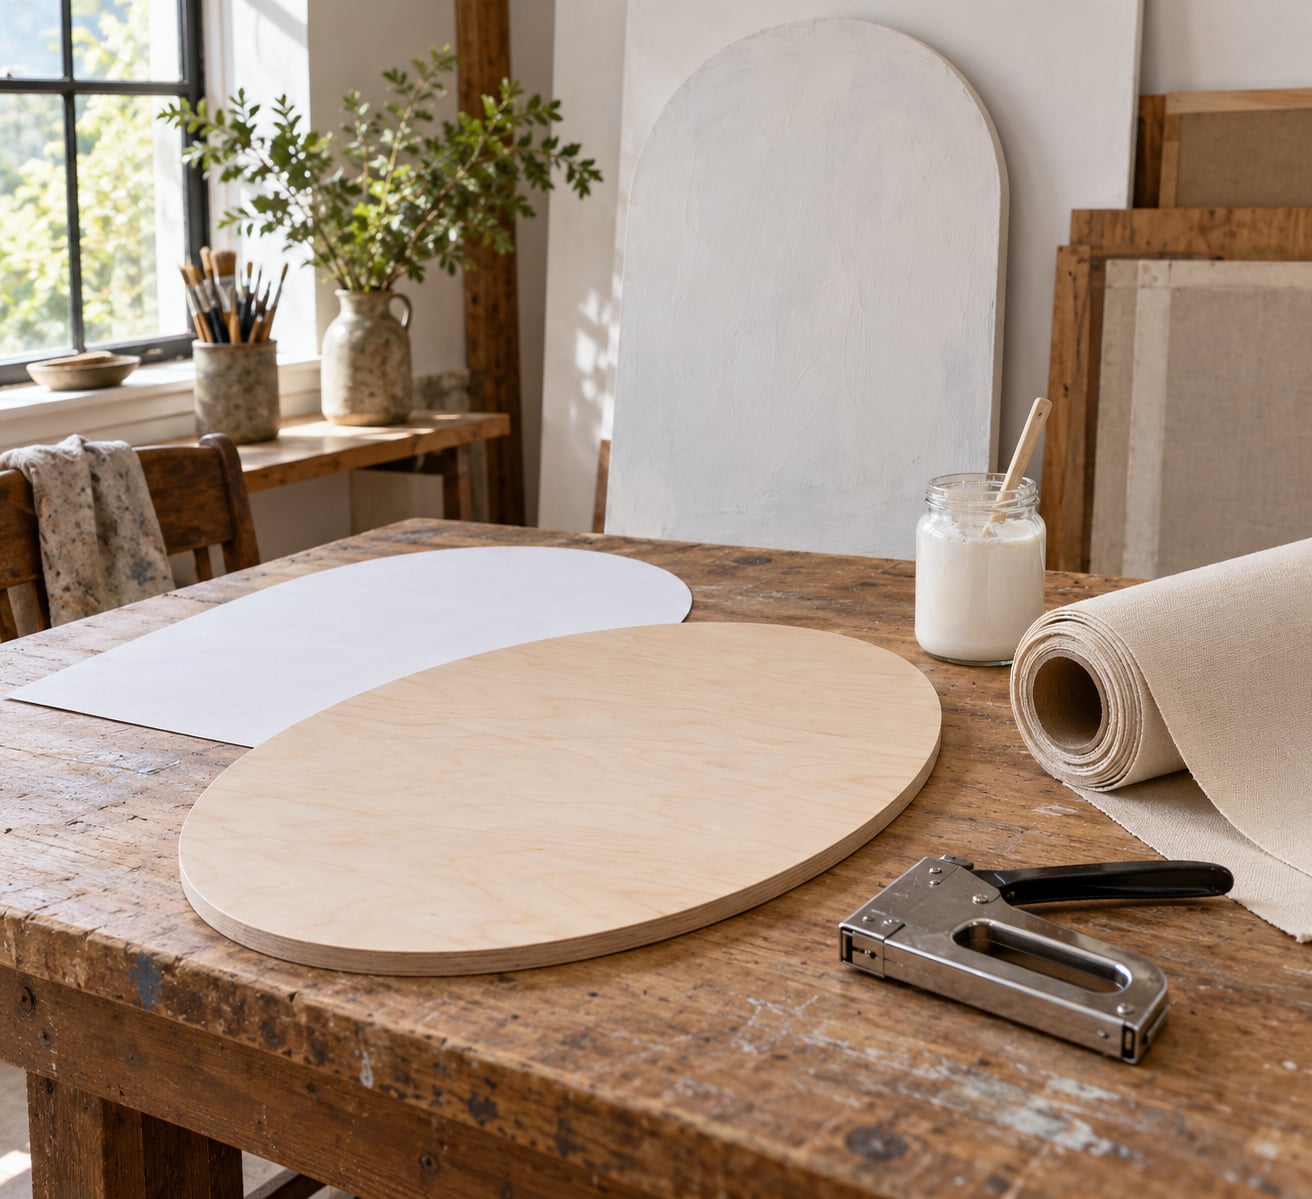
The substrate does most of the work, and the material you pick depends on size. Small studies up to about 12 inches can be built on 1/8 inch poplar or MDF. Anything larger, especially an arch or a long geometric shape, wants 1/4 inch birch plywood because a thin board in a wide outline will flex along its length.
MDF is smooth and cheap and takes gesso beautifully, but cutting it produces a fine dust that gets everywhere and settles into wet paint. If you work in a home studio, birch plywood is kinder to your lungs even though the face needs more sanding. Masonite is a reasonable middle ground, and poplar is light enough for plein air panels that you carry under your arm.
For the surface, unprimed duck canvas at 8 to 10 oz is the usual choice. It is stable, it takes a tight glue-down, and it grips gesso well. Linen is stiffer and more expensive and suits larger work. Beginners should know one thing: pre-primed canvas shrinks noticeably as it dries against a board, which is what causes the bubbling so many artists complain about. Unprimed canvas glued to a sealed board barely moves.
Adhesive is simple. PVA white glue, thinned with a little water, does the job and stays flexible enough to survive humidity changes. Hot glue goes brittle and pops off, and spray adhesive alone lacks the hold for a large panel. Some artists add a few dots of glue under the centre of the covering, but never rely on that for anything wider than a foot.
The tool list is short. You want a jigsaw with a fine wood blade for the cut, a coping saw as the backup for tight inside curves, a ruler and a compass or flexible curve for the template, a staple gun, a staple remover, canvas pliers, a spreader or plastic scraper for the glue, a shellac-based sealer, and a respirator if you cut MDF. A dust mask is not optional if the material is MDF, and clamping cauls or corner clamps save the corners of the covering.
On Reddit, artists in r/arttools and r/BeginnerWoodWorking who build their own panels recommend corner clamps, canvas pliers and an electric or pneumatic stapler, and most of them staple straight onto the stretcher bars. You can do all of this with a hand stapler and a few hours, the clamps just make the corners cleaner.
Step-by-Step: How to Make Shaped Panels for Paintings
How to Choose the Right Panel Shape
Start from the composition, not the outline. An oval suits a head and shoulders portrait because it crops the shoulders the way a crop mask does on a lens. A circle works for a single subject centred in a field, a moon study, a colour study. An arch reads as architecture, so it pairs well with botanical studies, doorways and windows, and it has historically been the shape of choice for devotional panels.
Geometric shapes, hexagons, trapezoids, triptychs, suit flat abstract work because the shape carries part of the composition. Organic contours suit landscapes and figure studies where a hard edge would fight the subject.
Two practical filters narrow the choice. First, viewing distance: a shape with no straight reference edge is hard to judge at a glance, so if the work will be seen across a room, favour a simpler outline. Second, transport. An oval panel fits a car seat and a portfolio; a 30 inch arch with a 1 inch depth needs two hands and a rigid carrier. When you build irregular shapes, keep every point on the outline at least 3 inches from the sharpest corners, because those corners are where a rigid board snaps first.
How to Make and Transfer a Template
Draw the shape at full size on paper or thin card first, then check it against the wall or the actual painting you are transferring. This is the step that decides whether the finished panel is a success, and it is the step people rush.
Simplify the curve. If your outline came from a photograph or a plant, break it into a series of short straights or a few long radii, because a hand-cut edge follows a drawn line more faithfully than a router bit follows a complex one. Add a registration mark, a small cross or a triangle, at a fixed point on the outline and a second one on the board. Those two marks let you line the template up again after you sand an edge.
For the transfer, tape the template to the board and mark the outline with a fine pencil, following the line with a nail or a ballpoint held upright so the point stays on the line rather than dragging beside it. Then go around a second time with the marker after the pencil marks, which is the line you will actually cut. If you are working on a very smooth surface, a little masking tape over the line prevents the pencil from skipping.
The check: step back and look at the outline from arm’s length. Any wobble you can see now will still be there after gesso and paint.
How to Cut the Support Shape
Score the marker line with a utility knife first, then cut with a jigsaw fitted with a fine-tooth wood blade and the shoe set so the board stays flat on the table. Cut just outside the line, about 1/16 inch, and sand or trim back to it. A flush trim with a sanding block and a straight edge across the cut takes the panel to the true line without any saw kerf showing.
For tight inside curves, switch to a coping saw. Relief carving is the usual way, but a jigsaw also works if you drill a starter hole on the waste side of the line and keep the blade moving slowly. A scroll saw does the job best of all if a shop nearby will cut it for you, which for a one-off arch is often the cheapest route.
After cutting, sand the face to 120 grit and the edge to at least 180, then round every edge very slightly. A sharp arris on a thin board is a tear waiting to happen when the canvas is pulled around it. Check three things before you move on: the outline matches the template, the board lies flat on a flat surface, and every point on the perimeter is the same distance from the centre as its mirror. Hold it up to a window and check for daylight through the thin spots.
How to Reinforce and Cover the Panel
A rigid board is already its own support, so reinforcement is about the covering rather than the panel. If you are working over 16 inches on the long side, add one or two battens across the back, glued and screwed, and take the corners of the outline off with a shallow curve so nothing touches the wall when it hangs. Canvas pliers are for the stretch method; for glue-and-weight they are unnecessary.
Seal the raw wood first. Two thin coats of shellac-based sealer, sanded between coats, close the pores and stop the board from drinking the adhesive unevenly. MDF and particleboard especially need this, since they drink like a sponge otherwise.
Cut the canvas roughly 4 inches larger than the panel on every side and lay it out for a full day first so the weave relaxes. Iron the fold creases out if it has been rolled. Thin the PVA with water until it runs off the spreader, and lay it on the board in one direction rather than in patches, which is what leaves air behind.
Set the canvas on top, press from the centre outwards with the flat of your hand, then smooth with the spreader in long strokes toward the edge. Work around the curve, not across it, and stop about an inch short so the glue is not squeezed out at the perimeter.
Flip the panel, pull the canvas firmly around the edge with even pressure, and staple through the fold at roughly 1 inch intervals, adding one staple at each quarter point first for balance. Corners on a curve need the fold clipped, not mitred, so trim a small triangle of excess away with the knife and staple the remaining flat tab.
Now the finishing pass that most people skip. Flip it back, sand the surface with 120 grit to knock down the weave ridges, then 180 to smooth them, then wipe with a damp cloth. That three-stage sanding is what gives you a matte surface instead of the stiffer, slightly ridged feel of a glue-down with no fairing. Weight the panel with a sheet of plywood and a bag of sand or a stack of books, and leave it 24 hours before sealing.
Signs it worked: no bubbles when you press the surface, no loose edge when you tug gently at a staple, no wrinkle lines running across the face. Signs it did not: bubbles you can hear under the surface, a gap at the fold, or a corner that lifts when you flex the board slightly. Both can be fixed by opening the bubbles with a pin, adding more glue underneath, and re-weighting.
For the stretch method the sequence is different. Build a frame that follows the outline, miter or join the sections, then stretch the canvas from the middle of each side, alternating sides every five to ten staples, and treat corners last. As one artist described it on Reddit, leave one edge of the corner partially unstapled and pull it toward the centre, because stapling both sides all the way to the corner twists the fabric and pulls the staple out. A slightly tapered face on the stretcher, so the canvas curves as it tightens, is the detail that makes the method look professional.
How to Finish and Display the Shaped Panel
Seal the surface with one coat of gesso, sand it, then two more coats, sanding between each. A wood panel usually takes three thin coats to close completely, and the edge needs sealing separately with a brush so no raw wood shows on the sides. A light dusting of marble dust in the final coat gives you more tooth for oils.
If the panel will be varnished, that is the moment to size it with a shellac-based sealer, since oils soak into an unsealed gesso. For acrylics, skip the sizing and go straight to paint, because acrylic wants a slightly absorbent surface.
The edges are the whole point of a shaped panel, so treat them as a designed surface. Leave them bare for a raw, contemporary look, or paint the gessoed edge in the same colour as the painting, or gild it. Paintable edges are the reason most people build a shaped panel rather than buying a stretched one.
Framing odd-shaped artwork is easier than people expect. The simplest approach is a float frame, where the panel sits on a rebate and the inner edge is routed at an angle so you see a sliver of it, which reads well on an oval or a circle. The classic approach is a shadow box, cut from four mitred rails with a clear or open face, which gives a consistent gap all the way round. Anything deeper than 2 inches needs a rabbet, not a stop, or the panel will fall out.
For hanging, a French cleat handles weight above about 10 pounds, and a single D-ring is fine for small panels. Whatever you use, position it so the battens on the back sit above the hanging point, otherwise the panel tips forward and the brace marks the wall. People regularly scratch their walls with protruding cradle bars, and the fix is simply to hang the panel the other way up.
For transport, sandwich the panel between two sheets of corrugated board, tape the sandwich, and cut a handle-sized hole in the outer board for anything over 16 inches. An arch is strongest at the crown and weakest at the springing points on either side, so support those two areas specifically.
Common Mistakes
Measuring from the wrong reference point. Measure the finished outside outline, then add the covering allowance to that number. Starting from the painting area and working outward produces a panel several inches small once the canvas is wrapped and the design is centred.
Choosing an outline that is too complicated. S-curves with a changing radius are the hardest thing to cut and the hardest thing to fillet cleanly. A hexagon with 2 inch sides takes an afternoon; a double curve takes a weekend and a mistake cannot be undone. Simplify before you cut, not after.
Weak corners on the board. A pointed corner on a thin board is a crack. Round it, or cut it off with a shallow curve, or add a glued batten behind it. Nobody sees the round; everybody sees the crack.
Wrinkles and bubbles in the covering. Nearly always air trapped under the canvas or glue applied in patches. Squeezed out with a spreader, the bubble should be gone within a minute. Bubbles that persist mean the glue was not wet enough, so pin them, inject a little more PVA, and weight the panel again.
Uneven adhesive. Patches of glue dry at different rates and telegraph through the gesso as soft spots. Spread one continuous layer in a single direction across the whole face instead.
A visible frame edge under the canvas. On the stretch method, the stretcher lip shows as a hard shadow line. Route or bevel that inner edge so the canvas folds over it, or staple over a wider lip so the fold covers it.
Torn corners and pulled staples. Over-tensioning distorts the fabric and lifts staples. Work from the middle of each side outward, alternate sides, and treat corners last with the clip-and-fold method above.
Hardware with no clearance. Protruding battens and hangers mark the wall every time the piece is moved. Hang high enough that the battens clear, or cut the cradle on a slope.
There is one more honest caveat. If you enjoy a soft, absorbent surface for blending large areas, canvas under the brush may suit your hand better than a firm panel, where paint can feel smeary. Artists split on this, and it is a preference rather than a quality difference. And if you need a lot of panels in standard sizes fast, a gallery-wrap from a supplier will beat your afternoon every time. Build your own when the shape, the size or the finish matters.
Frequently Asked Questions
Do I need a stretcher frame to make shaped panels for paintings?
No, and for most shapes you would rather not use one. The glue-and-weight method wraps canvas around a solid cut board and needs no frame at all, which makes it the easiest route to an oval, arch or geometric outline. A shaped stretcher frame only makes sense if you want the lighter, more traditional tension of stretched canvas on shaped work.
Can I paint directly on a wood panel without priming?
You can, and many contemporary painters do, because a sealed wood panel already gives a smooth surface. The trade-off is absorption: oils sink in and can dull over time, and the wood moves with humidity. Two coats of shellac-based sealer followed by two or three thin coats of gesso give you a stable, matte, archival surface instead.
What are the best staples for stretching canvas?
Use 3/4 inch staples for 1 inch stretcher bars and 1 inch staples for wider bars, and pick the thin-leg or wire type that bites into softwood without splitting poplar. Always staple into the end grain of the bar rather than the face, and space them about 1 inch apart. A hand stapler works; an electric stapler just saves your thumb.
Which is better, back stapled or splined canvas?
Back stapled is faster and cheaper, and on a shaped panel you can often staple straight into the edge of the board. Splined canvas wraps a strip of wood onto the back, which gives a cleaner gallery back and more strength on long spans. For small and medium shaped panels, back stapling is enough; splines earn their place on work over 24 inches.
What is the best wood for making my own painting panels?
Birch plywood at 1/4 inch is the most forgiving choice for anything large, because the face is smooth and it resists warping. Poplar at 1/8 inch is lighter and easier to cut, so it suits small studies and plein air panels. MDF gives the smoothest ground but produces heavy dust, and masonite sits between the two in cost and weight.
How do I frame odd-shaped artwork?
Measure the widest and tallest points of the outline, including the arch crown, and build the frame to those two numbers. A float frame with a routed inner edge shows a sliver of the panel and suits a clean, modern look. A shadow box with a rabbet 2 inches deep gives a consistent gap all the way round and hides the raw edges of the covering.
Conclusion
Build one small panel first and the whole method stops being mysterious. Draw a simple template at full size, confirm the finished outside measurement before you cut anything, and test the support method on a piece small enough to ruin. Once that first oval or arch is sealed, primed and painted, the method barely changes for the sizes that follow.