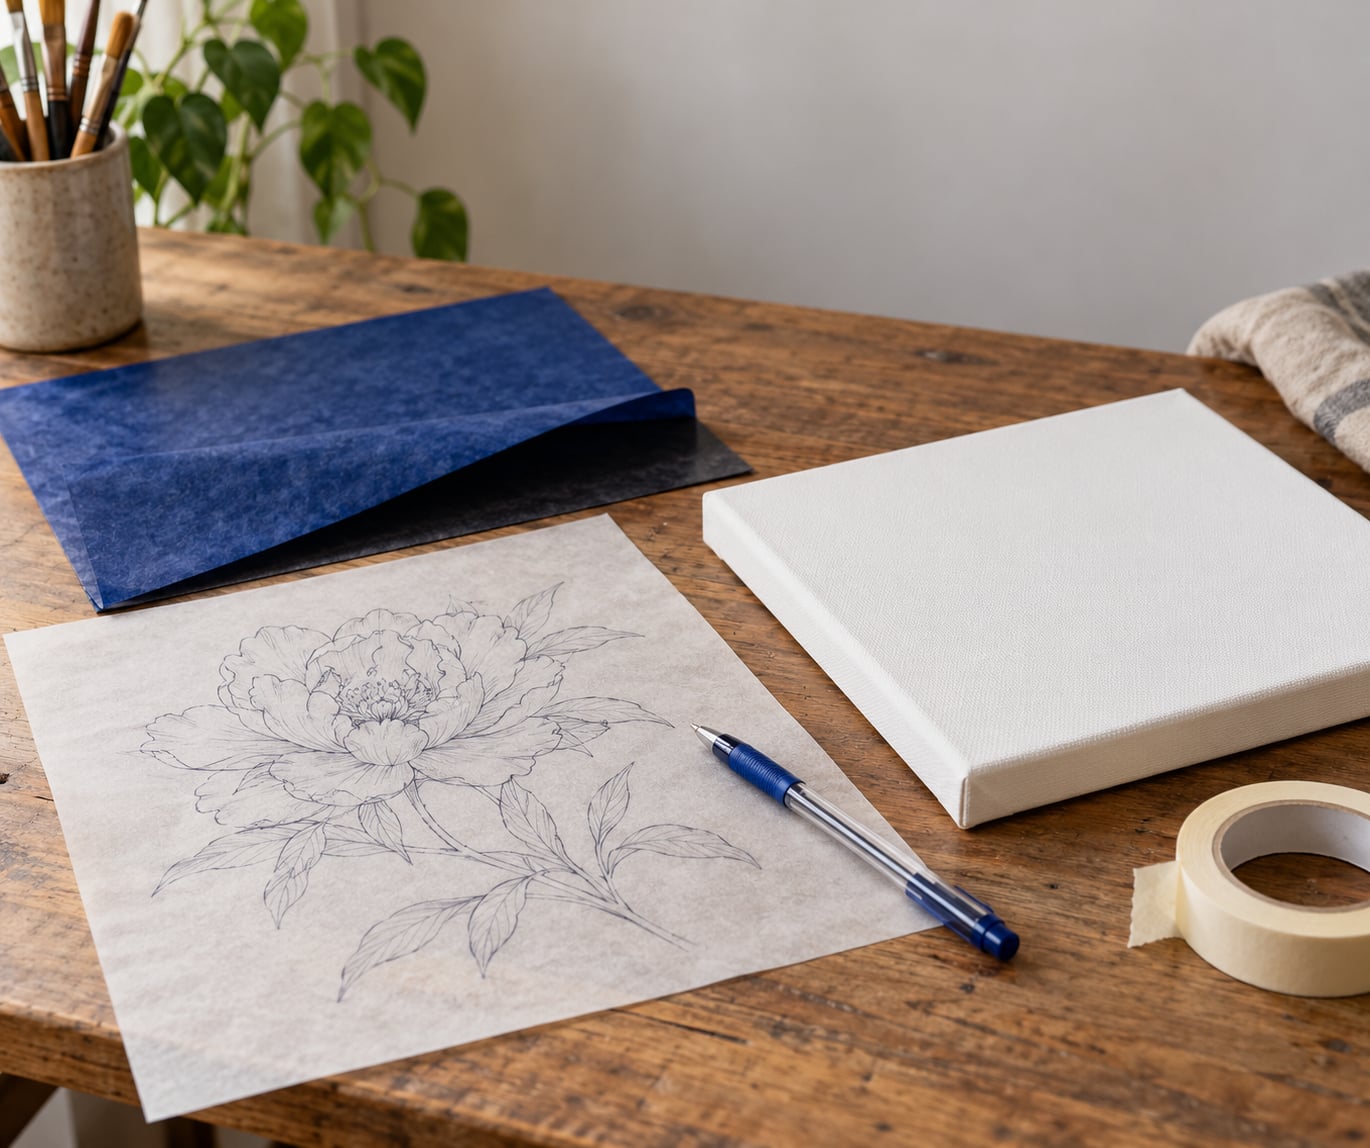
To use carbon paper to transfer a design, build a three-layer stack: your finished drawing on top, a carbon or graphite transfer sheet in the middle with the coated side facing down, and the surface you want the drawing on at the bottom. Trace over the lines of your design with light, even pressure, and the coating rubs off onto the surface below, reproducing your drawing at the exact size and position of the original.
That pressure-transfer trick is why it works so well for painting, lettering, pyrography, and fabric work. The hardest part is not the tracing; it is holding the stack still and keeping your pressure light enough that the line transfers without denting the surface. Get those two habits right and a transfer takes about ten minutes.
Before you buy anything, clear up one piece of confusion that trips up a lot of people. Artist carbon transfer paper is not the same as the heat transfer paper you iron onto a t-shirt, and it is not the layered stencil paper used for temporary tattoos. Both of those need a printer or a thermal machine. Everything below uses only a pen, a sheet, and your own artwork.
Quick comparison of the four sheets people call transfer paper:
- Carbon transfer paper — coated with a wax or pigment layer, gives a bold line, used for tracing onto canvas, wood, and fabric.
- Graphite transfer paper — coated with graphite, gives a softer grey line that lifts with an eraser and is the safest choice under transparent paint or watercolor washes.
- Wax-free artist transfer paper — pigment-only coating, leaves almost no residue, the easiest to erase and clean up.
- Heat transfer paper and tattoo stencil paper — need a heat press, a printer, or both. Not what this guide covers.
Table of Contents
- What You Need
- Step-by-Step: How to Use Carbon Paper to Transfer a Design
- 1. Choose the right carbon paper for your surface
- 2. Prepare and secure the transfer surface
- 3. Position the design and carbon paper
- 4. Trace the design with consistent pressure
- 5. Lift the paper and check the transfer
- Common Mistakes and Fixes
- Frequently Asked Questions
- How does carbon paper actually work?
- Should I use carbon paper or graphite transfer paper?
- What pencil or stylus is best for tracing over carbon paper?
- How do I transfer a design without a printer?
- Why do parts of my transferred line drop out?
- Can I paint over a transferred line, and can I erase it?
- Conclusion
What You Need
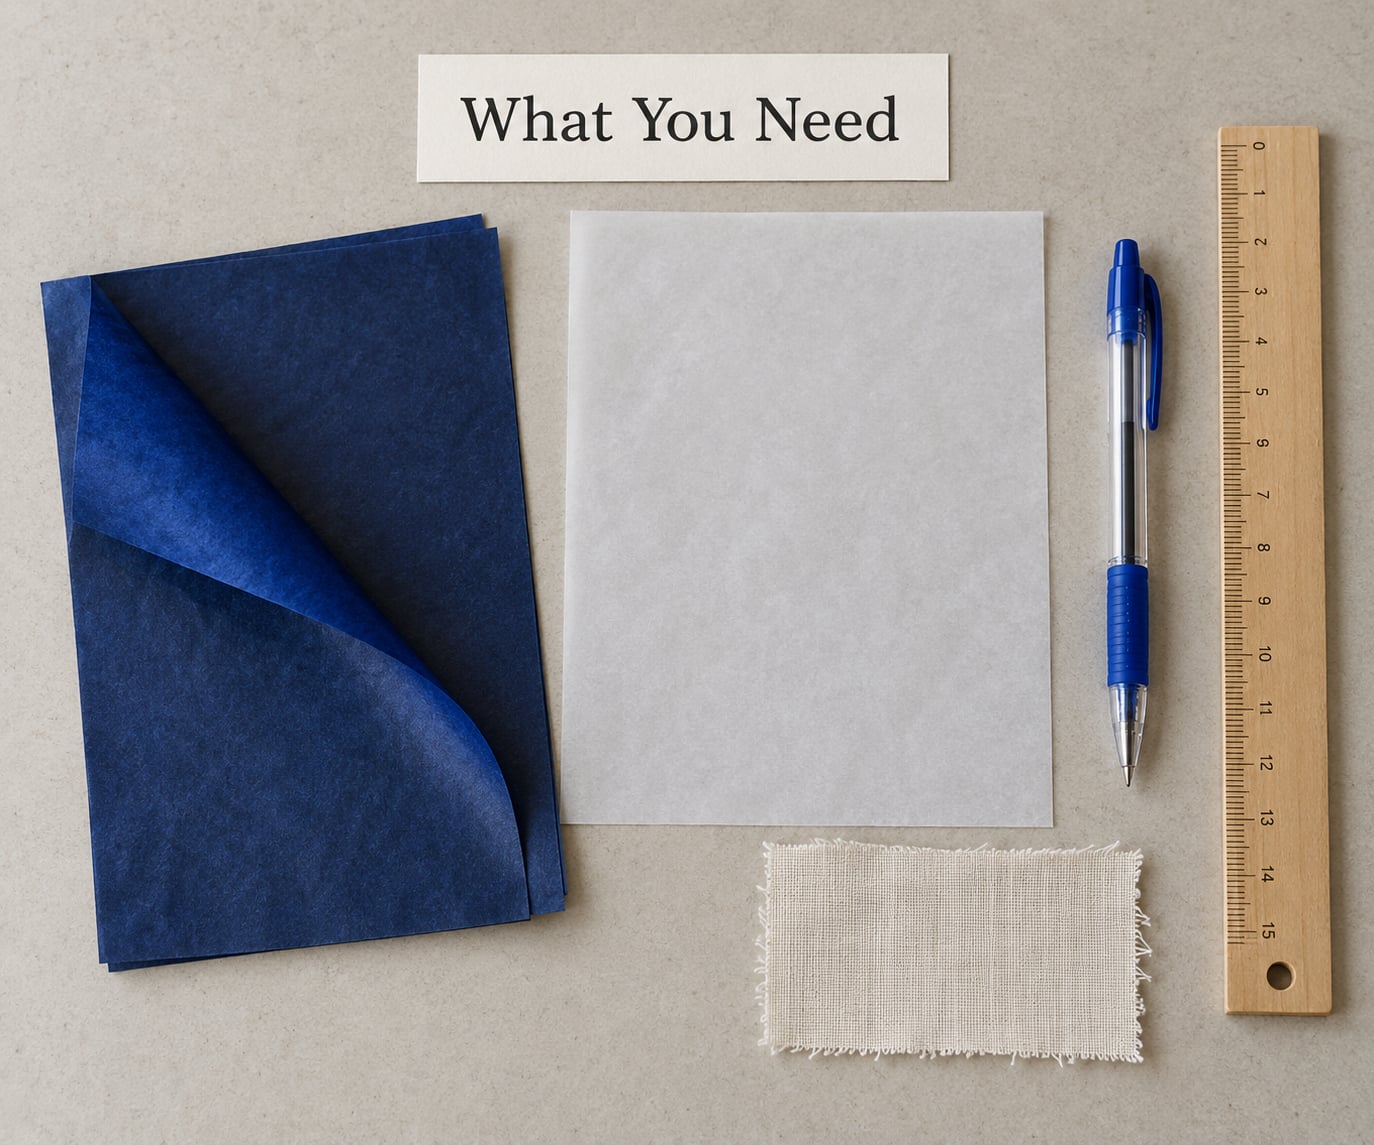
The supply list is short, but each choice changes the result more than most people expect. Here is what to gather before you start tracing.
- Transfer sheet — the single biggest variable. Blue carbon paper is bold and forgiving but leaves heavy lines; graphite sheets are lighter and erasable; white transfer paper is the only one that shows up on dark fabric and dark paper.
- Your design — a hand-drawn original, a printout, or a sheet of tracing paper with your drawing on it. Print at 100 percent scale, or the transfer will not match.
- A tracing tool — a ballpoint pen, a mechanical pencil, or a wooden stylus. Ballpoints deposit the most pigment; a soft pencil deposits the least.
- Backing board — a scrap of card, a clipboard, or a thin panel. It stops the stack flexing when you press, which is what causes slipping.
- Low-tack tape or binder clips — painter’s tape or artist’s tape works. Masking tape on a delicate ground can lift the surface.
- A soft cloth or tissue — for dusting off loose pigment before you start painting.
- A test scrap of the same material — the surface you plan to use. Always calibrate pressure here first.
Add a kneaded eraser to your kit. It is the fastest way to lift a graphite line that came down too dark, and it is the reason graphite paper is worth the small extra effort.
Step-by-Step: How to Use Carbon Paper to Transfer a Design
1. Choose the right carbon paper for your surface
Blue carbon paper is the standard choice for canvas, wood panels, and light fabric. It gives a strong, dark line that survives thick paint, though the line can resist transparent washes and look muddy under a thin glaze.
Graphite transfer paper gives a paler line in blue, red, green, or yellow, plus a pure graphite version. Reach for it when you are painting in watercolor or thin acrylic and want the underdrawing to disappear under the paint. Wax-free sheets behave similarly but leave the least residue of the three.
White transfer paper is the answer for black or navy fabric, dark toned paper, and dark-stained wood. The line is invisible on anything you cannot see, so test your surface first. If you want to know how it works before committing a whole design, a glue stick on tracing paper makes a quick graphite sheet.
One more option sits alongside these: Saral, a pre-coated wax-and-graphite paper sold in art supply shops. It marks a darker line than graphite paper but cleans off more easily than traditional carbon. Several artists roll a pastry wheel over it to lay down an even, subtle texture instead of tracing line by line.
2. Prepare and secure the transfer surface
Clean the surface and make it flat. Wipe away dust, oils, and loose graphite, because any grit under the stack will drag the design out of register as you press. On stretched canvas, pull the fabric taut and check it from an angle; a slack weave shifts under pressure even with tape on every edge.
On paper, tape your sheet to a board rather than to your table. On wood or MDF, check that the panel is flat by running your hand across it, and mark any low spot with pencil so you know to press lighter there.
3. Position the design and carbon paper
Lay the transfer sheet on the surface first, coated side down, then place your design on top. The image transfers face down onto your surface, so print your artwork mirrored if you need it to read correctly once it lands.
Tape the top edge first with two short pieces, hinge-style, then secure the sides and bottom. Keep the tape off your line work. Those few millimetres of tape across the drawing are what cause broken contours later. If you are working on a large piece, clip the stack to a board rather than taping it to the surface itself.
For hand-drawn designs with no printer at all, tape your drawing to a window or hold it over a light box and redraw it on tracing paper. The light box method takes ten minutes and gets you a clean copy you can tape down.
4. Trace the design with consistent pressure
Use light, even pressure and stay on the structure of the drawing, not the finishing details. Outline, main folds, and major intersections first; then go back for interior detail. Those interior details can wait until you check the first pass.
A ballpoint pen is the highest-yield tool: it writes as it marks, so you can see exactly which lines you have already traced. For fabric, place a clear plastic sheet over the design so the carbon paper does not tear or wear through on a weave. On stone, feather the pressure with the side of the pencil rather than stabbing it.
Trace curves in one continuous movement. Stopping and restarting at a curve is what breaks a contour into two disconnected marks.
5. Lift the paper and check the transfer
Peel the layers back slowly at a low angle rather than straight up, which drags the coating and smears the line. Start at a taped corner and work across in one movement.
Now check for gaps. Some sections of a transfer routinely drop out, and re-tracing a missed line is completely normal. Put the sheet back down over that area, match it to the original line, and trace it again. Two light passes beat one heavy pass every time.
Finish by dusting the surface with a soft cloth and setting the traced layer aside for a few minutes before painting, so the pigment stops moving under your brush.
Common Mistakes and Fixes
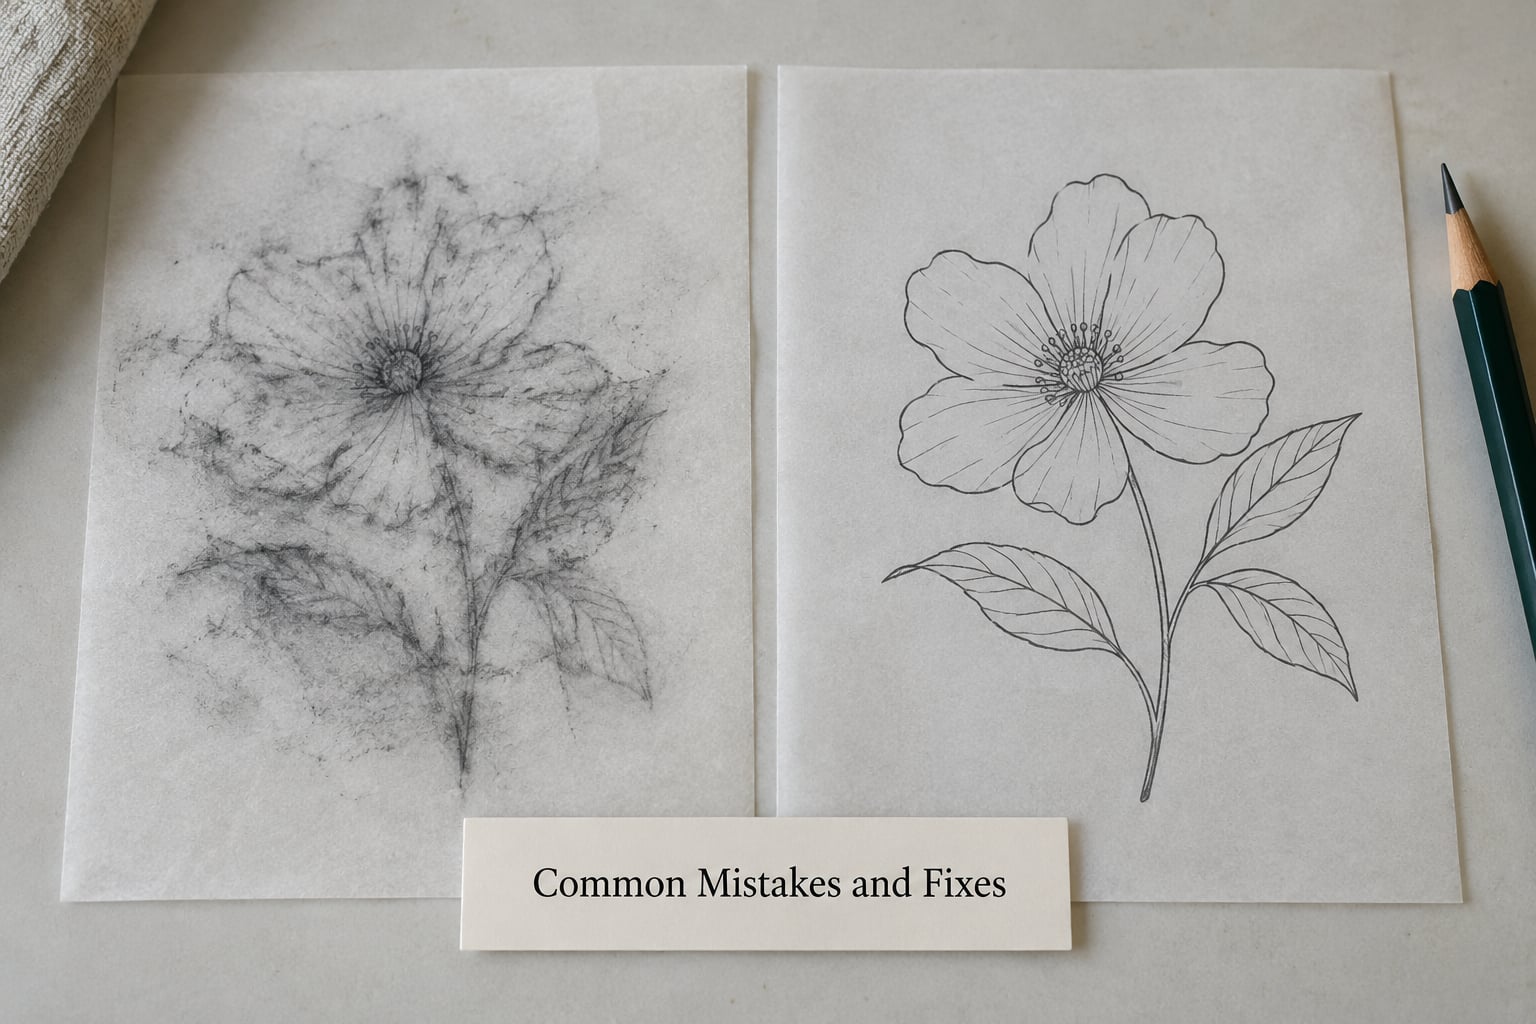
Almost every bad transfer comes from the same handful of causes. Work down this list and you will usually solve it without starting over.
Faint or patchy lines. The coating needs heat and pressure to release. Trace each line twice at moderate pressure instead of once at heavy pressure, and test a corner of your surface first to find the right amount. If you used graphite paper, press a little harder; if you used carbon, press a little lighter.
The design shifts mid-trace. This is the most common complaint in embroidery and lettering circles. The stack was only taped at the edges and the backing flexed. Tape the top edge first, clip the whole stack to a rigid board, and rest your forearm on the board so your hand is not the thing holding it together.
Smudging. You pressed hard and the coating spread sideways, or you lifted the paper too fast. Peel at a shallow angle, work light, and give the traced surface a minute to settle before touching it. Wax-free paper smudges far less if it is a recurring problem for you.
Broken contours and gaps in corners. Almost always tape over the line work. Move the tape outward and retrace the section. Tight corners also need a second pass because the sheet cannot flex into a sharp inside point.
Visible indents or embossing. You are pressing into the paper rather than onto it. Lighten up and support the sheet with a board. Watercolor paper and thin drawing paper emboss easily, so they always want a gentler touch than canvas or MDF.
The line shows through thin paint. Expected when you use carbon paper under transparent media. Switch to graphite or wax-free paper, or trace only the structural lines and skip interior detail.
Ink marks appear next to your transferred line. A ballpoint pen bleeds through thin tracing paper. Cover the design with clear plastic, switch to a thicker paper, or trace with a wooden stylus and a separate graphite coating underneath.
Frequently Asked Questions
How does carbon paper actually work?
Carbon paper works by pressure. A pigment or graphite coating sits on one side of the sheet, the sheet lies between your drawing and your surface, and tracing over the drawing pushes that coating onto the surface below. The transferred image matches the original exactly in size and position because nothing is redrawn. Lighter pressure gives a softer line and heavy pressure risks denting soft grounds.
Should I use carbon paper or graphite transfer paper?
Use carbon paper when you want a bold, hard-to-miss line on canvas, wood, or light fabric, and when you are painting opaquely. Use graphite transfer paper when you work in watercolor or thin acrylic, when you want the underdrawing to lift with a kneaded eraser, or when the line must not resist transparent washes. Wax-free paper sits between the two and leaves the least residue.
What pencil or stylus is best for tracing over carbon paper?
A ballpoint pen gives the strongest transfer and marks the paper as it works, so you can see what you have done. A wooden stylus is a good middle ground and will not tear a soft sheet. A soft pencil deposits the least pigment, which is useful when you want a faint guide line. On textured fabric, put a sheet of clear plastic over the design so the transfer paper does not wear through.
How do I transfer a design without a printer?
Redraw the design onto tracing paper first. Tape your original to a window on a bright day, or set it on a light box, and trace it onto the tracing paper by eye. You can also divide the design into a simple grid, redraw one square at a time, and use the same grid on the receiving surface to keep the proportions right. Once you have the copy, transfer it with carbon paper as normal.
Why do parts of my transferred line drop out?
Sections drop out when pressure was light, uneven, or concentrated in one spot. Trace every line twice at moderate pressure instead of pressing harder on the first pass. Keep the stack flat on a rigid board, because flexing is a common cause of gaps. Sharp inside corners also need a second pass, since the sheet cannot bend into them. Missing sections are normal enough that re-tracing them is part of the process.
Can I paint over a transferred line, and can I erase it?
Yes. A transferred line is a guide, not a permanent mark. Graphite lines lift with a kneaded eraser before you paint, which is why so many painters choose graphite paper. Carbon lines are harder to remove, though a clean cloth and a little warm water lift most residue before it sets. Always let a transfer dry or settle for a minute before painting so the line does not smear under your brush.
Conclusion
Start by cutting a small square of the exact surface you are working on and tracing one line on it, because that single test tells you how much pressure your material needs and saves a full design. From there, the method is simple: keep the stack flat on a rigid board, keep your tape clear of the line work, and trace twice lightly rather than once heavily. If your line reads clearly and the surface has no dent in it, you are ready for the full design.