A ribbon line is a drawing exercise where fabric is treated as a long, flat band rather than a simple curve. You draw its two long edges, mark where the band turns so it alternates between showing its flat face and showing its narrow edge, and the eye reads the twist as three-dimensional depth.
That is the whole trick, and it takes maybe ten minutes per strip. Below is how to use ribbon as a drawing line in five steps, plus the mistakes that trip up most beginners on their first attempt.
The method works with real ribbon laid on the page, with a narrow pen line drawn as if it were ribbon, or with a flat strip of collage paper. Start with a strip 10 to 15 cm long, a soft pencil, and a light hand.
Table of Contents
- What You Need
- Step-by-Step: How to Use Ribbon as a Drawing Line
- 1. Choose and Prepare the Ribbon
- 2. Test the Ribbon on Practice Paper
- 3. Draw a Light Guide
- 4. Place and Secure the Ribbon
- 5. Build Texture and Finish the Line
- Common Mistakes
- Frequently Asked Questions
- What type of ribbon works best for drawing lines?
- Can I use ribbon as a drawing line on canvas?
- How do I keep a ribbon line from curling or shifting?
- Can I paint on ribbon to change its color or texture?
- How do I make a ribbon line fade or taper at the end?
- Conclusion
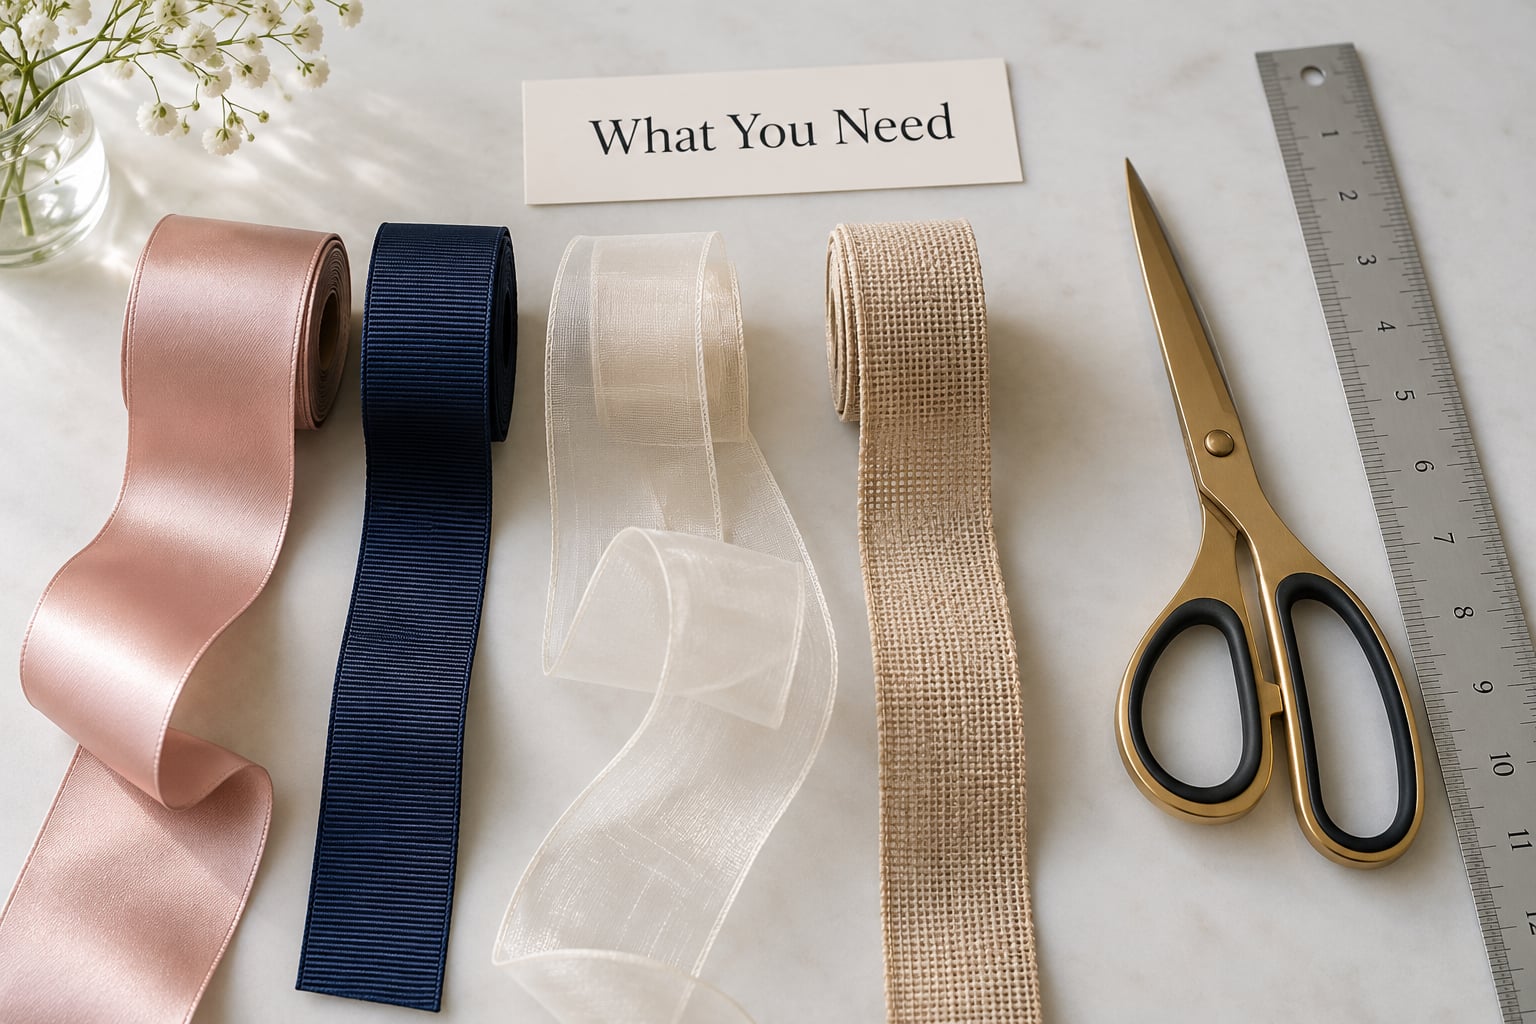
What You Need
None of this is specialised equipment. Everything on this list is probably already in a drawer or a craft tote.
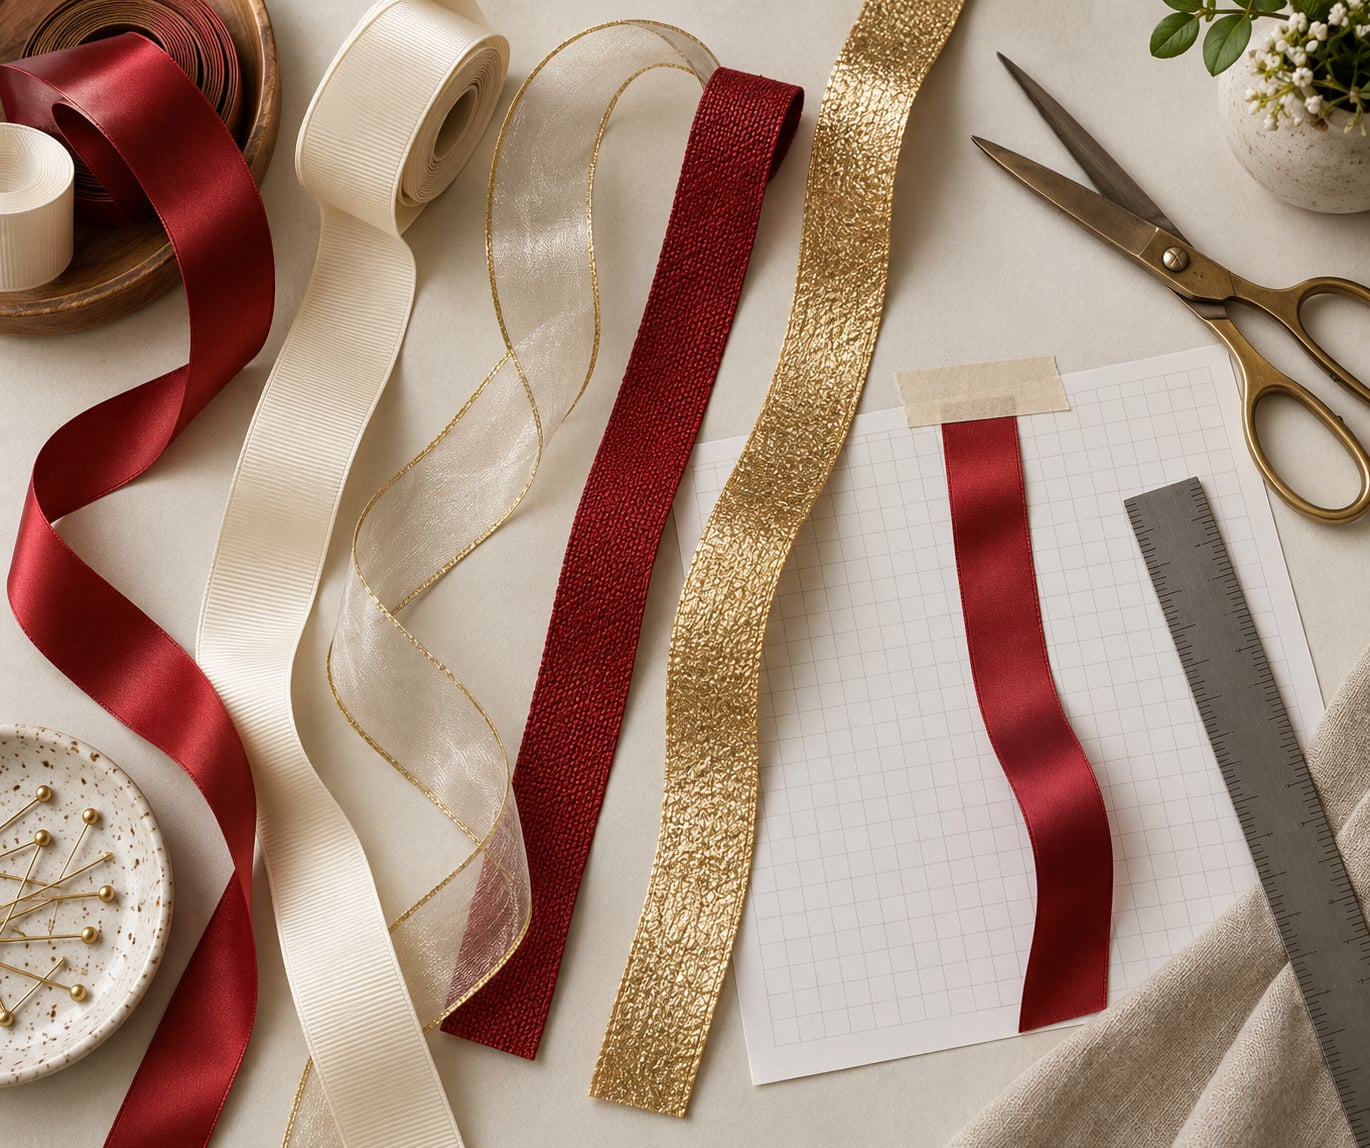
- Ribbon in two widths. A narrow strip around 5 mm and a wider one around 12 mm. Two widths teach you more than one width.
- Three ribbon types if you have them. Satin, grosgrain, and something sheer or textured. They behave nothing alike.
- Drawing paper. Cartridge paper or card stock holds a line better than thin sketch paper.
- HB or H pencil for the guide path, plus a soft eraser.
- Masking tape or a clear archival tape for holding the strip down without residue.
- Ruler and scissors for cutting clean, straight-edged lengths.
- Two liners or fineliners in a dark and a lighter value, or graphite pencil and a soft pastel for shading.
- A flat brush and thinned paint if you plan to tint the fabric in place.
For choosing a ribbon that will hold a clean line, judge three things: the weave, the stiffness, and the selvedge. A tightly woven satin with a crisp selvedge holds a straight run without wandering. Grosgrain has visible ribs that deposit a texture of parallel lines as it moves, which is useful when you want the mark to carry a pattern.
Sheer organza and chiffon are the ones to be careful with. They have almost no body, so they curl under their own weight and slide across the paper. That is not a failure; it is a different mark, and a narrower cut from the same sheer fabric behaves better because it has more edge to grip.
Ribbon width sets your line weight before you even draw anything. A 5 mm strip makes a narrow, searching line. A 12 mm strip makes a bold one. If you want a line that changes weight along its length, cut one strip at a diagonal so the visible width tapers from wide to narrow as you move.
Cutting a small batch of widths in one go saves time later. Snip 3 mm, 5 mm, 8 mm, and 12 mm lengths and lay them across a sheet of card so they stay flat. Pulling from a labelled strip is far quicker than cutting a new one mid-session, and the shape of the mark changes so much between widths that keeping them all to hand is worth the minute it takes.
Step-by-Step: How to Use Ribbon as a Drawing Line
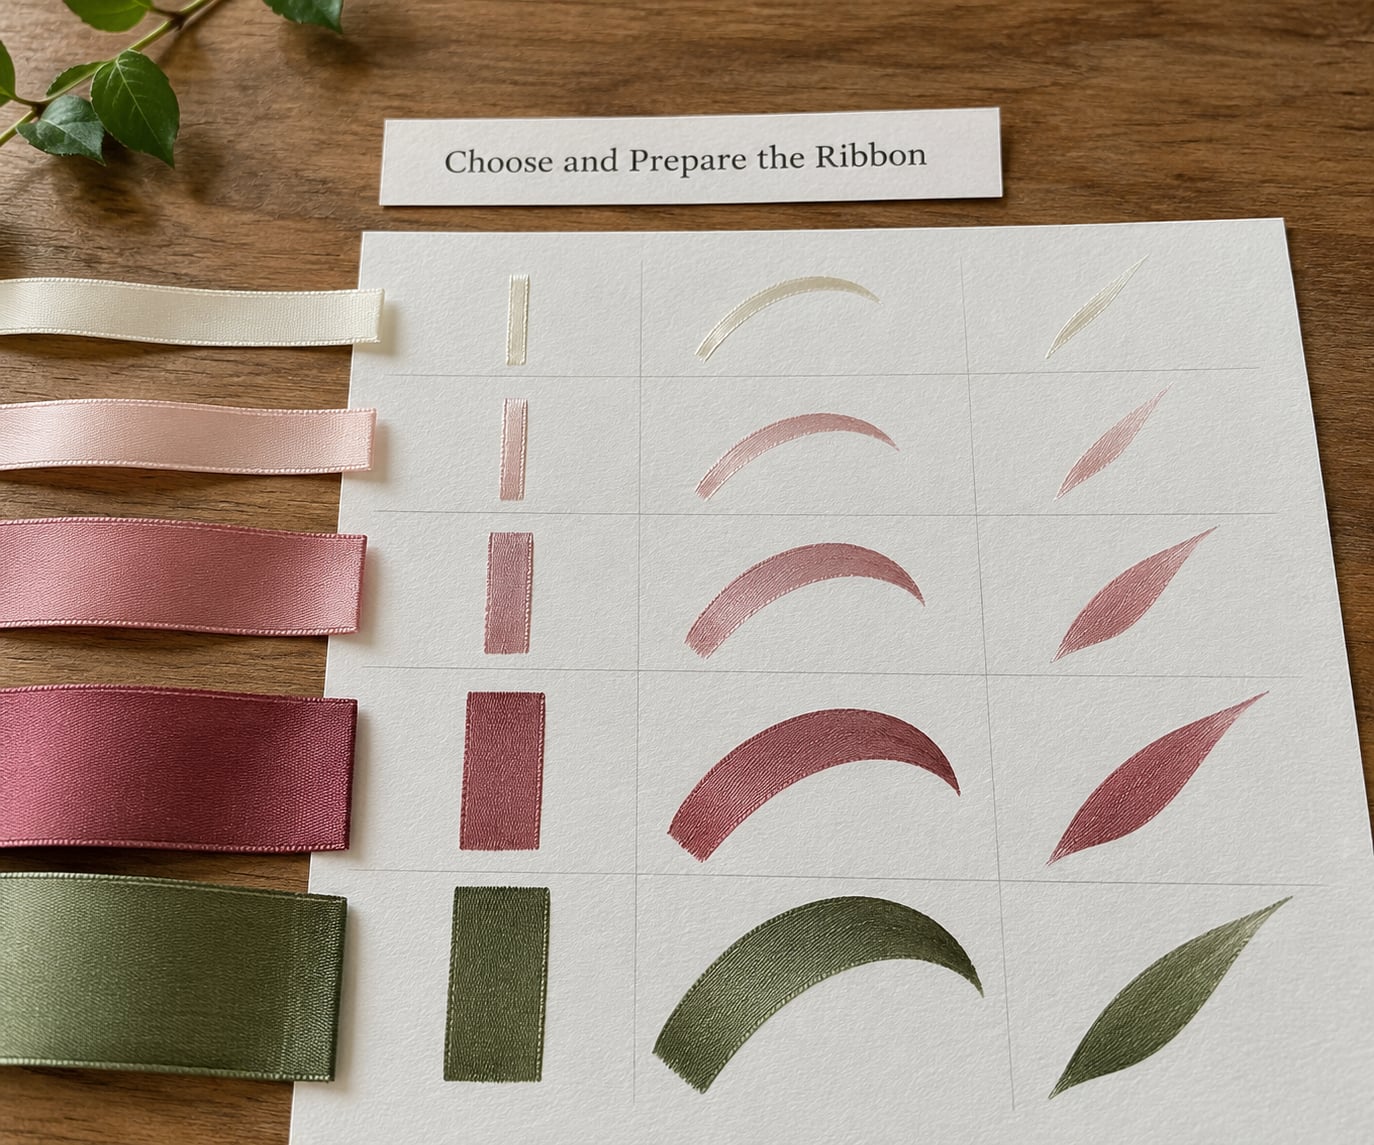
1. Choose and Prepare the Ribbon
Cut a length of ribbon and press it flat under a book or a sheet of paper for an hour if it has any memory of its own curve. Ribbons shipped in a roll hold a curl that fights you for the first few passes.
Trim both ends square. A diagonal cut gives you a taper, and a square cut gives you a blunt stop, so decide which ending you want before you place anything. Frayed ends drag across the surface and lift the middle of the strip, which is where most wobbly lines start.
If you want the strip to sit flatter, run it once along the edge of a table with light pressure, or mist it very lightly with water and let it dry on the paper. Damp satin grips noticeably better than dry satin. Test that on scrap first, because some synthetics mark the sheet.
What to look for at the end of preparation: the strip should lie flat under its own weight with no part of it lifting at the corners. If a corner lifts, trim it narrower rather than fighting it with tape.
2. Test the Ribbon on Practice Paper
Before you commit to a composition, run a short test on scrap paper. Draw four kinds of mark and check how the fabric behaved in each.
- A straight run about 10 cm long. Does the strip track true, or does it wander?
- A shallow curve. Does the strip lift at the outside of the bend?
- A tapering run, made with a diagonally cut strip. Does the point hold or does it drag?
- A short crosshatch, two passes at an angle. Does the crossing show the weave?
These four tests tell you everything. If the straight run wanders, your guide is too light. If the curve lifts, the ribbon is too stiff for the radius and you need a narrower strip or a lighter touch. If the taper drags, the tip is too blunt. If the crosshatch leaves no texture, the weave is too fine to read at that width.
Write the results on the sheet. Most people find their preferred width is not the one they expected.
Keep the test sheet. Referring back to it later tells you whether a disappointing result came from the ribbon or from your hand, and that distinction saves a lot of guessing on the next attempt.
3. Draw a Light Guide
Knowing how to use ribbon as a drawing line comes down to what happens before you place the fabric. A guide line that is too faint lets the strip wander, and one that is too dark shows through the finished mark and doubles the visual line.
Sketch the intended path lightly before you place anything. Use an HB pencil held loosely, and keep the pressure low enough that you can erase the guide completely afterward without scuffing the paper.
Your guide is the centre line of the ribbon, not its edges. Draw one line where you want the band to run, then set the strip down along it. Thinking in centre lines rather than outlines keeps a twisting form manageable, because you are describing one path instead of two.
For architectural or ruled work, mark measured guidelines with a ruler. Long straight runs need a reference more than curving ones do, since the strip supplies the visual weight and the guideline only has to keep it honest.
For organic contours, gesture first. Make one loose sweep with your wrist and no lifting, then trace over the sweep to firm it up. That two-pass gesture method keeps the line from going stiff, which is the single most common way a ribbon drawing ends up looking like a cartoon.
4. Place and Secure the Ribbon
Set the strip down along the guide and work from one end toward the other. Anchoring the starting end first means the far end stays free to correct, and any error gets pushed toward the end you have not committed yet.
Use small pieces of masking tape at the anchor point and, if the run is longer than about 20 cm, one more piece near the midpoint. Press the tape on the strip itself, never bridging from ribbon onto paper, because a bridge stretches the fabric and ruins the line.
Keep the tension almost absent. Pull the strip taut and it will bow sideways between anchor points; keep it slack and it will buckle. Aim for the point where the middle of the strip just touches the paper without creasing. That is the moment the mark becomes clean.
For permanent work, run a thin bead of archival matte medium under the strip and press it down flat with a burnisher or the back of a spoon. Matte medium stays invisible under line work and will not yellow the way some glues do.
If you are drawing rather than collaging, the same method transfers the path: hold the strip in place, trace its edges lightly with pencil, remove the strip, and reinforce the traced edges with ink. You end up with the exact line width the fabric described.
Surface changes how much pressure the tape needs. On cartridge paper a light press is enough; on card stock or a canvas board you have to press harder to catch the tooth, and pressing harder bows the strip. If the mark keeps drifting on a rough surface, add a thin sheet of smooth paper underneath rather than tightening your grip.
5. Build Texture and Finish the Line
A single pass gives you one clean line. Depth comes from making several, and how you overlap them changes the result completely.
- Parallel passes at slightly different offsets build a soft, wide band that reads as fabric without any shading.
- Crossed passes create a woven patch and bring out the grain of grosgrain or a textured ribbon.
- Painted sections let you change value along the length. Let each section dry before the next one touches it.
- Torn or cut edges instead of scissor edges give an organic, frayed boundary for collage work.
When you remove the ribbon, lift one end slowly and pull away at a low angle rather than peeling straight up. Peeling drags the fibre and takes a thin layer of paper with it.
Finish by reinforcing the structure lines that carry the twist, then leaving the secondary lines light. If you add shading, pick a light source before you start and hold it. A darker band in the fold where the ribbon turns under, a lighter crest along the top of each curve, and a soft cast shadow cast onto the paper are usually all it takes to make the strip sit on the sheet instead of floating above it.
Detail last and sparingly. A short crease line at each turn and a few tapered ends carry most of the realism.
Three values are usually enough to make fabric read as fabric: a light tone across the crest of each curve, the flat base colour across the middle, and a dark tone in the fold where the ribbon turns under and in the shadow it falls on the paper. Everything beyond that is refinement.
Once the placement itself feels effortless, the same structure works as a pen technique. Draw a narrow line along one edge, a wider one along the other, and vary both around each turn. That is a drawing a twisting ribbon line in ink, and it is the version most people want once they trust the placement.
Common Mistakes
Almost every flat ribbon drawing traces back to one of these seven problems. Work through them in order if yours looks wrong.
- Fraying at the ends. The fabric drags and the line wobbles. Cut with a sharp scissor, square to the weave, and seal the cut edges with a thin line of glue or matte medium before placing.
- Curling. A strip that curls will not sit flat, so every pass lifts. Press it flat under weight first, or use a lighter, narrower cut from the same ribbon.
- Unwanted shine. A glossy surface bounces light and flattens the form. Knock the back of the ribbon against matte paper to scuff it, or draw with a pencil rather than a marker.
- Shifting mid-run. The mark slides sideways and the edges stop being parallel. Anchor more often. Every 10 to 15 cm is safer than every 30 cm.
- Broken continuity. A line that starts, stops, and restarts reads as two lines, not one. Work in one direction per strip and never reverse halfway along a run.
- Adhesive residue. Ordinary tape pulls the paper surface off with it when you remove the strip. Use archival tape or a water-soluble tape, and remove it the same day.
- Overly uniform marks. Every pass identical gives you a barcode, not fabric. Vary the width, the pressure, and the spacing, and let the ends taper.
Two habits fix most of the list at once. Work from the anchor end outward so errors travel away from finished work, and check your run under raking light before you commit ink over it. Shine and residue that are invisible under a ceiling lamp show up clearly from the side.
If the outline still looks stiff and lifeless, the problem is usually pressure, not shape. Let the line vary in weight along its length and let the hand move slowly. Ribbon that looks soft in life almost never has a single constant line drawn over it.
A ribbon line can also read as too wide. Narrow strips sit comfortably next to a pencil line or a thin pen mark; once the fabric width approaches the width of the object you are drawing, the two compete and the fabric takes over the picture. When in doubt, go narrower than feels right.
Frequently Asked Questions
What type of ribbon works best for drawing lines?
Satin with a tight weave and a firm selvedge gives the most control, because it holds a straight run without wandering and its edges stay parallel. Grosgrain works well too, though its ribs deposit a ribbed texture that shows in the finished mark, which many artists prefer. Avoid sheer organza and chiffon for your first attempt, since they have almost no body and curl as soon as they touch the paper.
Can I use ribbon as a drawing line on canvas?
Yes, and on stretched canvas it grips better than on paper because the weave gives the fabric something to bite into. Tape down more often than usual, since the slight tooth of the canvas moves the strip as you draw, and test any misting on a scrap first because moisture can raise the weave. Heavy gesso or a gessoed board gives you a smoother surface if you want a clean line rather than a textured one.
How do I keep a ribbon line from curling or shifting?
Press the strip flat under a book for an hour first, which removes the curl memory that comes from the roll. Keep tension near zero while you work, because a taut strip bows sideways between anchor points and a slack one buckles. Masking tape holds a short run, and a strip more than 20 cm long needs a second anchor near the midpoint. Always tape the ribbon itself rather than bridging tape from ribbon to paper.
Can I paint on ribbon to change its color or texture?
Thinned acrylic or gouache works, and both soak into fabric more evenly than they do on paper. Dilute the paint first, apply in thin layers, and let each one dry before adding the next, otherwise the layers mix into mud. Test on a spare cut because some synthetics resist water and leave a ring where the paint pooled. For a temporary study, coloured pencil on the fabric rubs off during placement, so paint is the more reliable option.
How do I make a ribbon line fade or taper at the end?
Cut the strip on a steep diagonal rather than square, and the visible width narrows as you travel along it, giving you a natural taper with no extra work. For a fade, run the tip off the edge of the paper so the mark thins out as it leaves the surface, or brush a little water along the last few centimetres of the fabric. Blending the end with a soft pencil works well on textured ribbons, where the pigment catches in the weave.
Conclusion
The method comes down to four things: a strip pressed flat and cut square, a light centre-line guide, anchoring often with almost no tension, and removing the fabric slowly at a low angle.
Start with a 10 cm length on scrap paper. Cut it, press it flat, make four test marks, and check how it behaved before you commit to anything larger. Secure only the small section you are ready to finish.
Once the placement feels easy, the same mark transfers to pen and ink as a twisting ribbon line, and it starts working for hair, fabric, braids, and scarves too. Thinking of any flowing form as a flat band with turning edges is a genuinely useful habit to carry into other drawings.