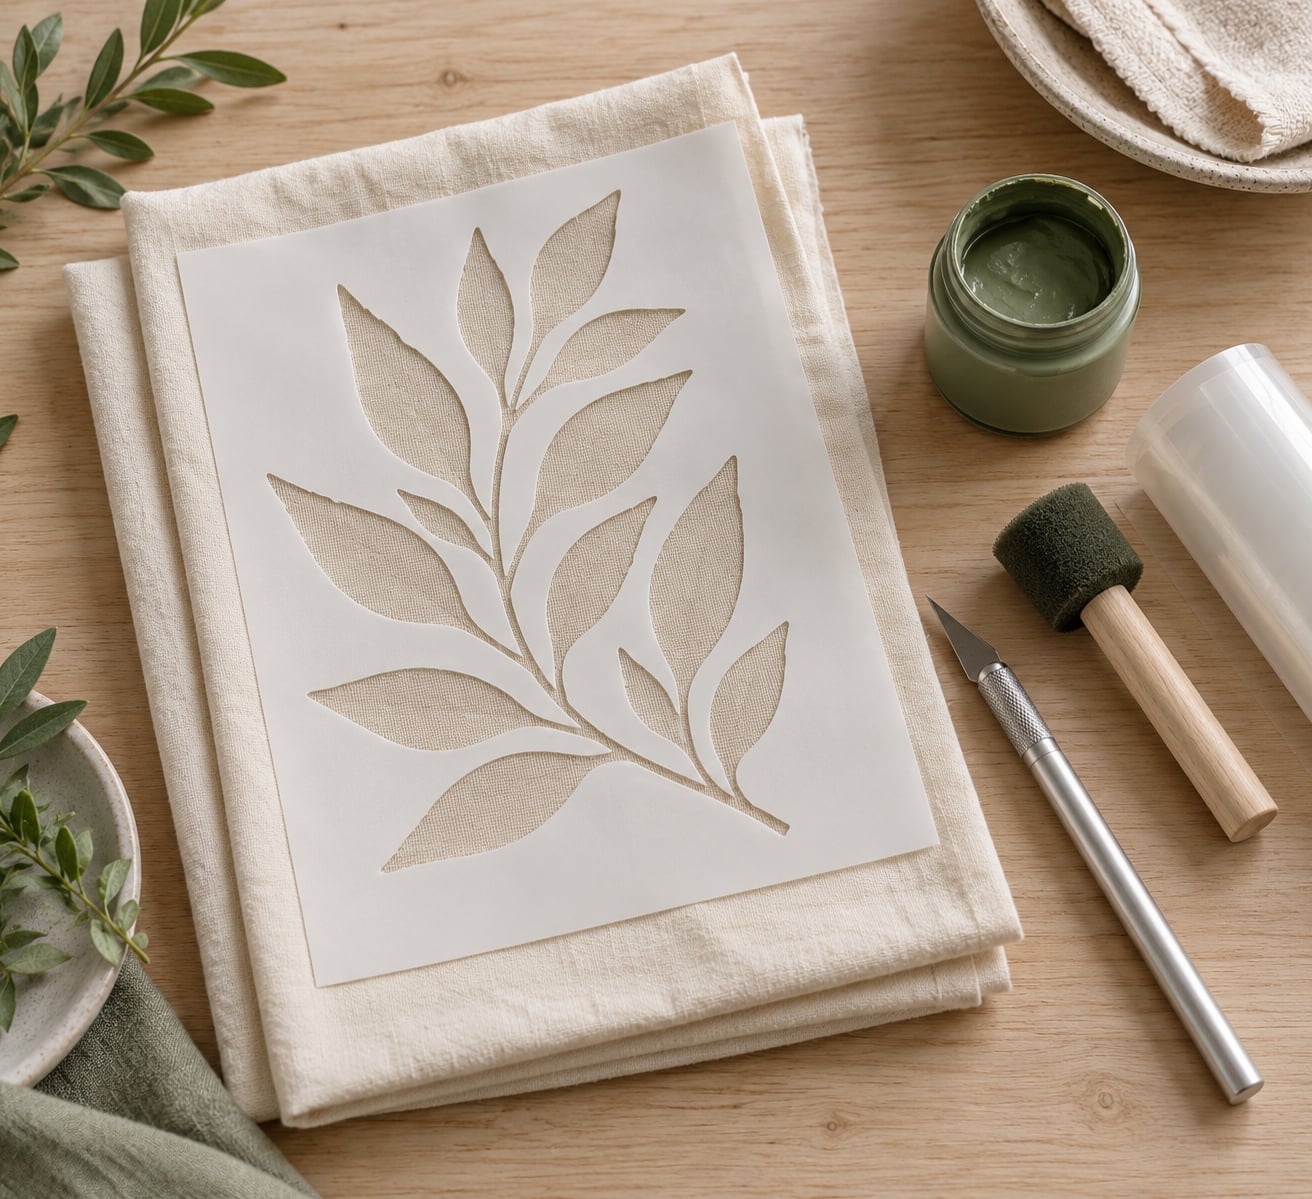
To make your own fabric stencils, print or draw a design on freezer paper or a thin polyester sheet, cut it out with a sharp craft knife, and bond it to fabric with an iron or repositionable adhesive. Dab thin paint through the openings and lift the stencil while it is still damp.
The whole process takes about 40 minutes for a first stencil that you can reuse a dozen times. It suits cotton, muslin, canvas, denim and cotton-poly blends, whether you are painting a tote bag, adding repeat patterns to a table runner, or cutting an appliqué template.
This guide covers the full route from a flat sheet of fabric to a stored, reusable mask. The order below is deliberate: pick the material, cut it clean, bond it flat, test it, then store it properly.
Table of Contents
- What You Need
- Essential materials
- Optional tools
- Which stencil sheet should you pick?
- Fabric and adhesive choices
- Step-by-Step: How to Make Your Own Fabric Stencils
- Step 1: Choose a Fabric and Design
- Step 2: Clean and Flatten the Fabric
- Step 3: Transfer and Cut the Stencil
- Step 4: Bond the Stencil to a Stable Backing
- Step 5: Test the Stencil Before Painting
- Step 6: Clean, Store, and Reuse the Stencil
- Common Mistakes
- How to Keep Fabric Stencils Reusable
- Frequently Asked Questions
- What is the best fabric for making a reusable stencil?
- Can I make fabric stencils without a rigid backing?
- What kind of paint works best on fabric stencils?
- How thick should homemade fabric stencils be?
- How do I stop paint from bleeding under a fabric stencil?
- How long does a homemade fabric stencil last?
- Conclusion
What You Need
The short answer to what is the best material for fabric stencils: 10-12 mil polyester film for a reusable stencil, freezer paper for a single-use stencil that costs almost nothing. Everything else sits between those two ends.
Essential materials
- Stencil sheet — freezer paper, polyester film (mylar), acetate or stencil vinyl. This is the mask that blocks paint.
- Printed design or hand-drawn template — traced in a light colour so the outline shows through the sheet without bleeding into the open areas.
- Craft knife with fresh blades — a dull blade crushes edges and drags threads out of the fabric weave.
- Cutting mat and ruler — a self-healing mat protects your table and stops the sheet sliding.
- Iron — for bonding freezer paper and for setting finished painted fabric afterwards.
- Repositionable spray adhesive — bonds reusable film and lifts cleanly without a residue line.
- Stencil brush or small foam roller — dabs paint rather than dragging it under the edges.
- Thin card or foam-core backing — gives the stencil a stiff handle so it cannot buckle while you paint.
Optional tools
A quilting ruler helps you keep straight lines, low-tack painter’s tape bridges a fragile cutout while you paint, and a light-coloured pencil or water-soluble pen marks the design. Clamps hold a larger fabric square steady if you are working away from a small mat.
Which stencil sheet should you pick?
| Material | Reuse | Detail it holds | Grip on fabric | Best use |
|---|---|---|---|---|
| Freezer paper | Single use | Medium | Excellent, ironed on | Quick one-off motifs, sashiko transfers |
| Polyester film, 10-12 mil | Many uses | High | Good with repositionable adhesive | Reusable masks on cotton and canvas |
| Acetate sheet | Moderate | High | Fair | Small stencils, it flexes at thin bridges |
| Stencil vinyl | Many uses | High | Fair on weave, poor on fleece | Machine-cut repeat patterns |
| Cardstock | Single use | Low | Weak once damp | Tracing templates, quick tests |
Thickness matters more than most people expect. Thin film flexes and tears at narrow bridges, while heavy film resists a knife blade, so 10-12 mil polyester film is the practical middle ground for a stencil you want to reuse.
Fabric and adhesive choices
Choose tightly woven, medium-weight fabric. Loose weaves such as burlap, gauze and open knit let paint wick sideways under the stencil edge, and smooth synthetics build a static charge that pushes the stencil away from the surface.
- Cotton and cotton-poly blends — easiest to stencil; they hold a crisp edge with thin coats of acrylic fabric paint.
- Canvas — rigid and stable, so the fabric rarely shifts; slightly thirsty, so load less paint than you think.
- Muslin and calico — light and simple, ideal for sashiko-style motifs and test pieces.
- Denim — works well, but pre-wash it several times first so the surface stops shedding dye and sizing.
- Knit and fleece — hardest case; the pile moves under the stencil and the adhesive grips poorly, so use a light mist and pin the edges.
Adhesive choice changes how long the stencil lasts. Iron-on heat sets a bond that survives washing but costs you the reuse of the sheet. Repositionable spray adhesive keeps the stencil reusable and peels away cleanly, and a layer of double-sided tape along the perimeter stops the corners curling.
Step-by-Step: How to Make Your Own Fabric Stencils
Step 1: Choose a Fabric and Design
Start with a silhouette, not a scene. Solid shapes with one or two internal openings cut cleanly and survive more applications than detailed line art.
Any opening smaller than about a quarter inch becomes a free-floating island, and a thin island tears the first time you peel the stencil off. Where you need a dot, a star centre or a small shape, cut it as one piece with the surrounding area and leave it in place until the end. If your design cannot work that way, narrow the outline into a bridge of tape or cut the island loose by hand after masking.
Size the design to the surface, not the other way round. A motif that reads well on a 12 inch tote panel turns into mud on a cuff, so measure the finished object and lay the design out at that scale before you print.
Step 2: Clean and Flatten the Fabric
Wash, dry and press the fabric before you start. Washing removes the mill starch and finishing agents that stop paint from bonding, and pressing removes the folds that lift a stencil off the surface.
Set the fabric on the cutting mat and mark the grainline with a strip of low-tack tape along one selvedge. Lay the stencil pattern with the grain running one direction, because fabric stretches across the grain and your lines will distort as you work.
You know this stage worked when the fabric lies flat with no ripples and does not slide when you press your palm onto it.
Step 3: Transfer and Cut the Stencil
To make your own fabric stencils accurately, transfer the design with the lightest medium that will show through the sheet. Draw the outline freehand in a soft pencil on the matte side of freezer paper, or print it in pale grey and tape it under the film so you can trace.
Hold the sheet down without pressing hard enough to distort the fabric. Weight it with a ruler, pin it inside the margins, or tape the corners loose so you can lift the whole thing without peeling tape off the fabric surface.
Score the outline first with a light pass, then go over it two or three times with a fresh blade. Rotate the sheet rather than your wrist when the line curves, and do not remove the islands or bridges yet. A cut-out centre piece lifted early takes the surrounding fabric threads with it.
Finish by peeling away everything that is not the stencil, leaving a small tab on one side if the mask needs a handle.
Step 4: Bond the Stencil to a Stable Backing
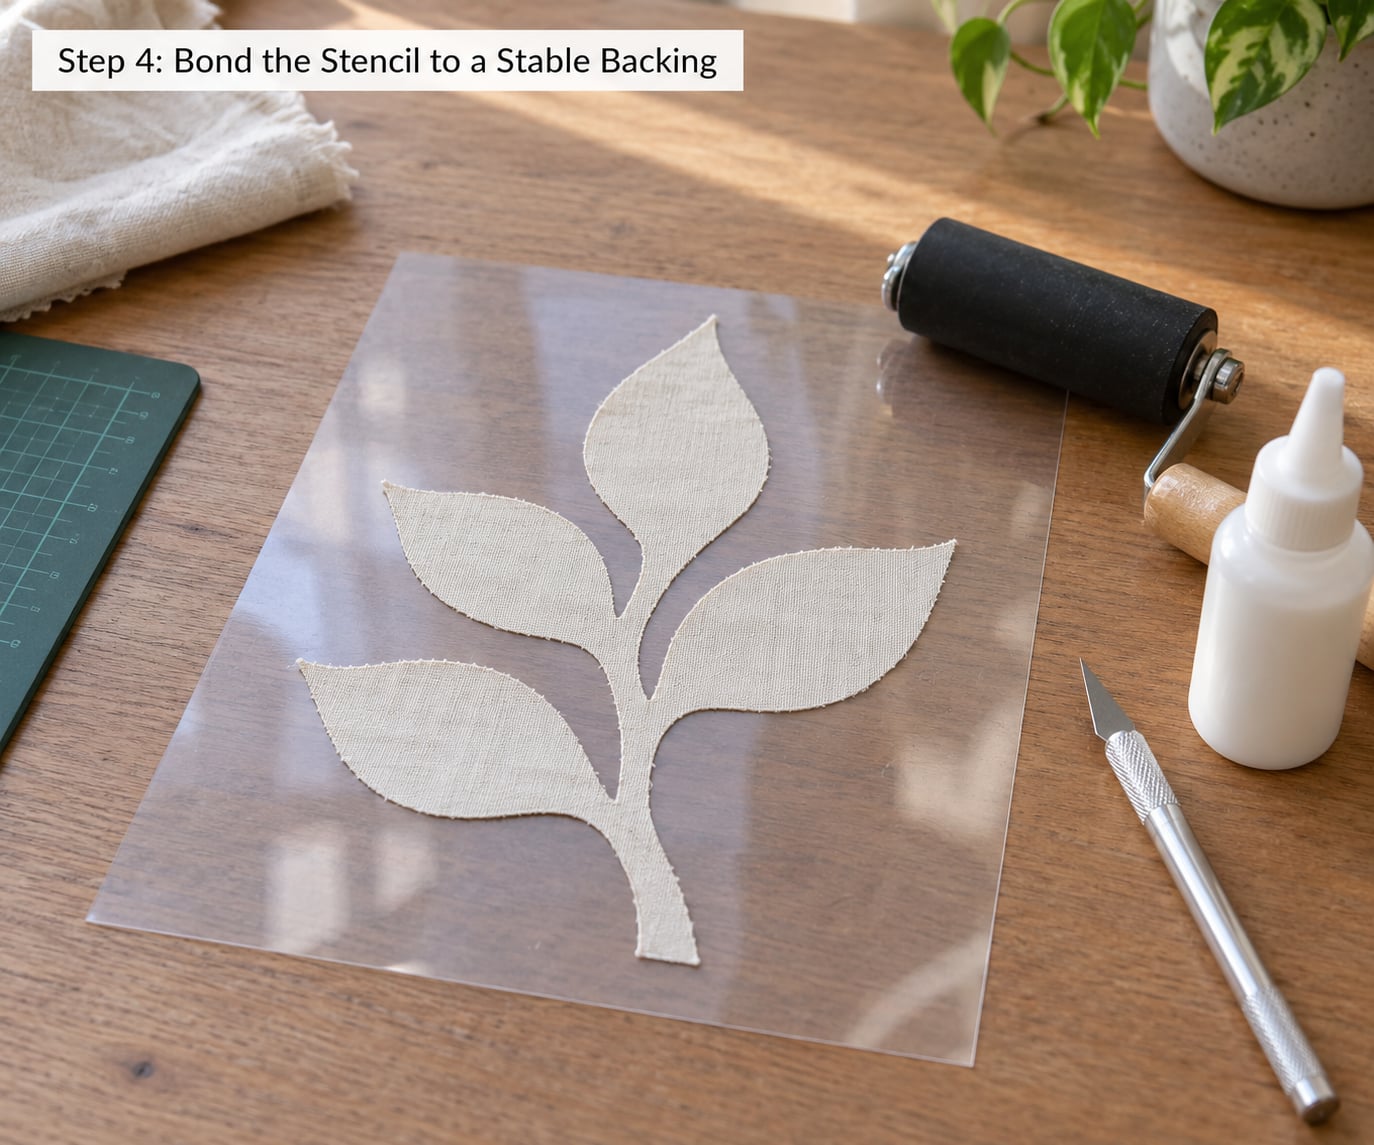
Spray adhesive onto the back of the stencil, not onto the fabric, and let it sit for the few seconds the can calls for before you touch it. Adhesive applied straight onto cloth soaks into the weave and later bleeds a halo into the painted area.
Lower the stencil adhesive side down onto the fabric from one edge to the other, so air does not get trapped underneath. Press the centre first and work outward with a roller or the flat of your hand, then check the surface under raking light. Any bubble you can see is a pocket where paint will run.
For a reusable film stencil, bond it to a thin sheet of transparency film or a piece of stencil board instead of leaving it floppy. The rigid backing makes the stencil sit flat on the fabric and gives you something to hold down without touching the openings.
Follow the full cure time on the adhesive can before painting. Touching the bond too early is the most common reason a stencil lifts halfway through a session.
Step 5: Test the Stencil Before Painting
Load your brush lightly. The paint should be the consistency of thin cream, not the thick paste that comes straight from the jar, and thick paint is exactly what squeezes under a stencil edge and blurs the line.
Secure the stencil with the backing card under your free hand, or rest a clean weight on the perimeter away from the openings. Then make a light test pass on scrap fabric in the same weave as the project.
Pounce rather than brush: tap the brush straight down, lift, repeat. Each pass deposits a thin layer that dries before you add the next, and the openings stay sharp. Check two things before you commit: the edges of the opening look clean, and no paint has crept under the mask. Where the edge lifted, press that corner down again and repeat the test.
Step 6: Clean, Store, and Reuse the Stencil
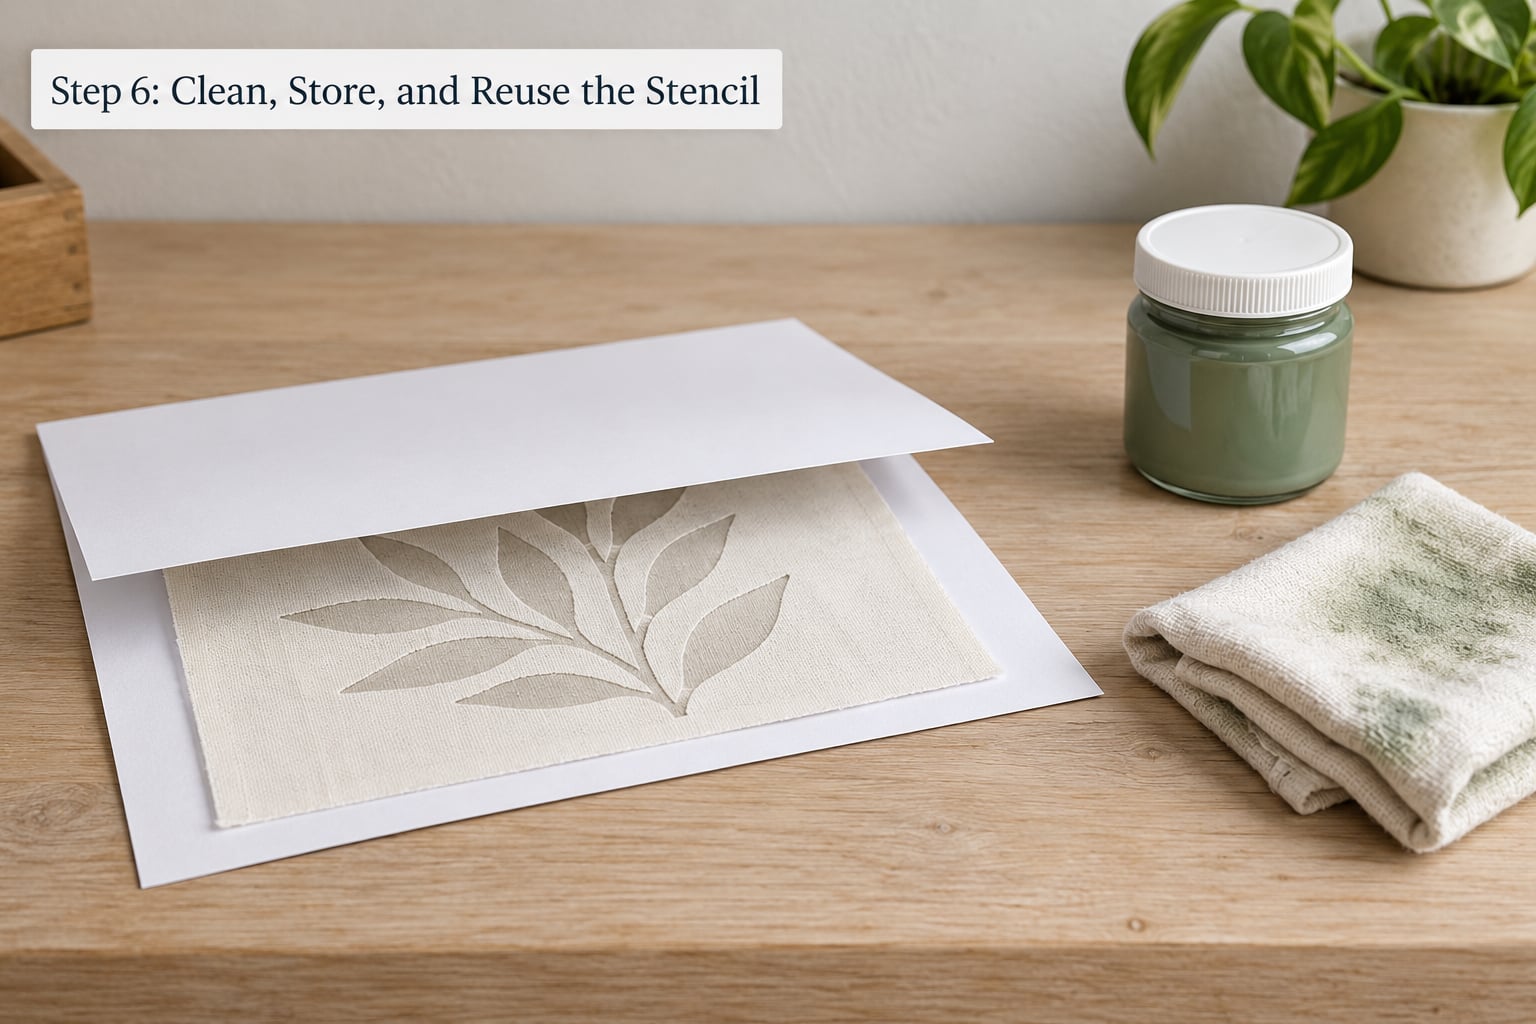
Lift the stencil while the paint is still slightly damp. Peeling a fully dry stencil drags the top layer of paint across the fibres, and that dragged paint becomes the fuzzy rim you see on the next attempt.
Move the stencil straight to your rinse water and work any paint out of the openings with a soft brush while it is still soft. A toothbrush works on fine line work, and a drop of dish soap in the water keeps the film free of oily residue.
Rinse, dry the stencil flat on a towel, and let both stencil and fabric fully dry before storing. Then sandwich the stencil between two rigid sheets of cardstock so nothing bends it, and keep it flat in a drawer or box.
Common Mistakes
The fabric shifted while you worked. Press the fabric flat first, work on the grain, and use a backing card or a second pair of hands holding the perimeter down.
Edges look fuzzy or drift. Your paint is too thick or too wet. Thin it, pounce thinner coats, and wait for each to dry before adding the next.
A bridge or island tore. The opening was too small or the sheet too thin for the span. Widen the opening, keep the cut-out in place until the outline is finished, or bridge it with two small pieces of tape on the back.
The stencil lifted mid-session. The adhesive set for too short a time, or too much went on in one pass. Give it the full cure time and use a second light coat rather than a heavy one.
Paint bled under the edges. Add a stiff backing card, dab instead of brushing, and check the weave. A loose weave will wick paint sideways no matter how carefully you work.
The stencil failed early. Freezer paper is designed for one use. If you need repeat applications, bond polyester film to a backing and clean it promptly after each session.
How to Keep Fabric Stencils Reusable
Longevity comes from discipline at the end of each session rather than from tougher material. Wash the stencil while the paint is wet, dry it flat and fully, and store it flat under something rigid.
Keep coats thin, since thick paint sits in the fibre and needs scrubbing that shortens stencil life. When a corner starts to curl or a bridge thins out, repair it straight away with a strip of stencil tape on the back, and re-spray the whole back before the next use.
A stencil kept this way usually outlasts the fabric it was made for. Mine have gone through six to ten applications each on canvas and cotton before I retired them.
Frequently Asked Questions
What is the best fabric for making a reusable stencil?
Tightly woven, medium-weight cotton is the easiest to work with, and cotton-poly blends hold paint well too. Canvas and denim are stable and forgiving. Avoid loose weaves like burlap, gauze and open knits, which wick paint sideways under the stencil edge, and smooth synthetics that build static and push the stencil away. Pre-wash and press whatever you choose before cutting.
Can I make fabric stencils without a rigid backing?
Yes, and for cotton and muslin the freezer paper route works well without one. The iron bonds the paper directly to the cloth, so it becomes part of the surface and lifts cleanly when you peel it while the paint is damp. A rigid backing only matters when you want to reuse the stencil itself, or when the fabric is large enough to buckle under your hand.
What kind of paint works best on fabric stencils?
Thin acrylic fabric paint, thinned with a little water or fabric medium, gives the cleanest edges because you can pounce it in thin layers. Heavy-bodied acrylic and any thick craft paint squeeze under the stencil edge and blur the line. Fabric medium mixed into ordinary acrylic paint makes the finished colour flexible and washable, while a fabric-safe sealer locks it in afterwards.
How thick should homemade fabric stencils be?
Around 10-12 mil polyester film is the practical choice for a reusable stencil. Thinner sheets flex and snap at narrow bridges, while heavy-gauge film resists a craft knife and dulls the blade quickly. If you are cutting with an electronic machine rather than by hand, use the thickest sheet the machine can feed without dragging or tearing it.
How do I stop paint from bleeding under a fabric stencil?
Hold the stencil flat with a stiff backing card under your free hand, then pounce rather than brush. Thin the paint so it behaves like cream, work in thin layers and let each dry, and use a light mist of repositionable adhesive on the stencil back rather than a heavy coat. On loose weaves, no amount of care fully stops wicking, so test on scrap first.
How long does a homemade fabric stencil last?
It depends on the sheet. Freezer paper is a single-use stencil by design, while polyester film or stencil vinyl cleaned promptly and stored flat between rigid sheets usually survives six to ten applications. Bridges wear first, so patch them with stencil tape on the back rather than discarding a stencil that still cuts and lays flat accurately.
Conclusion
A stencil is just a cut sheet that blocks paint, and the whole method comes down to four things: clean flat fabric, a knife kept sharp, a bond given time to set, and paint applied thin.
Start by washing and pressing a piece of tightly woven cotton, then cut one simple high-contrast silhouette with no opening smaller than a quarter inch. Bond it to a thin rigid backing with repositionable adhesive, run a single light test pass on scrap fabric, and check the edges before you touch the piece you actually want to keep.
Once that first stencil works, the same process scales to repeat patterns, whole sets of linens, and machine-cut vinyl masks once you know what your failures look like.