Cheap packing that actually works is simple: sandwich the artwork between two rigid boards with a non-abrasive layer touching the surface, fill every gap so nothing can move, then pay for a service priced by size and weight instead of speed. Budget method takes about 20 minutes per piece once you have the habit.
Most of the money artists lose on shipping is not lost in postage. It is lost buying the wrong box, adding a frame the buyer did not ask for, or paying for overnight service on a piece that was never that fragile. Strip those out and packing gets cheap without getting risky.
A few terms come up constantly, so it helps to know them before you start. Glassine and acid-free paper are non-abrasive interleaves that protect the surface. Foam board or corrugated cardboard is the rigid sandwich. Void fill is whatever stops the package shifting. Dimensional weight is the carrier’s calculation of how heavy your box is based on its size, and it is where most budget shipping plans go wrong.
Table of Contents
- What You Need
- Step-by-Step: How to Pack Art for Shipping on a Budget
- Prepare and Protect the Artwork
- Wrap the Artwork for Protection
- Choose a Box That Fits
- How to Pack Art for Shipping on a Budget When No Box Fits
- Fill Empty Space and Seal the Box
- Label, Weigh, and Compare Shipping Rates
- Common Mistakes
- Frequently Asked Questions
- What is the cheapest safe way to ship a painting?
- Can I ship artwork in a padded envelope instead of a box?
- How should I protect quilts and textile art during shipping?
- Should I insure artwork when shipping on a budget?
- Is it cheaper to use a prepaid shipping label or pay at the counter?
- How do I ship a framed painting without the glass breaking?
- Conclusion
What You Need
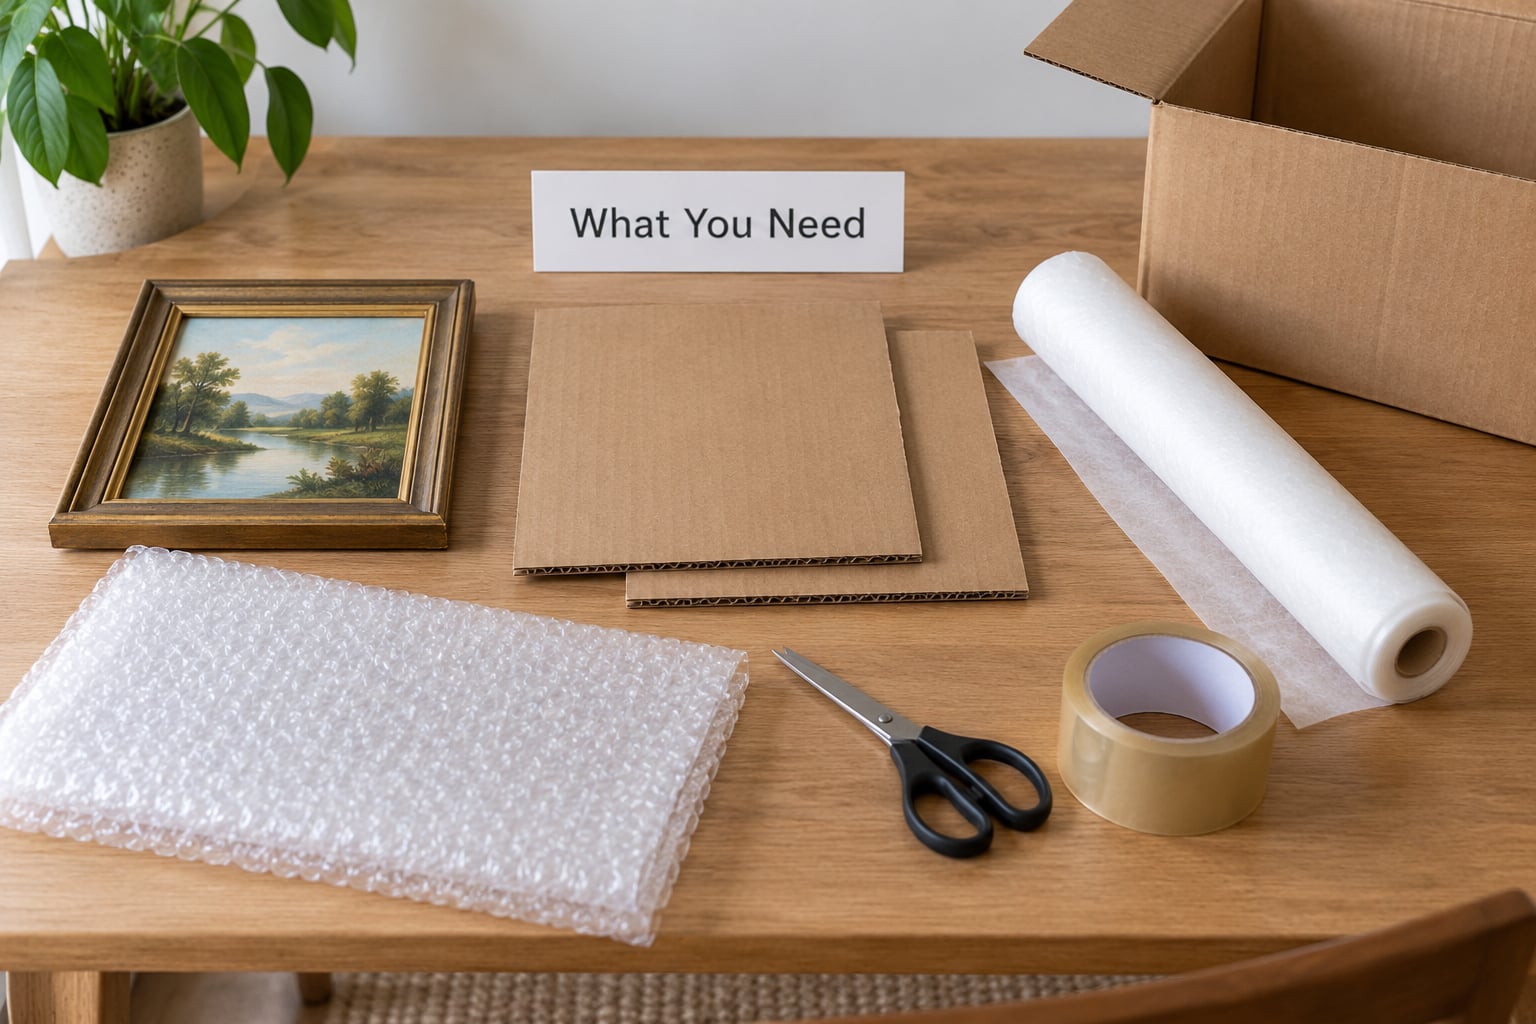
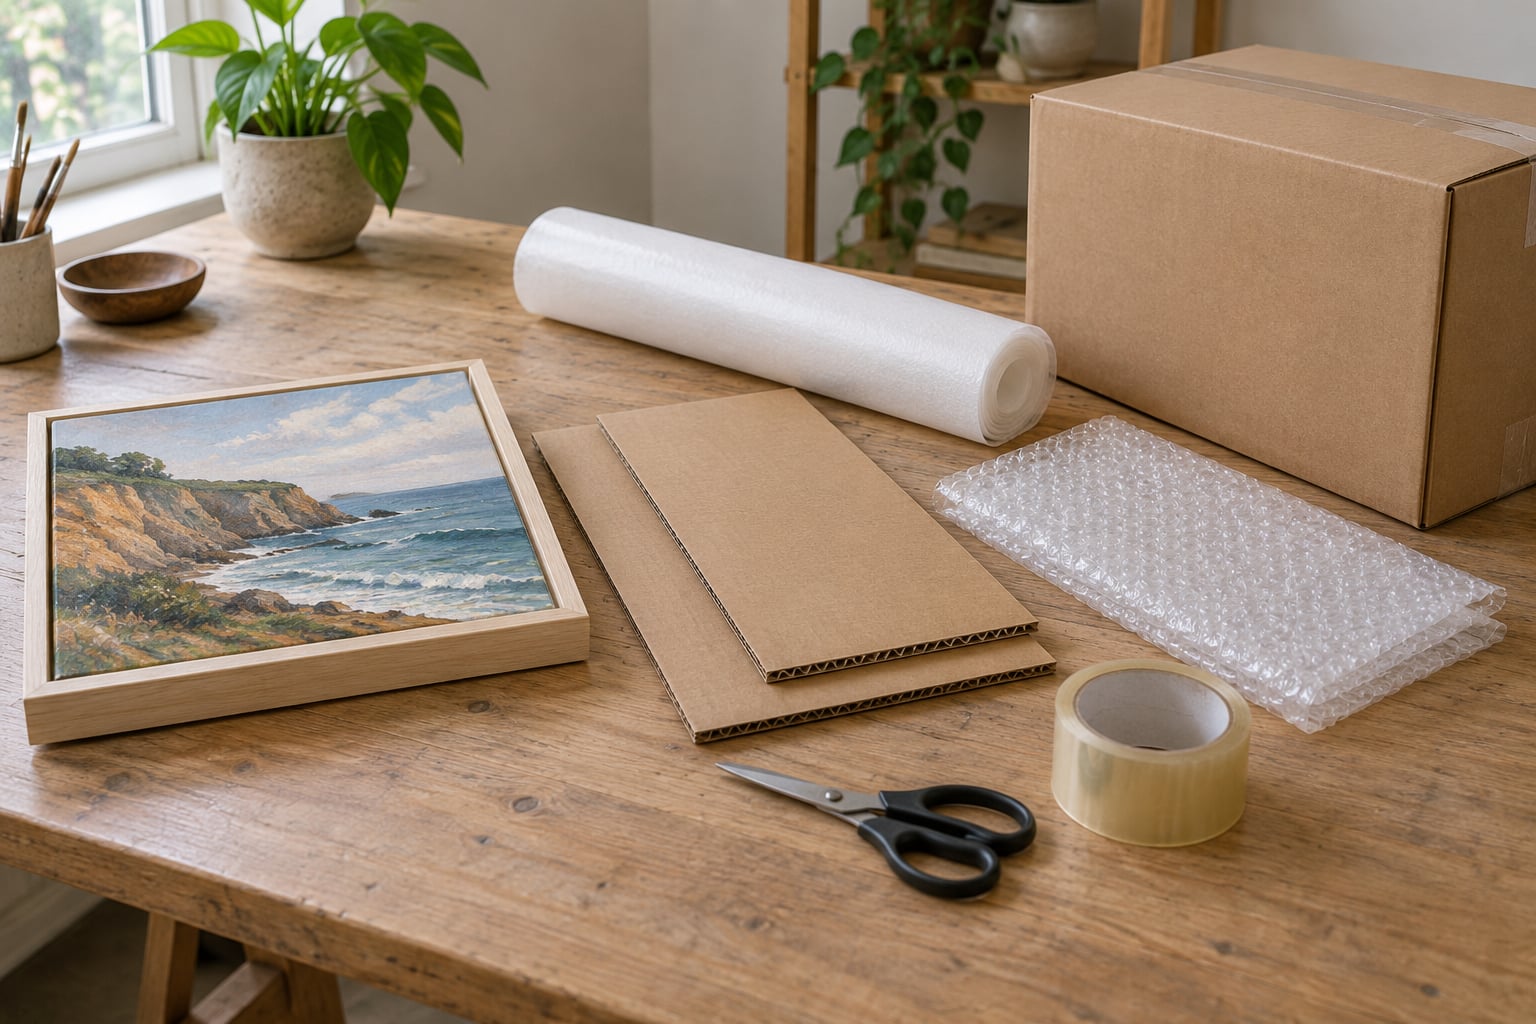
Two rigid boards slightly larger than the artwork. Foam core from a framing shop, corrugated cardboard from a hardware store, or the back panels of two picture frames you already own all work. The boards only need to stop the artwork from flexing.
A non-abrasive face layer. Glassine or parchment paper is the right answer; plain printer paper works in a pinch but has no acid buffer, so skip it for anything you plan to keep.
Cushioning for the void: crumpled kraft paper, void fill, or a pool noodle sliced lengthwise. Bubble wrap is useful around the outside of the sandwich, and painters on r/artbusiness argue strongly against putting it directly on the paint surface, where the trapped air can imprint acrylic, oil, and even cured varnish.
Tape, a marker, scissors, and a box with about 2 inches of clearance on every side. A rigid outer box does more for your piece than any amount of extra padding. Keep a reuse pile of boxes, tubes, and foam board offcuts so the second shipment costs you nothing but postage.
Step-by-Step: How to Pack Art for Shipping on a Budget
Prepare and Protect the Artwork
Clean the surface with a dry microfiber cloth and photograph the front, back, edges, and any existing damage. Those photos are the only evidence you will have if a claim comes later, and claims are decided on documentation, not memory. Write the packing date on the back of the work in pencil if it is a wet surface, so you can tell later how long it dried in the box.
Then protect whatever is vulnerable. Framed work with glass gets painter’s tape in an X across the pane, which holds shards in place if it does crack. Protruding edges, knots, beads, and hardware get a small square of foam board or a pool noodle sleeve, and nothing loose goes in the box. Mixed-media work with raised elements needs a rigid board over the face so pressure lands on the board and not on the collage.
For a still-wet oil painting, wait. Fresh oil can take weeks to touch-dry and months to cure enough to survive a box. Oil pastel is different: wrap each stick region in wax paper and interleave sheets so pigment does not transfer onto the back, and tell the buyer about the possibility of a light bloom in transit.
Wrap the Artwork for Protection
Lay a sheet of glassine or parchment over the painted face, sized to cover it with a few inches to spare. This is the barrier that prevents abrasion, and it is the one step artists skip that they later regret. Nothing goes on top of that paper except the rigid board, and tape touches board edges only, never the artwork.
Slide the artwork face-down onto a second sheet of glassine so the two protected surfaces never touch each other, then sandwich it. The rule is that the boards are the only things taking pressure, and the artwork floats loose enough inside them that a bump bends the board rather than the piece.
For quilts, batting, and textile work, the rigid sandwich does double duty: it stops the quilt folding over a box edge, which is the damage quilt makers worry about most. Wrap the quilt in acid-free tissue first, roll it loosely rather than tightly, and never use a rubber band, which leaves a crease line that may still show months later. Wood cutouts and shallow assemblages get the same treatment with cardboard spacers between the raised parts so pressure never lands on the relief.
Choose a Box That Fits
Measure the finished sandwich, then add 2 inches to each dimension and buy or build a box at that size. A snug box is the single biggest cost saver available, because dimensional weight charges you for the space you use even when the package is light. An oversized box around a small painting can cost several times what the picture is worth.
Do not slide the artwork into a box a size larger and hope padding holds it. Slide the box on over the sandwich instead, which keeps the piece flat and centred, and then fill around it.
How to Pack Art for Shipping on a Budget When No Box Fits
Buy the biggest flat cardboard box you can find and cut it down. Measure the sandwich, score and cut the box so the panel is a few inches larger all round, fold the extra material into overlapping flaps on the inside, and reinforce every seam with two runs of tape. That one taped box handles most 16×20 and 20×24 canvases and costs a fraction of a purpose-made art box.
For works too long for any box, build a two-piece system: two shallow panels sandwich the artwork, packing tape secures the edges, and the whole panel goes into a larger box at an angle so nothing rests on a corner. For a roll of canvas, a mailing tube is still the cleanest option, though some artists prefer long cardboard boxes because a canvas rolled tightly into a tube can take a set.
Fill Empty Space and Seal the Box
Fill every gap so the package cannot be shaken, tilted, or dropped without something stopping. Kraft paper, void fill, or a sliced pool noodle along the edges all do this. Test it the way carriers do: shake it, tilt it corner to corner, and press on the centre of the face. If anything moves or the boards bow, add more.
Seal with an H pattern of packing tape down the centre seam and across both end seams, then reinforce the corners. Brown packing tape on the seams beats clear tape on corrugate because it grips the fluting and does not split when the box is cold. Check for anything sharp poking through a corner, and nothing loose on the closure.
Label, Weigh, and Compare Shipping Rates
Weigh the packed box after it is fully sealed, and measure it at its widest points. Write the dimensions and weight down, then get quotes from USPS, UPS, and FedEx for ground services rather than picking the fastest option. A discounted label service built for small sellers is often the cheapest way to buy postage, and prepaid labels are normally cheaper than paying at the counter, though a carrier counter can hand you a flat-rate box you would otherwise have to source yourself.
Skip services you do not need. Priority upgrades cost real money and rarely change the outcome for a well-packed piece. Do pay for tracking, and add signature confirmation for anything valuable enough that a porch theft would hurt. A “fragile” sticker is a label that changes nothing about how the box is handled, but accurate addresses and a clear phone number do.
Two costs trip up first-time shippers. Declaring a value above a carrier’s limit can make an item ineligible for the service, and the carriers’ standard coverage is not fine art coverage. Independent art insurers often require packing by a professional handler, which defeats a budget plan entirely. Read the policy language before you buy, and if a work is worth more than the shipping, treat the insurance question as a separate decision from the packing question.
Common Mistakes
Bubble wrap straight onto a painted surface. Trapped air can leave a visible pattern in varnish and paint. Fix: glassine or parchment first, bubble wrap outside the boards.
Tape on the artwork. Packing tape on a canvas face or a print pulls the surface or leaves residue. Fix: tape to the board edges and the box, never to the work.
No rigid inner support. Padding alone does nothing against bending. Fix: two boards, one on each side, always.
Under-padded corners. Frames and boards take the first hit at the corners. Fix: corner protectors or a pool noodle sleeve on each corner before the outer box goes on.
Room for the piece to move. Any slack becomes a lever during a drop. Fix: fill it until the box will not shake or flex.
Choosing a carrier by the headline rate. The cheapest quote ignores dimensional weight and oversize surcharges. Fix: compare the fully packed box, measured and weighed, across all three major carriers.
Shipping a framed piece with glass in it. Glass is the most expensive part of a frame to replace and the most common breakage. Fix: sell unframed, or pull the glazing and ship the frame separately.
Two habits pay for themselves over a year. Reuse boxes and foam board offcuts instead of buying new, and reuse them in the other direction, since a padded mailer that already survived one trip is stronger than a new empty one. Ask the carrier what box size they recommend for your measurements, which takes two minutes and often tells you the cheapest box you have not thought of.
One honest note: for very small originals, the postage can exceed what the sale is worth. That is not a packing problem and no packing method fixes it. Bundle small works into a single shipment, or sell small pieces as prints.
Frequently Asked Questions
What is the cheapest safe way to ship a painting?
Sandwich the painting between two rigid boards with glassine or parchment over the painted face, tape only the board edges, then place it in the smallest double-wall box that leaves 2 inches of clearance on each side. Fill the gaps so nothing moves and buy the slowest ground service you can live with. This setup costs almost nothing in materials and survives the drop tests carriers actually run.
Can I ship artwork in a padded envelope instead of a box?
Only for small, unframed, rigid prints with no raised surface. A padded envelope handles scuffing but does nothing against bending, crushing, or a dropped corner. If you use one, slip a piece of cardboard inside so the print cannot flex, keep the envelope inside a box for anything valuable, and expect no insurance worth relying on. Framed or canvas work always needs a box.
How should I protect quilts and textile art during shipping?
Wrap the quilt in acid-free tissue, roll it loosely rather than tightly, and never secure a roll with a rubber band, which leaves a crease that can last. Sandwich the roll or folded quilt between two rigid boards so nothing folds over a box edge, and fill the box so it cannot shift. Ship early in the week so a delay does not leave a quilt sitting in a depot over a weekend.
Should I insure artwork when shipping on a budget?
Treat it as a separate decision from packing. Carrier coverage above a set value can make a piece ineligible for the service, and standard carrier coverage is not fine art coverage. Independent art insurers often require packing by a professional handler, which can cost more than the artwork. For work priced high enough to lose sleep over, read the policy wording or sell unframed so the replacement risk is smaller.
Is it cheaper to use a prepaid shipping label or pay at the counter?
Prepaid labels are usually cheaper, because the counter rate includes retail handling and the clerk finds the most expensive service that fits. Buying postage yourself also lets you compare all three major carriers in a few minutes instead of taking whatever the counter offers. The exception is a flat-rate box: if you can pick one up at a carrier counter, you pay postage only and skip the box cost entirely.
How do I ship a framed painting without the glass breaking?
Put painter’s tape in an X across the glass so shards stay in the frame if it cracks, then wrap the frame in a layer of paper and cover the corners with cardboard corner protectors or a sliced pool noodle. Slide the frame into a snug box so it cannot move and fill every gap. The cheaper option is to pull the glazing and ship the frame empty, which removes most of the weight and nearly all of the breakage risk.
Conclusion
Start with the measurement, not the box. Note the artwork’s dimensions, build the rigid sandwich with a non-abrasive layer on the face, choose the smallest box that clears it on every side, fill the gaps until the package will not shake, then compare rates on the sealed box across USPS, UPS, and FedEx. If you pack art for shipping on a budget with that order of operations, the material cost stays low and the piece has a far better chance of arriving whole.