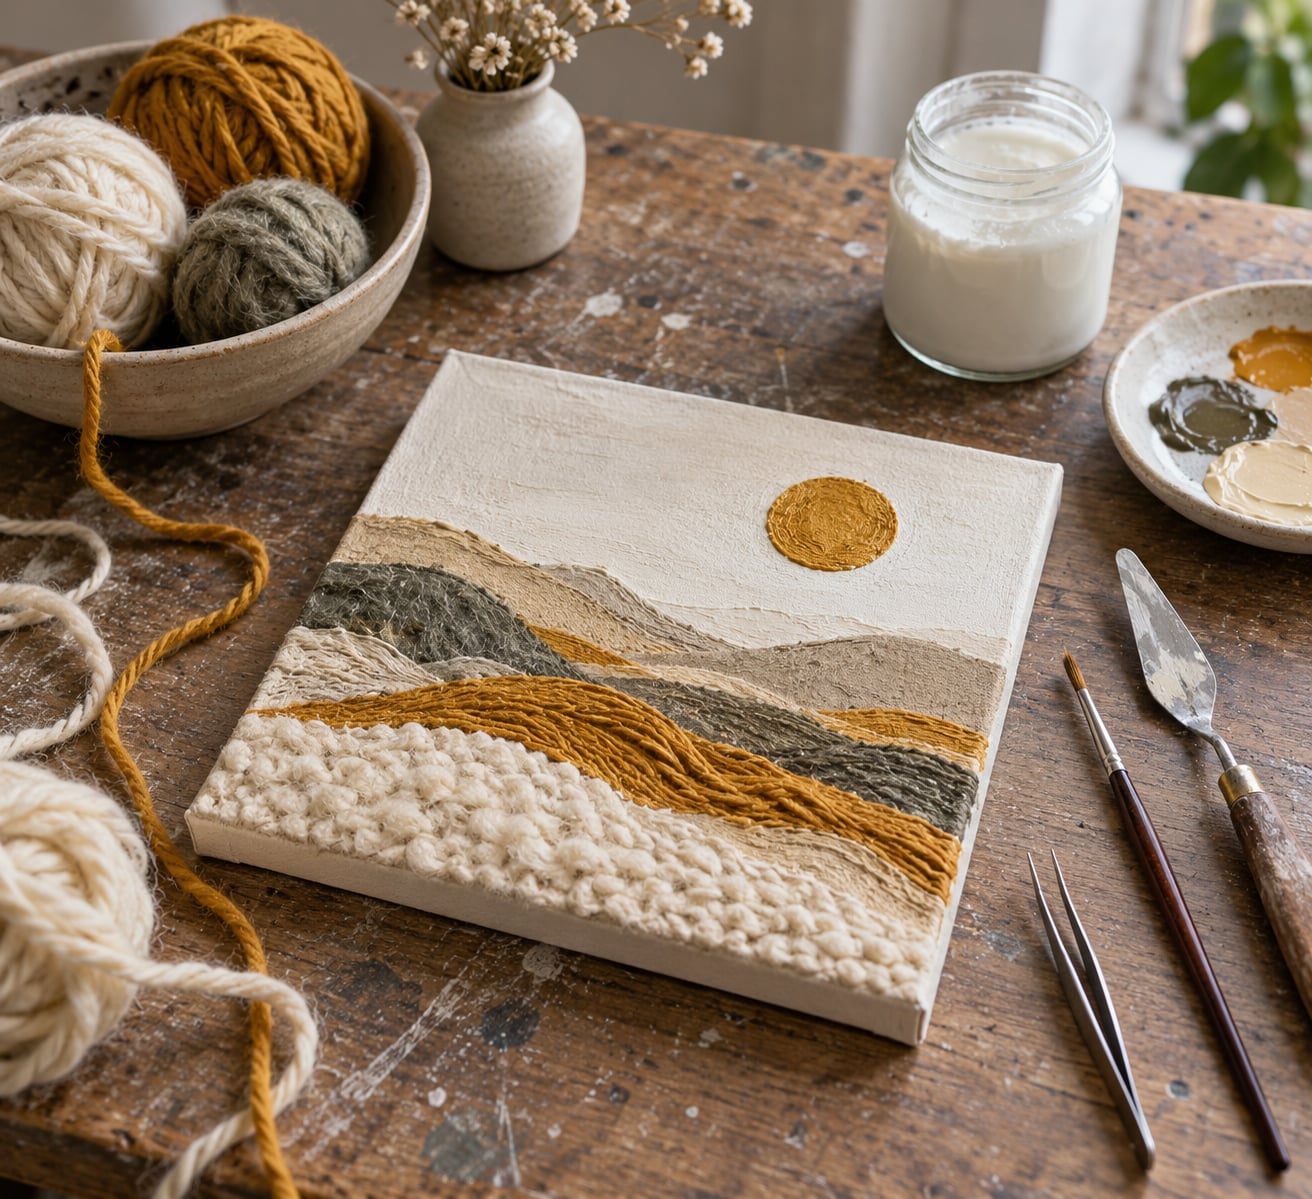
To add yarn to a mixed media painting, bond it to the surface with a clear-drying adhesive: brush on a thin, even layer of PVA tacky glue or acrylic matte medium, press the strand down in short sections with tweezers or your fingers, then let it cure fully for 12 to 24 hours before you varnish or display it. The whole process takes 20 minutes on a small panel, and beginners usually get a clean hold on the first try.
Yarn is one of the fastest ways to give a flat painting depth. A strand sitting on a painted surface throws a small shadow, catches light differently than paint, and gives the eye something to read as physical rather than drawn.
Most of the trouble people have with fibre in a painting comes down to two things: too much adhesive, and moving the piece before it has cured. Get those right and the rest is placement.
Table of Contents
- What You Need
- Step-by-Step: How to Add Yarn to a Mixed Media Painting
- Plan the Yarn Placement
- Prepare the Painting Surface
- Choose an Adhesion Method
- Attach the Yarn
- Add Paint and Surface Detail
- Dry and Finish the Painting
- Common Mistakes
- Frequently Asked Questions
- What is the best yarn for a mixed media painting?
- Can I paint over yarn after attaching it?
- How do I keep yarn from lifting off a painting?
- What adhesive works best for yarn on canvas?
- How long should I wait before sealing a painting with yarn?
- Can I use wool, cotton, or acrylic yarn for a mixed media painting?
- Conclusion
What You Need
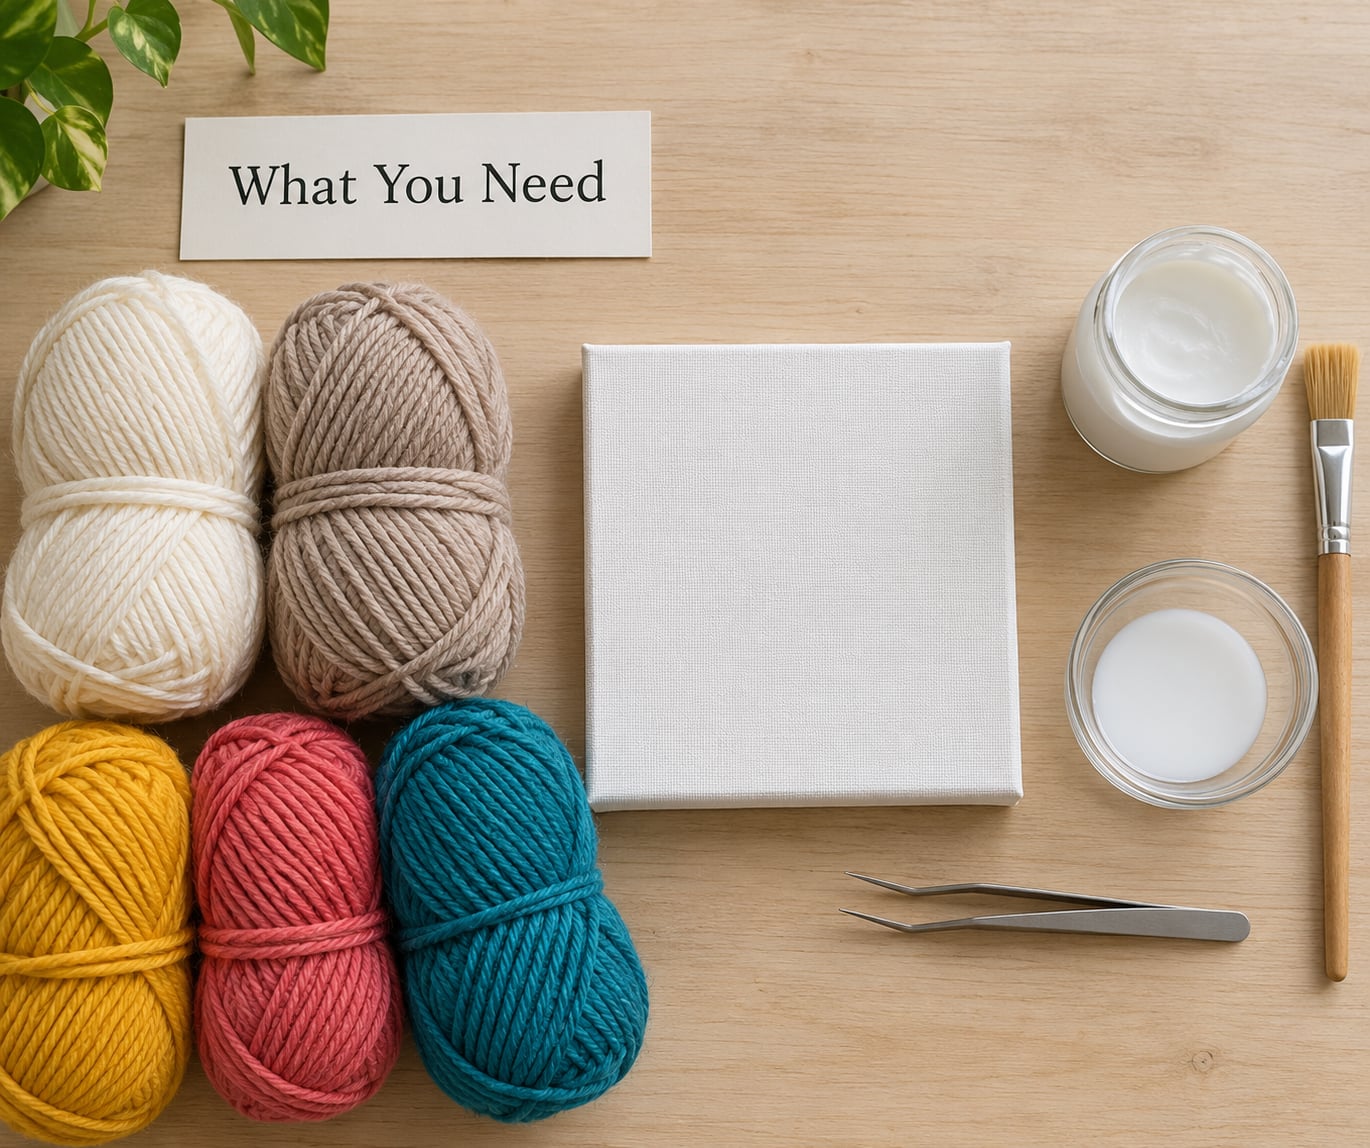
You do not need much. Most of what a yarn painting needs is already in a mixed media studio.
- Surface. A stretched canvas, an unprimed wood panel, or heavy card. Rigid board is easier for beginners because nothing flexes while the glue dries.
- Yarn. Worsted-weight acrylic for crisp lines, chunky yarn for rope-like relief, mohair or chenille for fur and grass, jute twine for rustic texture.
- Adhesive. Clear-drying PVA or tacky glue for most work, acrylic matte medium when you want the bond to disappear into the painting, hot glue for quick structural holds.
- Ground and paint. Gesso or a primer for bare board, plus your usual acrylic colours.
- Tools. Tweezers, fine scissors, a small flat brush for adhesive, a palette knife, and a soft cloth for cleanup.
- Finish. A matte or satin varnish, or a clear acrylic sealer if you want the fibre to stay soft and fuzzy.
The one place beginners over-buy is the yarn. A single worsted skein gives you far more line length than you think, and colour choice matters more than quantity. Pick two or three shades that sit near your palette and let the fibre do the work.
Step-by-Step: How to Add Yarn to a Mixed Media Painting
Plan the Yarn Placement
Sketch the yarn path before you touch adhesive. A light pencil line tells you whether the fibre is going to read as a line, a shape, or a field of texture, and it saves you from gluing a curve in the wrong place.
Test the scale on scrap first. A strand that looked right in your hand is often fatter on the surface than you expect, so lay a loose piece down and step back a few feet.
Decide what the fibre is doing before you commit. A deliberate yarn element has a beginning, an end and a consistent tension. If it looks accidental, that is usually because it was placed without a plan.
Prepare the Painting Surface
Clean the surface and let it dry fully. On bare board or raw canvas, apply one or two coats of gesso and sand lightly between them, because a smooth ground gives the adhesive something to bite into.
Paint your base layers and let them dry to the touch before placing yarn. Paint that is merely tacky will pull up in strings the moment you press fibre into it, and you will lift paint off the surface with the yarn.
There is a second option if you want the yarn partly buried. Lay strand onto wet paint or fresh gesso so the ground sinks over it, then skim a thin coat of matte medium across the top. You get texture with a flatter surface, which is useful when the painting needs to sit behind glass.
Choose an Adhesion Method
Use thin layers, not thick ones. Adhesive that seeps up through the fibres is the most common reason a yarn piece looks messy.
- PVA or tacky glue holds worsted and chunky yarn on canvas and board, dries clear, and sands if a mistake needs fixing. It stays slightly flexible, so it moves with the surface.
- Acrylic matte medium doubles as adhesive and paint. Brush it on, press the yarn in, then use the same medium to scumble colour over the strand later.
- Contact adhesive gives an instant, non-flexible hold on paper and board. Spray or dab it onto the back of the yarn rather than the painting, so you keep control of placement.
- Hot glue is fast and strong for structural pieces, but it sets brittle and shows a glossy bead. Use it for woven elements and heavy yarn, not for fine lines.
- Stitching and couching lock fibre down permanently. Run the yarn through a sewing-machine foot or tack it with a needle and heavy thread, then hide the stitches under paint.
Attach the Yarn
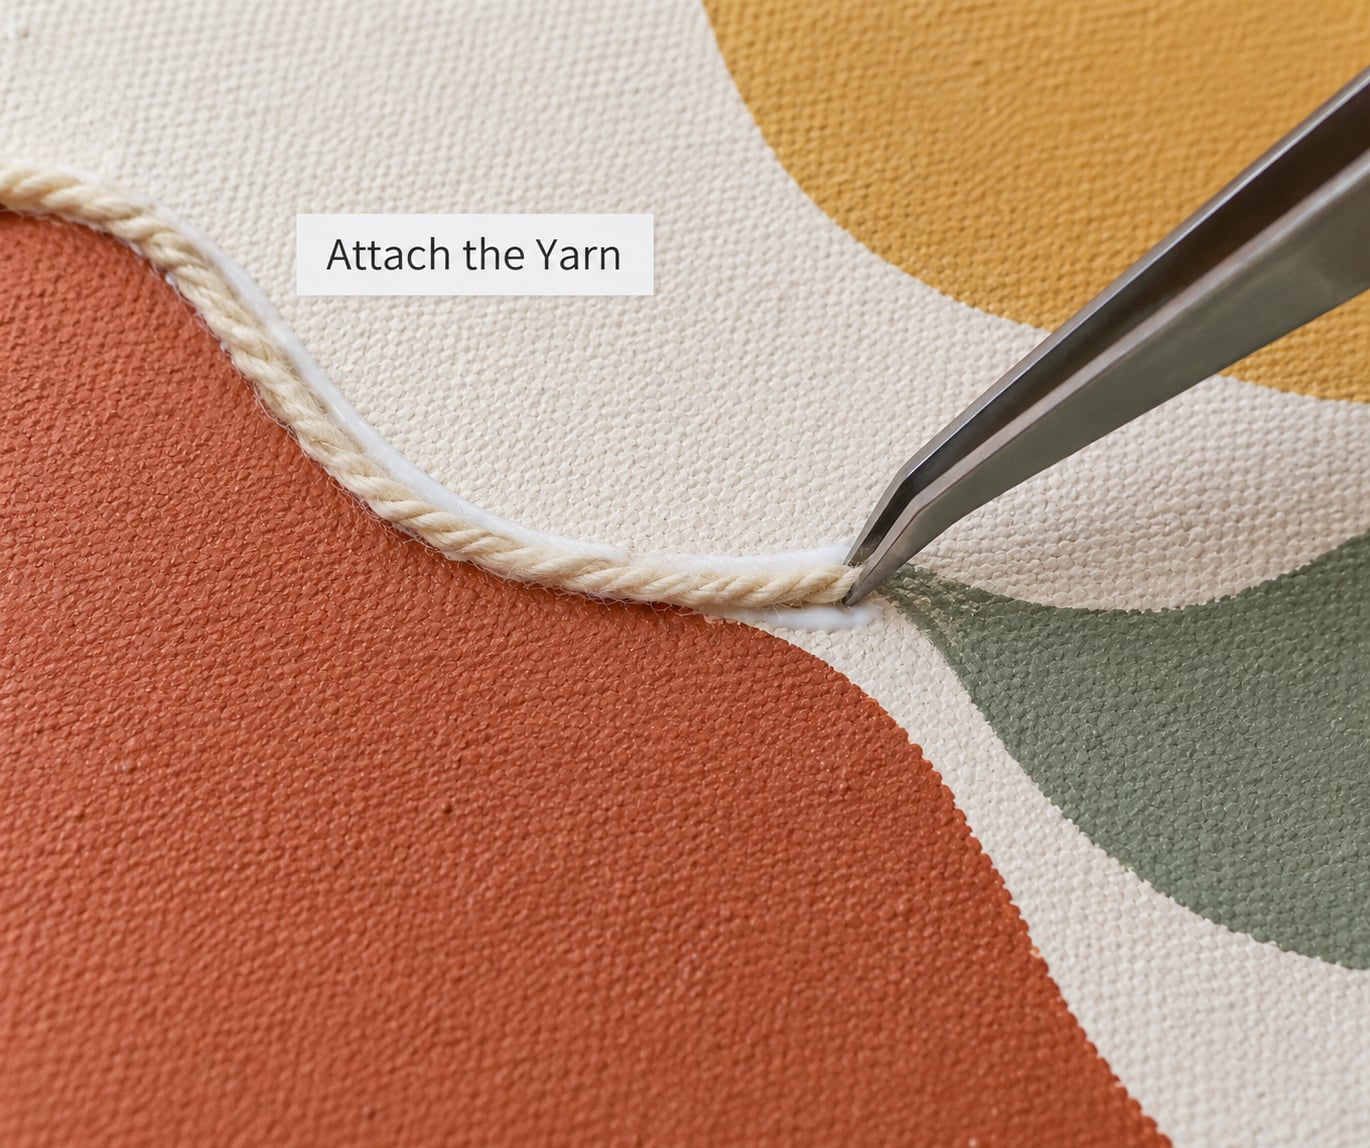
Work in sections a hand’s width across. Put down a thin, even film of adhesive, lay the strand into it, and press along the length with tweezers or the flat of your finger.
Press the middle first, then the ends, so the strand cannot slide sideways while you are smoothing it. Excess glue at the ends is what causes lifting later, so keep the film thin and consistent.
For curves, tension the yarn lightly against the pencil line before you press it down. Curved strands made under tension sit flatter and read more confidently than ones that were tacked down in segments.
Loops, wraps and woven shapes need the same adhesive under each pass rather than only at the anchor points. A loop held at two points and free in the middle lifts the moment you hang the piece.
To wrap yarn around a canvas edge, run adhesive along the edge, press the strand over it, and trim it flush with the back. Clean lines at the edges are what separate a deliberate finish from a rushed one.
Add Paint and Surface Detail
Paint over yarn partly to integrate it, not to hide it. A dry brush dragged lightly across the raised fibres catches the tops and leaves the shadowed sides dark, which keeps the dimensional quality intact.
You can also brush paint between the fibres with a thin flat brush, working from the background inward. This pulls the two materials together without flattening the strand.
Acrylic paint dyes acrylic yarn directly if you saturate it, though the result is always a little uneven on the colour wheel. Test on an offcut first, and work in thin coats rather than soaking.
Dry and Finish the Painting
Leave the piece flat and undisturbed for 12 to 24 hours. Longer is better in humid conditions. Test the hold with a light tug at an edge before you move on to finishing.
Clean any glue haze around the fibres with a damp cloth while it is still slightly soft, and trim loose ends with sharp scissors.
Seal with a matte or satin varnish if you want protection and a unified surface. Keep matte varnish away from mohair and chenille, which lose their halo under a heavy coating. Leave the fibre fully dry for 24 to 48 hours before varnishing, and skip varnish entirely if softness matters more than dust protection.
Common Mistakes
Yarn lifting at the edges. The ends almost always carry too little adhesive. Fix it by running a thin line of glue under the last inch of each end and pressing it flat overnight.
Glue seeping through the fibre. Too much adhesive, applied too thickly. Use half the amount you think you need and press the yarn into a wet film rather than floating it on top of a thick coat.
Yarn reading as flat and lifeless. Usually a matte medium was used too heavily, or the strand was pressed too hard. Leave a little of the curve visible and do not burnish the surface.
Fibres that look painted on rather than part of the piece. The colours have drifted away from the palette. Keep fibre to roughly 30 percent of the colour weight and let the remaining 70 percent stay in the paint.
Fraying and a fuzzy halo. Short ends and brushed-off fibres catch light and pull attention. Trim ends with sharp scissors and press them down with a little adhesive rather than pulling them out.
Uneven texture across the piece. The strand changes tension as you work. Cut yarn to set lengths rather than working from one long skein, and check spacing as you go.
Painting before the yarn is secure. A brush dragging over a cured-but-cold bond will shift the strand. Wait the full cure, then test with a fingertip before you add paint.
One habit worth adopting early: keep a scrap of the same surface and the same yarn nearby while you work. Testing adhesion on the real surface tells you more in ten seconds than any product description.
Frequently Asked Questions
What is the best yarn for a mixed media painting?
Worsted-weight acrylic yarn is the easiest starting point because it holds a clean line and grips adhesive well without bulk. Chunky yarn gives rope-like relief, mohair and chenille suit fur, grass and water, and jute twine adds rough natural texture. Match the yarn weight to the line you want: thicker yarn reads as a shape, thinner yarn reads as a drawing.
Can I paint over yarn after attaching it?
Yes, and it is one of the best ways to make fibre look like part of the painting. Dry brush lightly across the raised fibres so the tops take colour and the shadowed sides stay dark, or brush paint between the strands with a thin flat brush. Avoid soaking the yarn, since heavy paint stiffens it and reduces the tactile quality you added it for.
How do I keep yarn from lifting off a painting?
The ends lift first, because that is where the adhesive film thins out. Run a thin line of clear-drying PVA or acrylic matte medium under the last inch of each end, press it flat with tweezers, and leave the piece flat and undisturbed for 12 to 24 hours. Working in hand-width sections and pressing the middle before the ends also stops strands sliding sideways.
What adhesive works best for yarn on canvas?
For acrylic yarn on canvas or board, clear-drying PVA or tacky glue is the dependable general choice. Acrylic matte medium works well when you want the bond to disappear and the same medium can double as paint over the top. Hot glue gives a strong, instant structural hold but stays brittle and glossy. Stitching or couching gives the most permanent result on heavy fibres.
How long should I wait before sealing a painting with yarn?
Let the yarn cure flat for 12 to 24 hours first, and up to 48 hours in humid conditions, then test the hold with a light tug at an edge. After that, apply a matte or satin varnish in thin coats. Keep heavy coats away from mohair and chenille, which lose their soft halo, and skip varnish entirely if you want the fibre to stay fuzzy.
Can I use wool, cotton, or acrylic yarn for a mixed media painting?
All three work. Acrylic yarn is the most forgiving and takes acrylic paint well. Cotton lies flat and takes dye cleanly, which makes it useful for fine line work. Wool adds warmth and a slight halo, and takes longer to bond because of its natural oils, so clean the strands first and allow a longer cure. Test any fibre on a scrap before it touches the painting.
Conclusion
The most reliable first move is a test: put a short length of your yarn on a scrap of the same surface with the adhesive you plan to use, and leave it overnight. That one small check answers the question that trips up most beginners.
From there, place your fibre before the paint has fully cured or while the base layer is still just tacky enough to grab, work in thin adhesive films, and press the ends down properly. Give the piece 12 to 24 hours flat before you handle it, then finish with a light varnish if you want protection.
Updated for 2026.