To make paper from fabric scraps, you cut natural fibres such as cotton, linen or denim into small pieces, soak them, blend them into a slurry, add a paper binder so the fibres bond, then form the sheet on a mesh mould and press it dry. An afternoon of soaking plus a day of drying gives you a textured sheet no two alike.
I keep a jar of quilting cotton offcuts by the cutting mat, and for a long time those tiny slivers just went in the bin. Turning them into paper solved that, and gave my collage work a surface I could not buy off a shelf.
The one thing that surprises people is why the binder matters. Cotton and linen are cellulose, same as wood pulp, but scissor-short fibres barely cling to each other on their own. Tear up a few sheets of old printer paper or envelope and blend that in with the fabric, roughly a third to a half as much as the fabric by dry weight, and you get a sheet that handles instead of flopping apart.
Start with plain, undyed cotton or linen for your first batch. Denim is dramatic but stains your hands and your work surface, and blends fussy, so it comes after you have the mechanics down.
Table of Contents
- What You Need
- Step-by-Step
- How to Make Paper from Fabric Scraps: Prepare the Fibers
- Soak the Scraps Until They Separate
- Blend the Fabric Into a Smooth Pulp
- Screen the Pulp Into a Sheet
- Press and Transfer the Wet Sheet
- Dry the Paper Flat or on a Screen
- Finish, Store, and Use the Paper
- Common Mistakes
- Frequently Asked Questions
- Can you make paper from any kind of fabric?
- Does cotton behave differently from denim?
- What can I use instead of a blender?
- How do I stop the wet sheet tearing when I lift it?
- Is homemade fabric paper safe to write or print on?
- Conclusion
What You Need
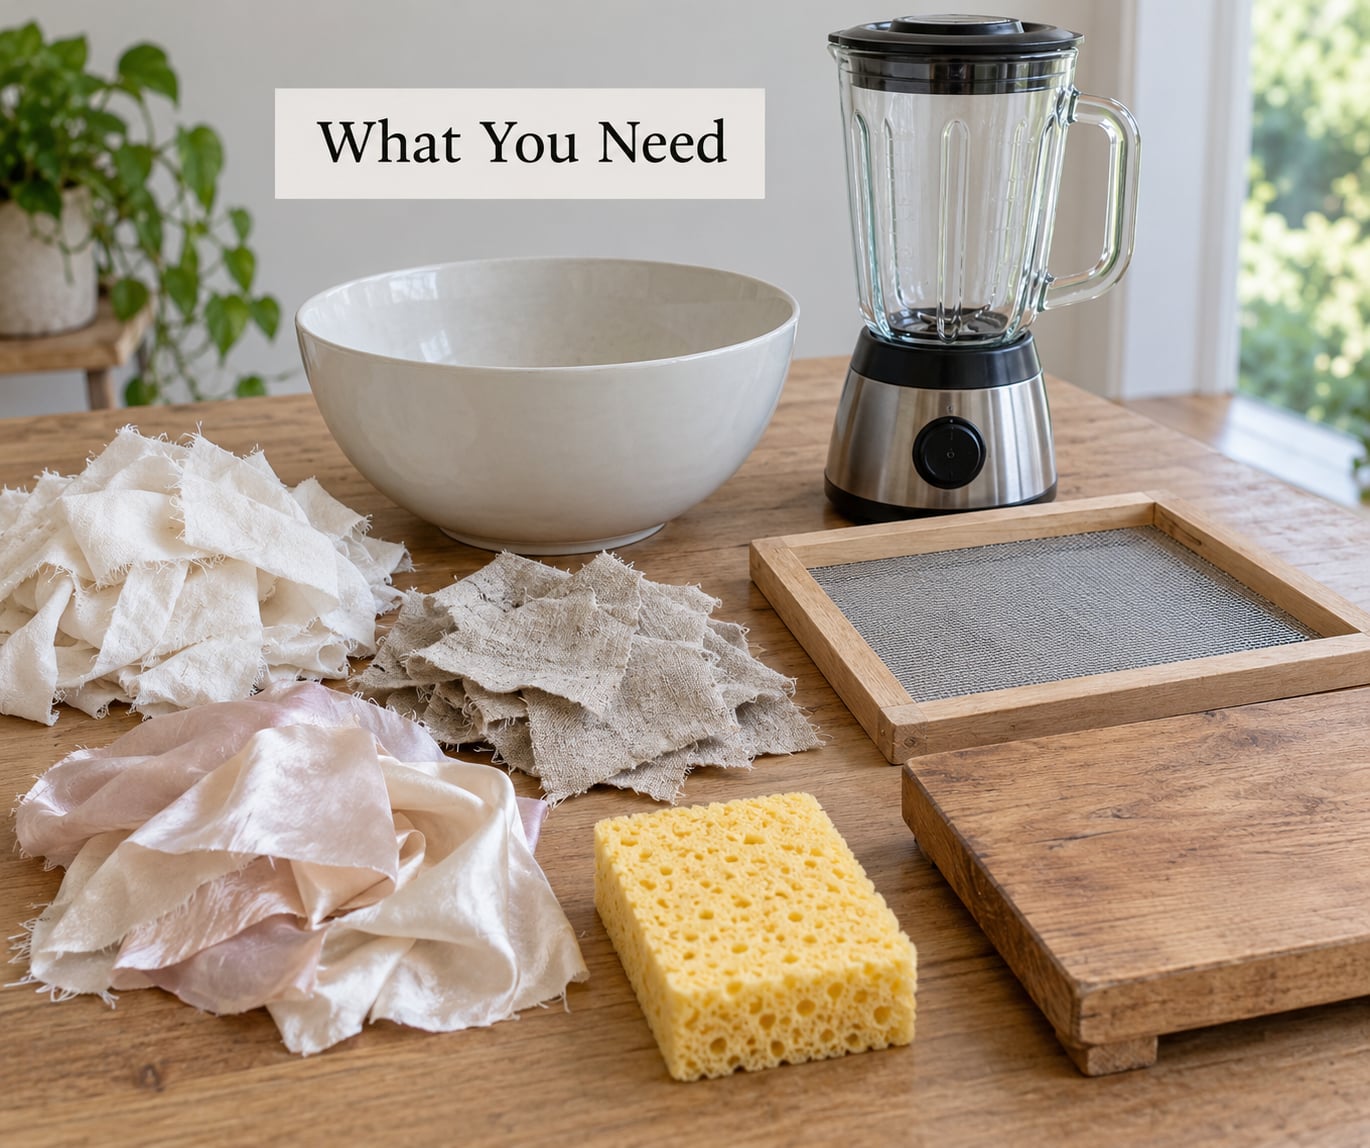
- Fabric scraps. Plain cotton, linen, denim, hemp, or wool with no thick seams, zippers, buttons, fusible backing, or coated prints.
- Paper binder. Torn-up printer paper, envelopes, or a few sheets of your own failed handmade paper. This is what makes the sheet hold together.
- A pot or basin big enough to submerge your scraps, plus a smaller bowl or jar for soaking.
- A blender or food processor with a filled jug. Use one you do not cook with, or a thrift-store find.
- A mesh screen or mould. A hand mould and deckle is ideal, but a fine-mesh splatter screen, window screen, or a picture frame with mesh stapled across it all work.
- A shallow tray or tub to catch the sheet as water drains through the mesh.
- A sponge for pressing water out without crushing the fibres.
- Absorbent material for couching: old towels, a cotton pillowcase, or paper toweling.
- A pressing surface such as a wooden board or thick book you do not mind getting wet.
- Wire rack, drying screen, or flat surface for the final dry.
Nearly all of that can be improvised. I pulled a sheet onto a baking rack for drying and pressed against a scrap of plywood, and neither one cost more than a trip through the kitchen drawer.
Step-by-Step
The whole process runs about an hour of active work plus drying time. Here is the sequence that works most reliably.
How to Make Paper from Fabric Scraps: Prepare the Fibers
Sort your scraps and cut out anything that will not pulp: seams, elastic, interfacing, fusible backing, coatings, and the shiny synthetic lining of a coat. Then tear or snip what remains into pieces about the size of a postage stamp. Smaller pieces hydrate faster and blend more evenly.
Natural and synthetic fibres behave nothing alike here. Cotton and linen are cellulose and separate into soft, spinnable pulp. Polyester, nylon, elastane, and acrylic do not break down in water; they melt into lint and slime that gums the blender blades and clogs the mesh.
Before you commit a whole jar, run one fabric type as a test batch. Drop a couple of pieces in water and rub them between your fingers. If they soften, fray, and feel like wet felt, you are good. If they stay slick and springy, or the colour runs into the water in a cloud, set that one aside for a different project.
Soak the Scraps Until They Separate
Put the scraps in a jar or bowl, cover them with hot but not scalding water, and leave them for one to two hours. Warm water softens the fibre walls faster; you do not need to boil anything, and boiling weakens some colourfast dyes.
You will know they are ready when a piece tears easily between two fingers and no longer feels like cloth. Cotton and linen usually give up sooner than denim, which is stiffened with starch and can take closer to two hours.
One warning worth taking seriously: this is not a route for oily, chemically treated, or contaminated textiles. Workwear with solvent-heavy finishes, fabric marked for hazardous disposal, and anything carrying a bodily-fluid or chemical stain should not go in your kettle or your sink drain.
Blend the Fabric Into a Smooth Pulp
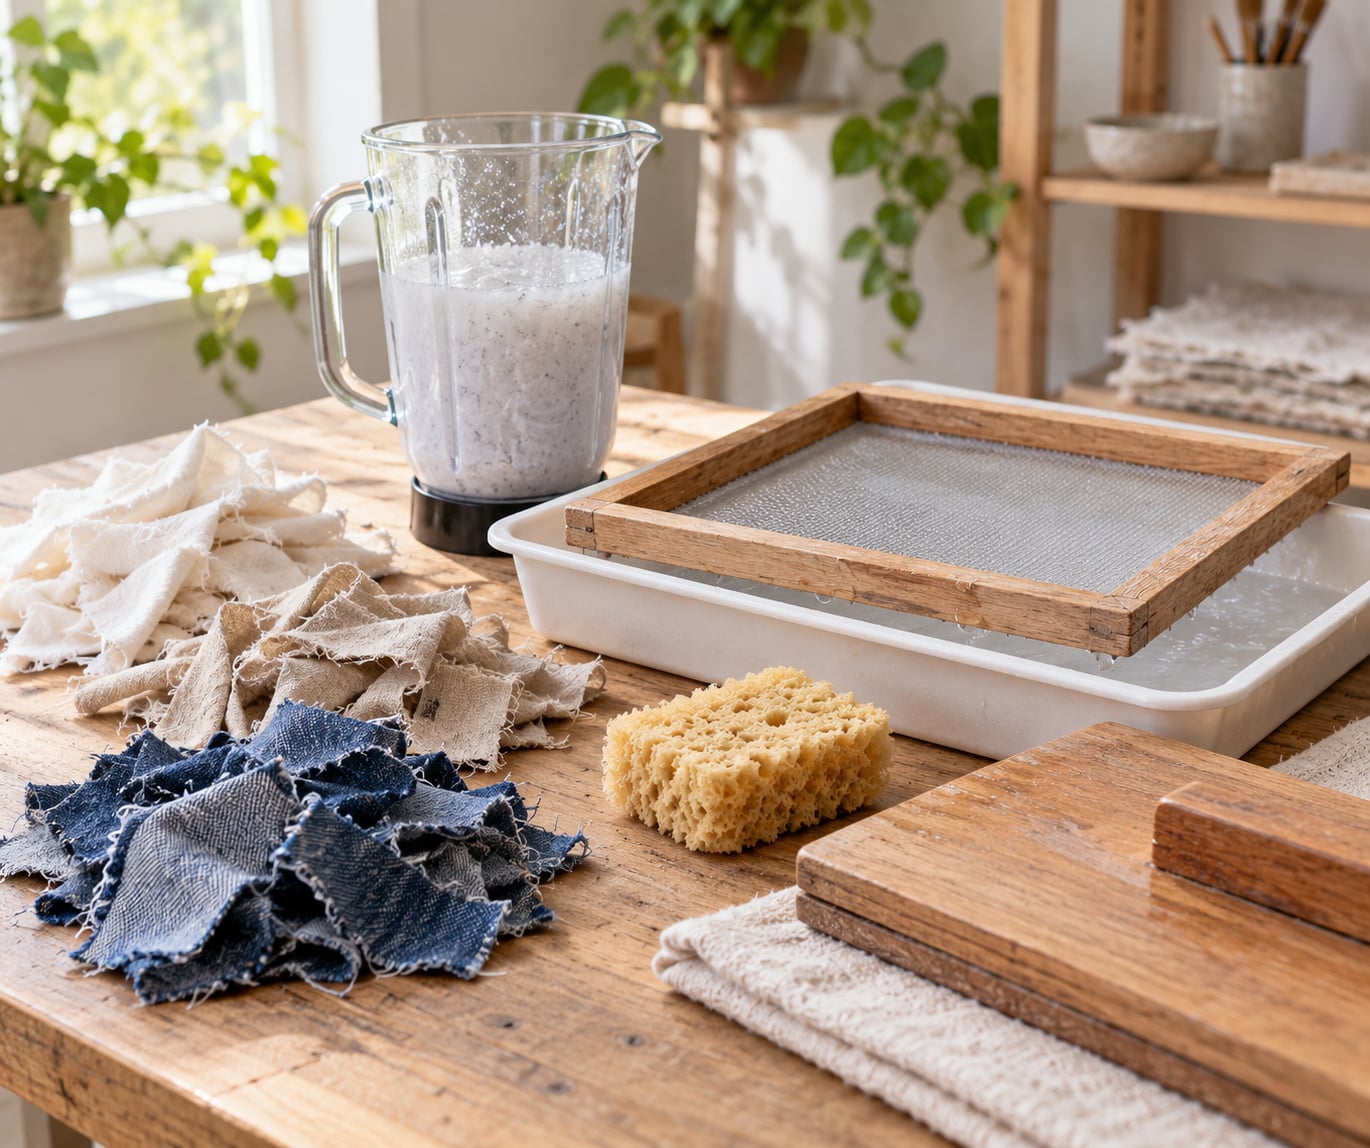
Fill the blender jug about a third with the soaked scraps, top up with water to cover them, and secure the lid. Pulse in short bursts first, then run on low for about ten seconds. You want the consistency of a thick smoothie, not a purée.
Over-processing is the main reason people give up. Running the blender for a full minute churns the fibres into a gluey paste that spreads badly and gives a dense, boardy sheet. Pulse, check, and stop while visible threads are mostly gone.
Pour the pulp into your vat and repeat with the rest of the batch. Stir each addition in so you do not end up with pockets of thick fibre. A mortar and pestle works for a couple of small test batches if you have no blender; it is slow and tiring but it will get there.
If you have visible lint and unseparated threads floating in the vat, the blend was too short or too fast. Fish them out and blend that portion again rather than adding more time to the whole vat.
Screen the Pulp Into a Sheet
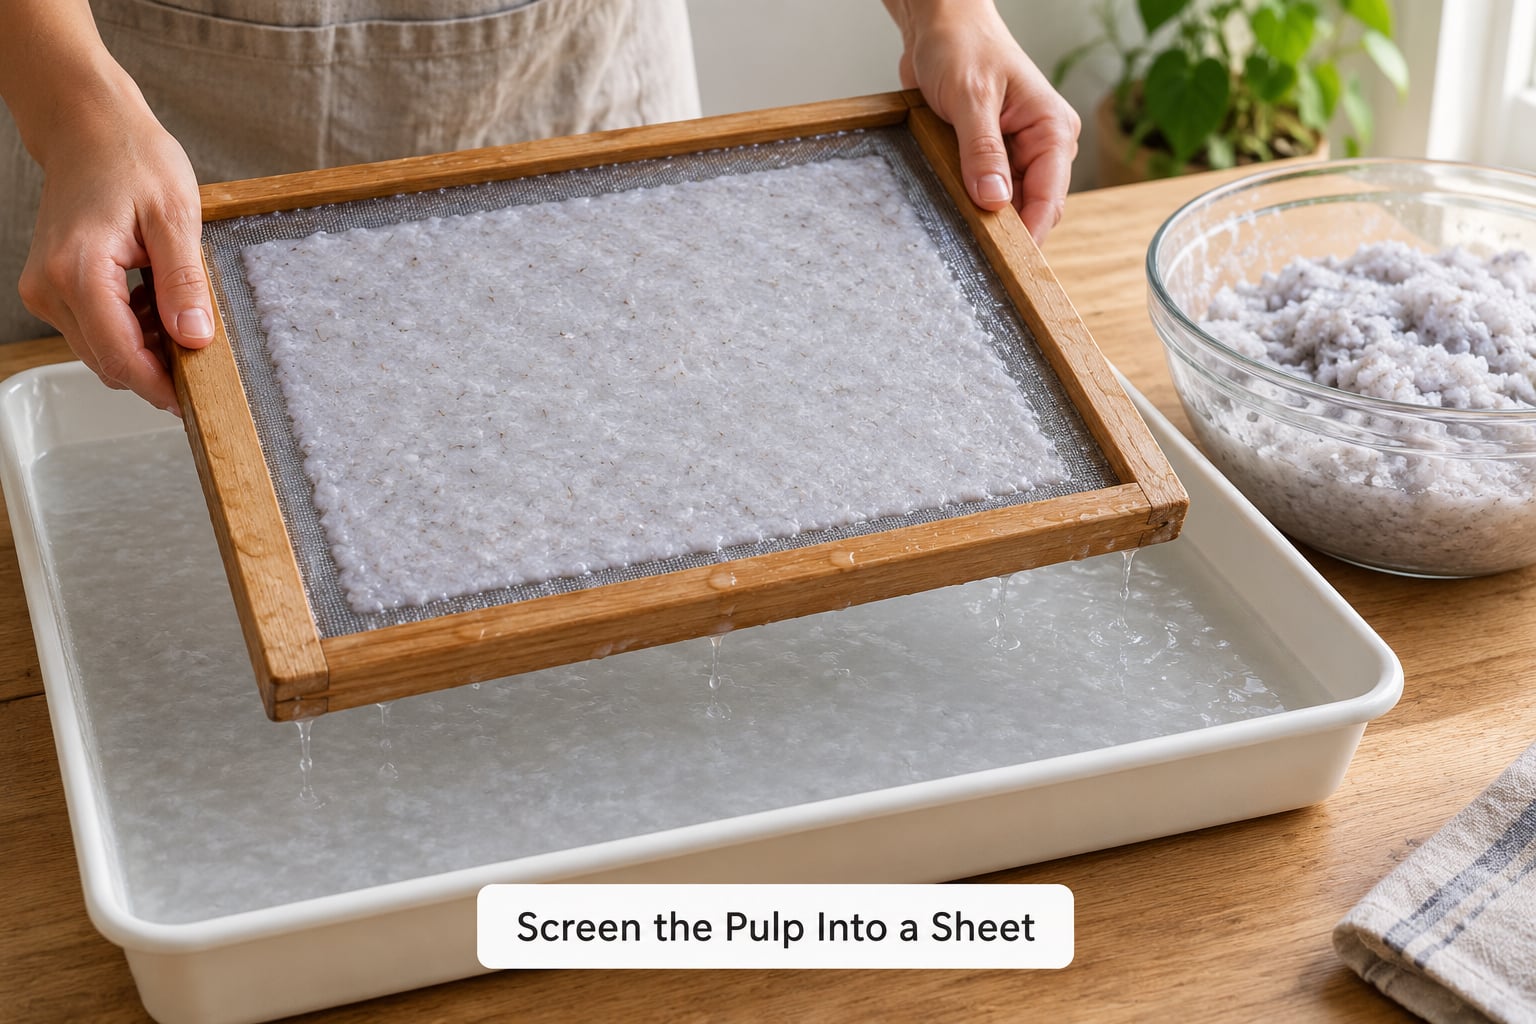
Dilute the pulp with water until it looks like thin cream and a full ladle covers the bottom of the tray in a thin layer. Hold the mesh screen over the tray, lower it into the slurry, and stir gently just under the surface so fresh pulp moves onto the screen.
Work the frame side to side in small shakes. That motion lets water drain and fibres find each other, which is what forms the sheet. Look for an even, continuous layer with no bald patches.
Three things go wrong here. If the pulp drains straight through, you diluted too much and need to add more pulp before the next attempt. If it forms lumps, you stirred too hard or loaded the screen too heavily. And if the layer is thin and holey, the shake was too forceful.
A rough starting quantity helps: about half a cup of dry pulp per 5.5 by 8.5 inch sheet. Guessing above or below that changes the thickness more than anything else you do.
Press and Transfer the Wet Sheet
Lay a piece of absorbent material on a board. Invert the mould onto it and let the sheet drop, then peel the mesh away from the back. Peel slowly, from one corner, with the mould kept flat rather than lifted at an angle.
Sponge the water out with light presses straight down. Do not scrub and do not slide the sponge across the surface; that crushes fibres and lifts the sheet. Pressing hard gives you a smooth, denser sheet. Gentle pressing gives a softer, more textured one with visible fibre.
Check the layer against the light or hold it up to a window. A continuous translucent film means success; gaps mean thin spots you should patch with pulp before drying, because dry holes cannot be filled.
Dry the Paper Flat or on a Screen
Lay the couched sheet face up on a dry towel, cover it with another towel or sheet of paper toweling, and press with a weight. Leave it overnight, then lift the paper. Depending on thickness and humidity, it needs 24 to 48 hours to dry completely, and it will still feel slightly cool and flexible if it has not.
Drying on a mesh screen or wire rack lets air move on both sides and speeds things up, but it also warps the sheet into gentle cockles that some people like and others do not. Drying flat between absorbent layers gives the smoothest result and keeps edges crisp.
Make sure the paper is genuinely dry before you store it. Cool, damp paper stored flat is exactly the condition that grows spotting and a musty smell.
Finish, Store, and Use the Paper
Lift the dry sheet off the towel, trim or tear the edges for a deckle look, and flatten under a heavy book for a few hours if it has curled. For a tougher sheet, brush a little wallpaper paste or gel medium over the surface while it is still slightly damp.
Store finished sheets flat between sheets of acid-free paper or clean unprinted newsprint, not in a stack of glossy magazine pages.
Cotton makes the softest, most absorbent sheet, good for collage and art journaling. Linen gives a smoother, crisper surface that takes ink well. Denim produces a strong grey-blue sheet with flecks, useful for covers. Wool and felt behave differently again, since protein fibres need more agitation and leave a felted rather than a papery surface. Cotton and linen are the easy first choices.
Common Mistakes
Pulp tears instead of separating. The fabric was too stiff or the soak was too short. Give denim or heavy canvas the full two hours, and add hot water rather than more blending.
The sheet is weak and floppy. Not enough binder. Tear in more paper and remix the vat; you should be able to hold a corner of the wet sheet without it folding in half.
Holes appear after lifting. You shifted the pulp on the screen or pressed with a scrubbing motion. Lower the screen flat and press straight down.
Colour bleeds into other fabric. Undyed or loosely dyed scraps. Rinse the soaked pieces in clean water until the water runs clearer before blending, and keep a batch of undyed scraps in reserve.
The sheet curls or ripples as it dries. It dried on one surface only, or too fast near a heater. Air it on a rack with air moving on both sides.
Spots and a musty smell after a week. It went into storage damp. Add two more days of drying before you file it away.
Fibre in the sink, drain blocked. Never pour leftover pulp water down the drain. Let it settle in a bucket, scoop the water off the top for the plants, and compost or bin the fibre sludge.
Two habits make the biggest difference to consistency. Weigh or measure your dry pulp rather than guessing by handfuls, and change the water in the vat between every sheet so fibre does not accumulate and thicken.
Frequently Asked Questions
Can you make paper from any kind of fabric?
No. Cotton, linen, denim, hemp and wool pulp well because they are natural fibres. Polyester, nylon, elastane, and acrylic do not break down in water and turn into lint that clogs the mesh and gums the blender blades. Also skip anything with fusible backing, coated prints, heavy seams, zippers, or buttons, since those never separate cleanly.
Does cotton behave differently from denim?
Yes. Cotton softens in under an hour and blends into a smooth, pale pulp that gives a soft absorbent sheet. Denim is stiffened with starch, so it needs closer to two hours of soaking and longer blending, and the indigo dye usually transfers to your hands, the blender, and the work surface. Denim is worth the mess once you know cotton.
What can I use instead of a blender?
A food processor with a metal blade does the same job and often copes better with stiff fibre. A mortar and pestle works for small test batches, though it takes real effort. You can also skip the blender entirely and tear the soaked fibre into a very wet pulp by hand, then break down clumps with a whisk. Expect a coarser, more textured sheet.
How do I stop the wet sheet tearing when I lift it?
Most tearing happens at the release, not in the vat. Couch the sheet onto absorbent material instead of lifting it off the mesh, peel the mould away slowly from one corner while keeping it flat, and press with a sponge straight down rather than scrubbing. If the sheet is very thin or very wet, it will not hold together, so add binder or press out more water first.
Is homemade fabric paper safe to write or print on?
It depends on the binder in the mix. A rag-rich sheet with a torn-paper binder usually takes pencil, pen, and light ink, though the texture fills pen nibs. For printing, gouache or collage work, seal the surface with a thin coat of wallpaper paste or gel medium once dry. Pure fabric pulp with no binder makes a beautiful sheet that is better treated as a collage surface than a writing one.
Conclusion
Making paper from fabric scraps is a matter of four things: sorted natural fibre, a soak, a short low-speed blend, and a sheet pulled evenly on mesh and pressed until it dries. Add torn paper as binder and the sheet will actually hold together in your hands.
So do this first. Put a handful of plain cotton or linen scraps in a jar, cover them with hot water, and leave them for an hour while you get on with something else. When you come back, blend them for about ten seconds, pull one sheet on a screen, and note how it handles. Adjust the water and the blend time on the second batch, then scale up.