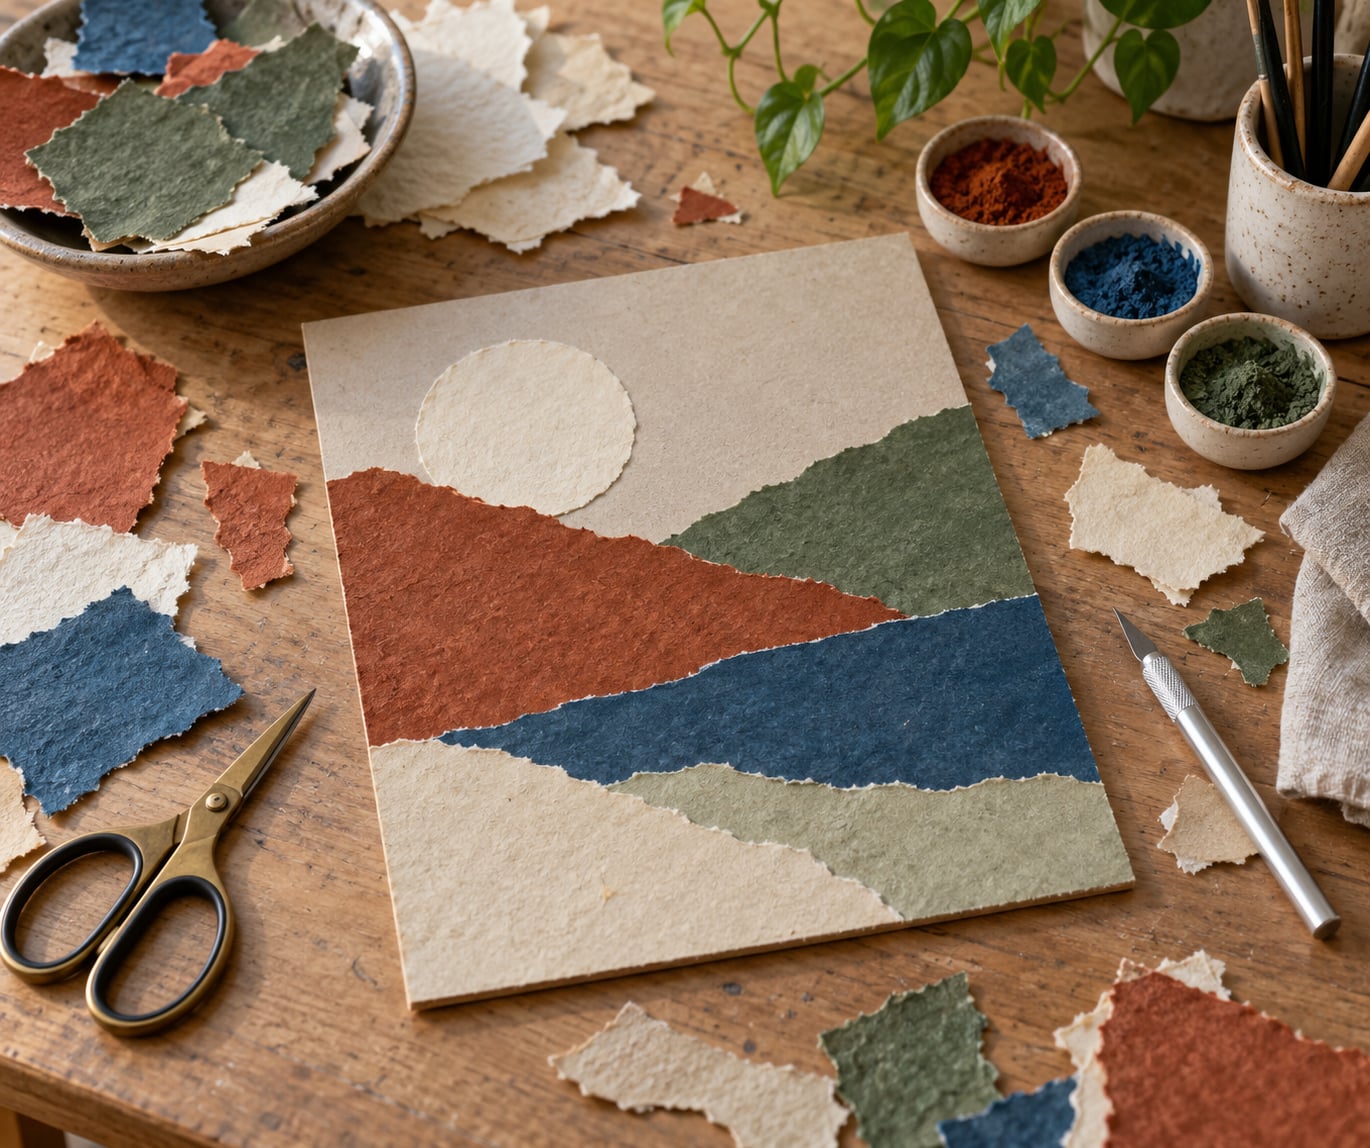
Making a collage with handmade paper takes four hands-on stages: prepare and flatten your sheets, arrange them into a composition you like, glue them down in layers, then add color and a protective finish. Most people finish a beginner-sized piece in about an hour, and no press or special equipment is involved. Knowing how to make a collage with handmade paper well comes down to one habit above the rest: decide the arrangement before anything wet touches the paper.
The word that matters here is handmade. Those sheets have deckle edges, uneven thickness and high absorbency, which is exactly what gives a collage depth and a soft, irregular border. The same qualities are also why glue spreads differently on every sheet, why pieces curl as they dry, and why a paper that looks lovely on its own can turn a composition muddy. This guide walks through the whole process in seven steps, then fixes the six mistakes beginners hit most often.
Table of Contents
- What You Need
- How to Make a Collage with Handmade Paper
- Step 1: Choose a Theme and Paper Palette
- Step 2: Prepare and Flatten the Papers
- Step 3: Sketch a Simple Composition
- Step 4: Cut the Paper Shapes
- Step 5: Layer and Glue the Collage
- Step 6: Add Color, Marks, and Texture
- Step 7: Finish and Protect the Collage
- Common Mistakes
- Frequently Asked Questions
- What is the best glue for handmade-paper collage?
- Should I tear handmade paper or cut it with scissors?
- How do I keep a handmade-paper collage from wrinkling?
- Can I use watercolor, ink, or paint on handmade paper?
- Do I need to seal a handmade-paper collage?
- How do I choose colors that work for a beginner collage?
- Conclusion
What You Need
A handmade paper collage needs very little: three to five compatible papers, an adhesive, a firm backing, and a handful of tools. Everything else is optional color.
- Handmade papers, three to five sheets. Cotton, mulberry, abaca, kozo and rag papers all work. Mix is fine, matching is not required.
- A backing surface. Heavy cardstock, primed board, watercolor paper, or a wood panel sealed with gesso. A surface around 300 gsm gives you something firm to press against and stops the paper curling at the corners.
- An adhesive. PVA glue, matte medium, gel medium, a glue stick, or spray adhesive. Pick by how much repositioning you need, see below.
- Cutting tools. Sharp scissors, a craft knife with a fresh blade, a cutting mat, and a pencil for marking shapes.
- Application tools. A flat brush for gluing and a smaller brush for detail work, plus a palette or plate for mixing.
- Pigment, optional. Watercolor, ink, colored pencil, graphite, or acrylic paint for marks on top.
- Finish, optional. Matte medium or acrylic medium as a sealant, plus mounting board for framing.
Not every adhesive behaves the same way with absorbent handmade stock, and this is the single decision that separates a smooth collage from a buckled one.
PVA glue dries clear and fast, sands smooth, and is cheap, but it soaks into thirsty paper and can ripple the sheet. Matte medium doubles as glue and a sealant: it holds paper down and leaves a velvety matte surface you can sand. Gel medium is thinner and glossier, good for translucent papers like tissue and mulberry. Glue stick grabs instantly and barely wets the surface, which makes it the safest option for thin papers, though coverage is patchy on textured sheets. Spray adhesive gives you a long repositioning window and coats evenly without soaking in, at the cost of ventilation and overspray.
Beginners usually get the best results from a PVA or matte medium for the permanent layers and spray adhesive for auditioning pieces. If you are working with very thin tissue-like papers, keep the glue stick close.
How to Make a Collage with Handmade Paper
Work in this order and each stage stays manageable. Preparing before arranging, arranging before gluing, and gluing before adding color.
Step 1: Choose a Theme and Paper Palette
Start by limiting yourself to three complementary papers plus a fourth for one accent area. Sorting by color rather than by what is beautiful on its own removes most of the hesitation later. Look at each sheet and ask what it contributes: one large quiet ground, one mid-value shape, one dark accent, one small bright note.
Judge weight and absorbency too. Thick rag paper sits differently from thin mulberry, and a heavily sized sheet will not drink color the same way as a raw one. When you mix papers of very different absorbency in one collage, expect the glue to behave inconsistently and plan for it by sealing the thirstiest sheet first.
Step 2: Prepare and Flatten the Papers
Flatten every sheet before it goes anywhere near the layout. Handmade paper arrives with cockles and ridges that turn into visible waves the moment you glue it. Dampen the back of a sheet with a light mist, lay it between two clean sheets of heavy paper, and press it flat under something heavy for a few hours. A book is a perfectly good weight.
While you have the sheets out, brush off loose dust and trim off any edge that is badly crumpled rather than trying to flatten it. If you plan to print or write on the surface, test a drop of water first. Unsized papers feather instantly, sized ones hold a line, and knowing which you have prevents a ruined sheet halfway through.
Step 3: Sketch a Simple Composition
Make a thumbnail the size of a postage stamp before you make a collage the size of a poster. Two or three rectangles and one circle are enough to test where the eye lands and how much empty ground you want to keep.
Place your focal point off center, usually on a third rather than in the middle. Vary scale deliberately: one shape noticeably larger than the rest, one noticeably smaller. Sort your paper into light, middle and dark groups as you work, because a strong value range does more for coherence than any amount of color matching. If you are building an abstract landscape collage, the value range is what keeps the horizon readable.
Step 4: Cut the Paper Shapes
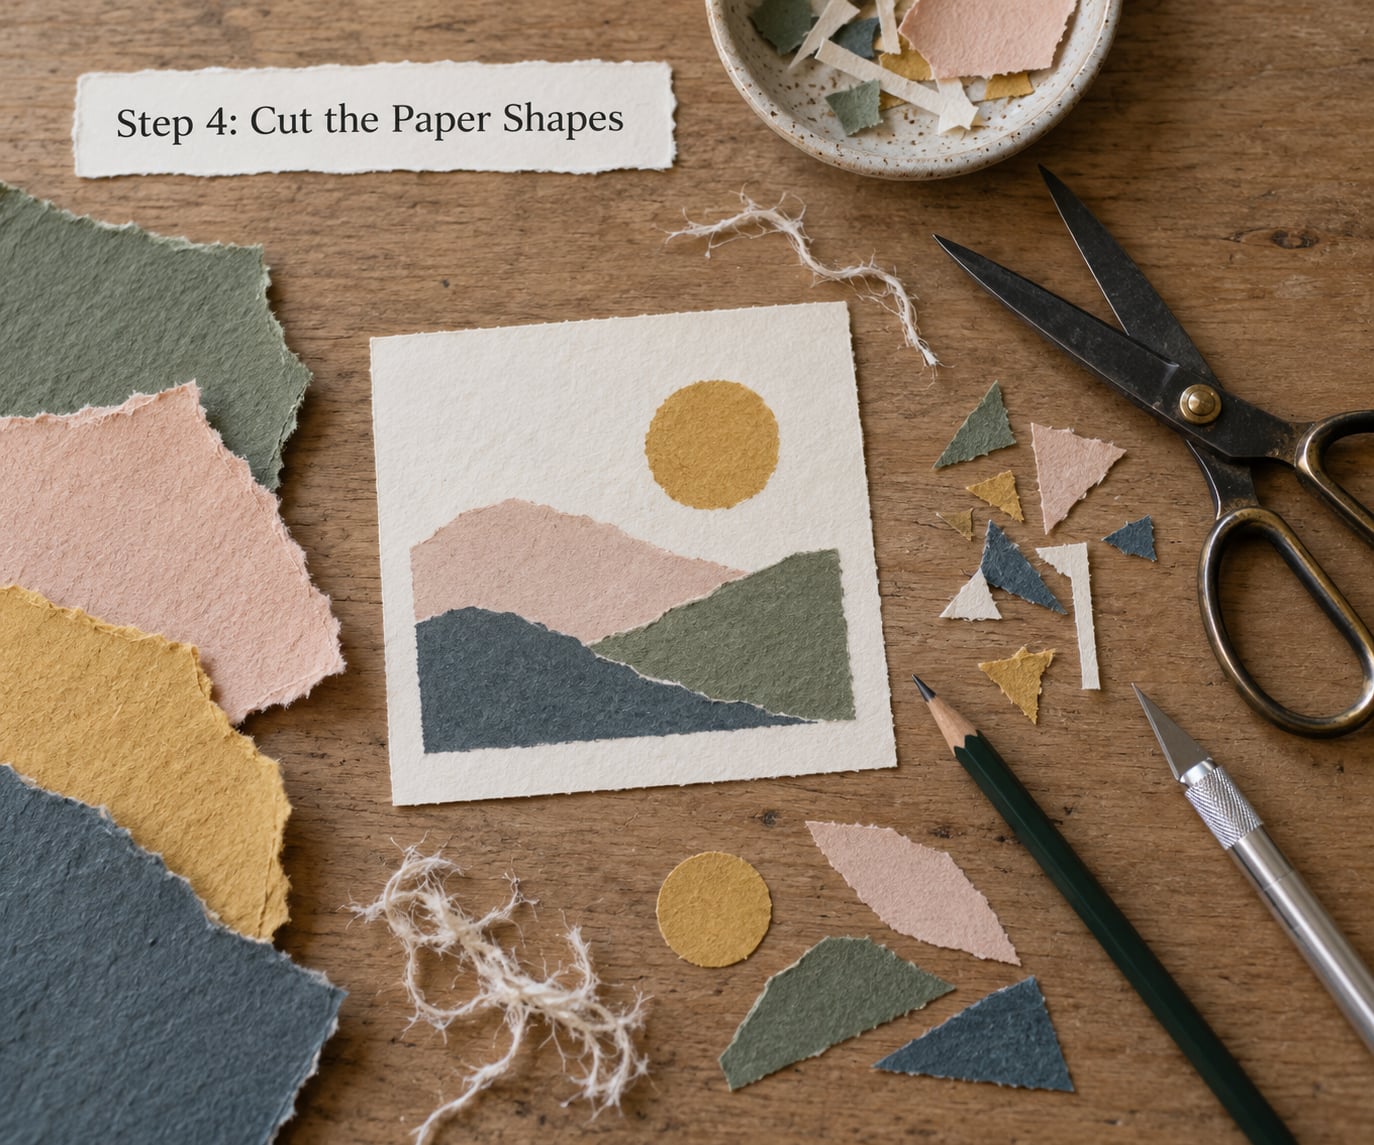
Tear organic shapes and cut straight ones, and use both. A torn edge exposes the fibers of a handmade sheet and gives a soft, irregular line that reads as intentional; a cut edge gives control when you need a clean border or a strip. Tear with the sheet flat on the table, pulling gently along a line so the fibers separate evenly rather than shredding.
Keep a consistent visual weight across the composition. A large torn shape carries more visual weight than a small cut one, so balance them rather than cutting everything into similar sizes. Work in groups and stay loose, keeping offcuts because they become the strips and small accents that fill gaps later.
Step 5: Layer and Glue the Collage
Glue the largest areas first and work up to the small details, so nothing important gets buried. Test the whole arrangement with spray adhesive or dry-fit it, then lift it piece by piece onto the backing in the same order you planned.
Apply adhesive in a thin, even layer and slightly beyond the edge you want to keep. Too much glue is the main reason sheets buckle, because it takes longer to dry and the shrinking happens on one side only. If the glue has not grabbed yet, you can usually lift a piece within a minute or two and reposition it, so test lightly first. Press each layer down evenly with the flat of your hand or a clean sheet of paper, then move on.
To dry flat, sandwich the work between two sheets of clean paper and weigh it down evenly across the whole surface. Heavy books in one corner bend the sheet; a flat even weight across the full area keeps it where you put it.
Step 6: Add Color, Marks, and Texture
Add color with restraint and the paper texture stays visible. Transparent watercolor washes or ink glazes sink into the fibers and tint without hiding what is underneath; opaque acrylic covers a section completely, which works best when you want one deliberate block of solid color.
Keep the focal area the most contrasted and let the outer areas settle down. Colored pencil, graphite hatching and pencil outlines are useful for defining an edge or tying two papers together where they meet. A transparent wash over a paper you disliked often solves the problem faster than finding a replacement.
Step 7: Finish and Protect the Collage
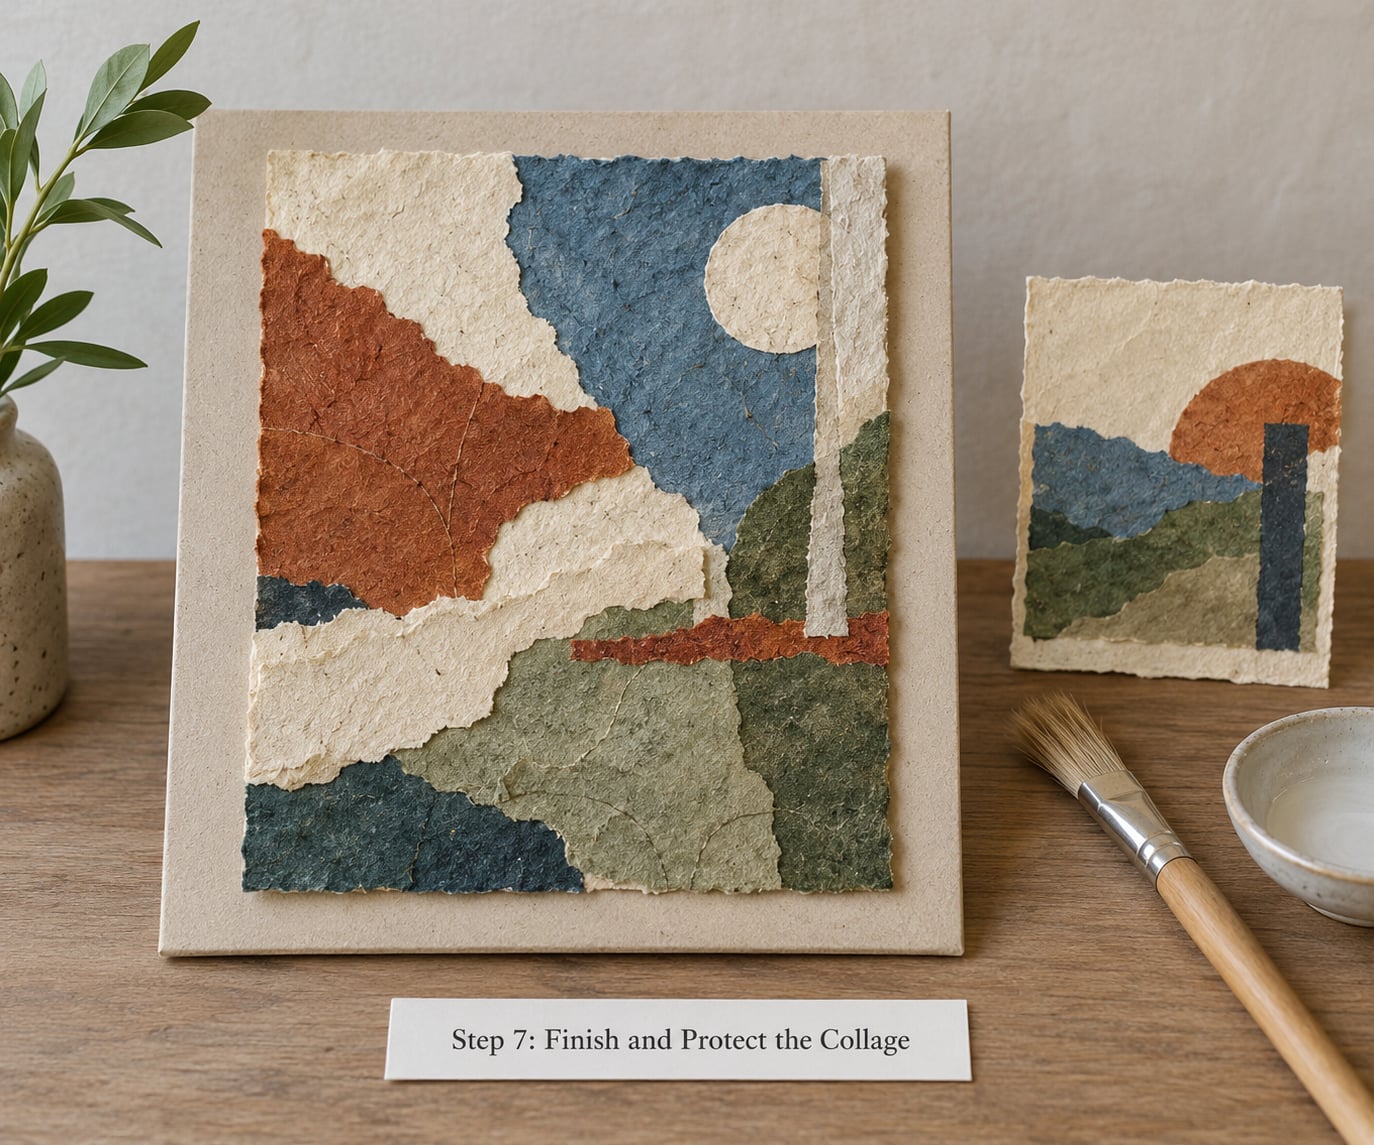
Wait until every layer and every mark is fully dry before finishing, which usually takes overnight on absorbent paper. Then decide whether the surface needs protection. Matte medium applied with a soft brush in thin coats seals fiber, deepens color and leaves a velvety finish; acrylic medium is tougher and better suited to work that will be handled.
Add a small number of final details once the surface is sealed, such as a few light highlights or a drawn line, and let them cure. Mount the finished piece to a rigid board with a small border showing if you want it framed, and keep it out of direct sunlight and damp storage. Handmade papers are usually acid-free, but recycled and found papers may not be, which is worth knowing before you frame something.
Common Mistakes
Almost every failed handmade paper collage comes down to one of six things, and each has a simple fix.
The paper buckles while drying. Too much adhesive, applied unevenly, or an absorbent sheet glued too wet. Use less glue, spread it thinner and evenly, and press the work flat under an even weight until it is completely dry.
Layers lift or peel later. The glue dried too fast, or you applied it only at the edges. Cover the whole back of the piece and press it firmly for a minute before moving on.
Colors turn muddy. Too many mid-value colors sitting next to each other with no clear light or dark. Sort your papers into light, middle and dark, and cut the mid-tones back.
The composition feels crowded. Every piece is roughly the same size. Cut one shape noticeably larger, remove two or three small pieces, and let some background show.
The glue shows through the paper. A watery adhesive soaking into a thin sheet. Switch to a glue stick or spray adhesive, which coats the surface rather than soaking in, or seal the sheet first.
You cannot find the focal point. Contrast is equal everywhere. Make the center area the highest contrast, either the darkest or the lightest, and soften everything around it.
Frequently Asked Questions
What is the best glue for handmade-paper collage?
PVA glue or matte medium work best on most handmade papers. Matte medium doubles as adhesive and sealant, so it saves a step. Use a glue stick or spray adhesive on very thin or delicate sheets, because wet glue soaks through them and causes ripples. Whatever you choose, apply it thinly and press the layers down while they dry.
Should I tear handmade paper or cut it with scissors?
Both work, and they suit different purposes. Tearing exposes the fibers and gives a soft, organic edge that suits torn paper effects and natural subjects. Cutting gives you straight lines, strips and controlled shapes. A beginner collage usually benefits from a mix: torn grounds and shapes, cut strips and defined edges for structure.
How do I keep a handmade-paper collage from wrinkling?
Wrinkling comes from too much moisture on one side of the sheet. Use less adhesive than you think you need, spread it evenly with a flat brush, and press the piece down with a clean sheet of paper. While it dries, sandwich the whole work between sheets of paper and weigh it down evenly across the full surface rather than in one corner.
Can I use watercolor, ink, or paint on handmade paper?
Yes, and it suits the surface well. Watercolor and ink soak into the fibers and tint the sheet without hiding its texture. Acrylic paint sits on top and covers completely, so use it for deliberate blocks of solid color rather than all-over coverage. Test a small corner first, because unsized papers feather and sized papers hold a sharp line.
Do I need to seal a handmade-paper collage?
Sealing is optional but worthwhile if the piece will be handled, framed under glass, or kept in a humid room. Matte medium seals the fibers and deepens the colors without adding shine. If you only use watercolor and ink on raw paper and nothing touches the surface, you can leave it unsealed. Always let every layer dry fully first.
How do I choose colors that work for a beginner collage?
Work with three to five papers and limit yourself to a short palette. Sort your papers by value into light, middle and dark groups, since a clear value range does more to make a collage look intentional than close color matching. Give the piece one focal area with the strongest contrast and let the edges of the composition stay quieter.
Conclusion
The process that works is simple enough to repeat: flatten your papers, choose a short palette with a real range of light to dark, sketch a thumbnail with one focal point, glue the largest shapes first in thin layers, add color while keeping the paper texture visible, and seal the piece once it is dry.
Start small. Pick three complementary handmade papers, cut a few shapes, and test a thumbnail composition the size of a postcard before building anything larger. Once you see how those three behave together under glue, choosing the next paper gets much faster.