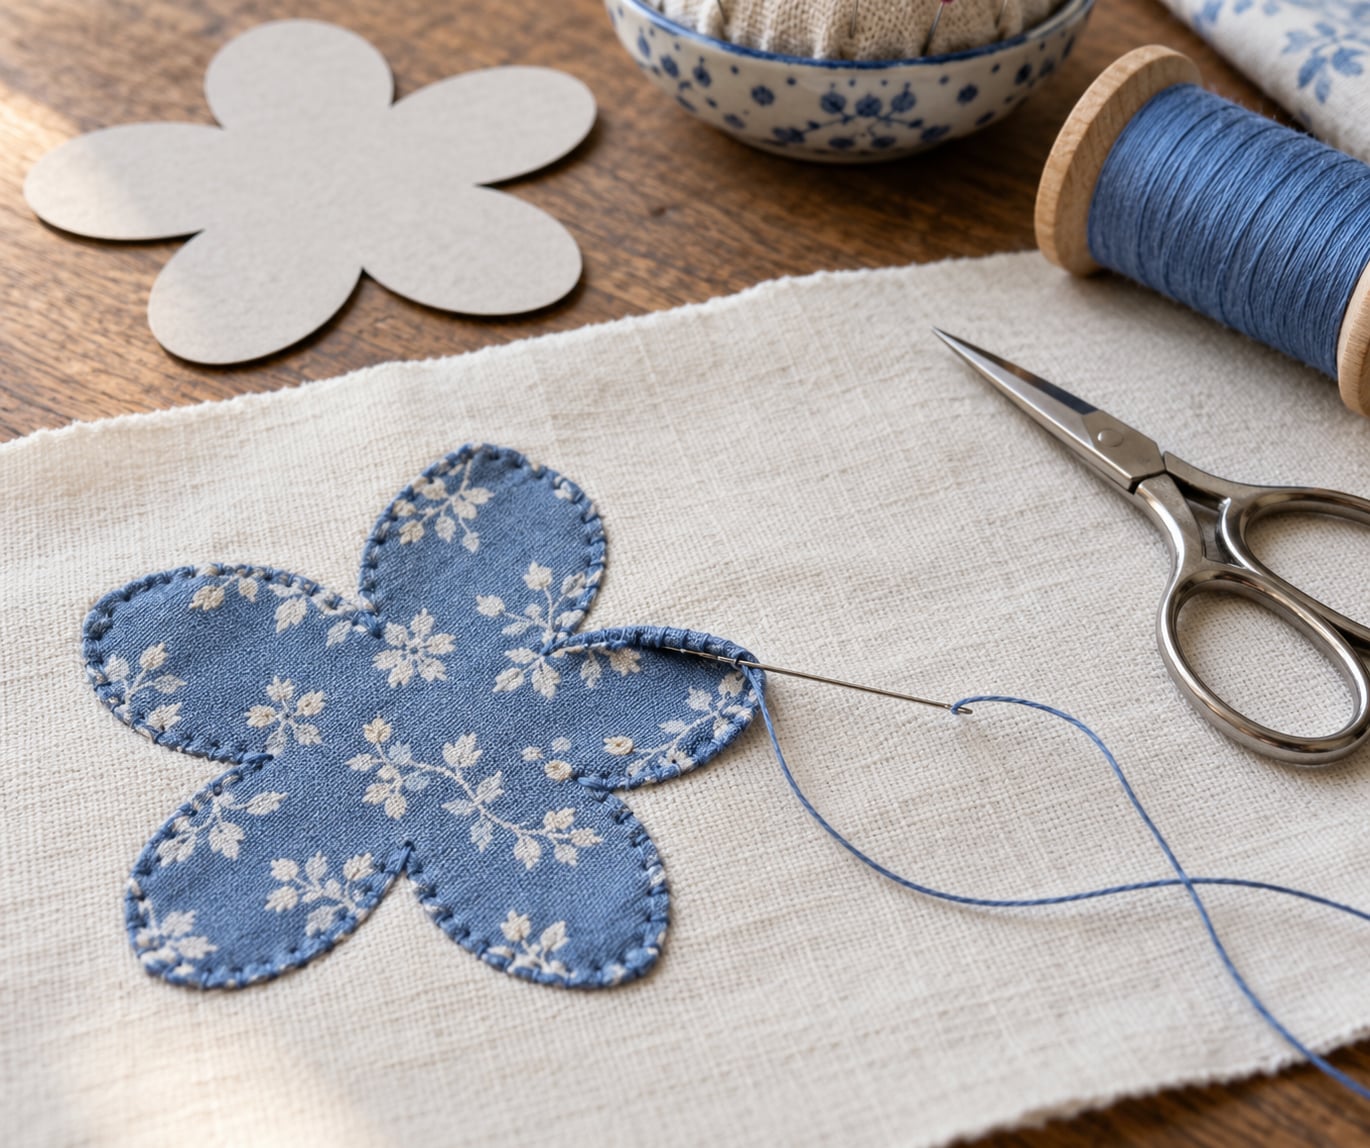
Needle turn appliqué is a hand technique where the seam allowance of a shape is folded under and stitched down to the background fabric a few stitches at a time, so nothing shows on the right side. Knowing how to needle turn applique takes one patient hour on your first shape and closer to ten minutes on the fifth, and the whole method rests on a single idea: you fold the allowance, you never cut it away.
The three types of appliqué you will run into in craft books and classes:
- Machine appliqué — raw edges stitched down with a zigzag or satin stitch, usually over fusible web.
- Fusible appliqué — iron-on web bonds the shape to the background. Fastest of the three, and the least forgiving.
- Hand or needle-turn appliqué — the raw edge is turned under with the needle and secured by hand. No web, no machine, no visible stitch line.
Hand needle turn is the slowest method and the only one that gives you clean control of curves, points and lettering. This guide covers it end to end, from washing the fabric to the last press.
Table of Contents
- What You Need
- Step-by-Step: How to Needle Turn Applique
- 1. Prepare and stabilize the base fabric
- 2. Trace and cut the applique shape
- 3. Position and secure the applique
- 4. Sew a straight running stitch
- 5. Turn and press each edge section
- 6. Secure the turned edge
- 7. Finish the applique and inspect the result
- Common Mistakes and How to Fix Them
- Tips for Smooth Results
- Frequently Asked Questions
- What are the three types of appliqué?
- What is needle-turned appliqué?
- What type of thread is best for needle turn appliqué?
- What type of stitch is best for sewing appliqué?
- What are common appliqué mistakes to avoid?
- What are some good patterns for needle turn applique?
What You Need
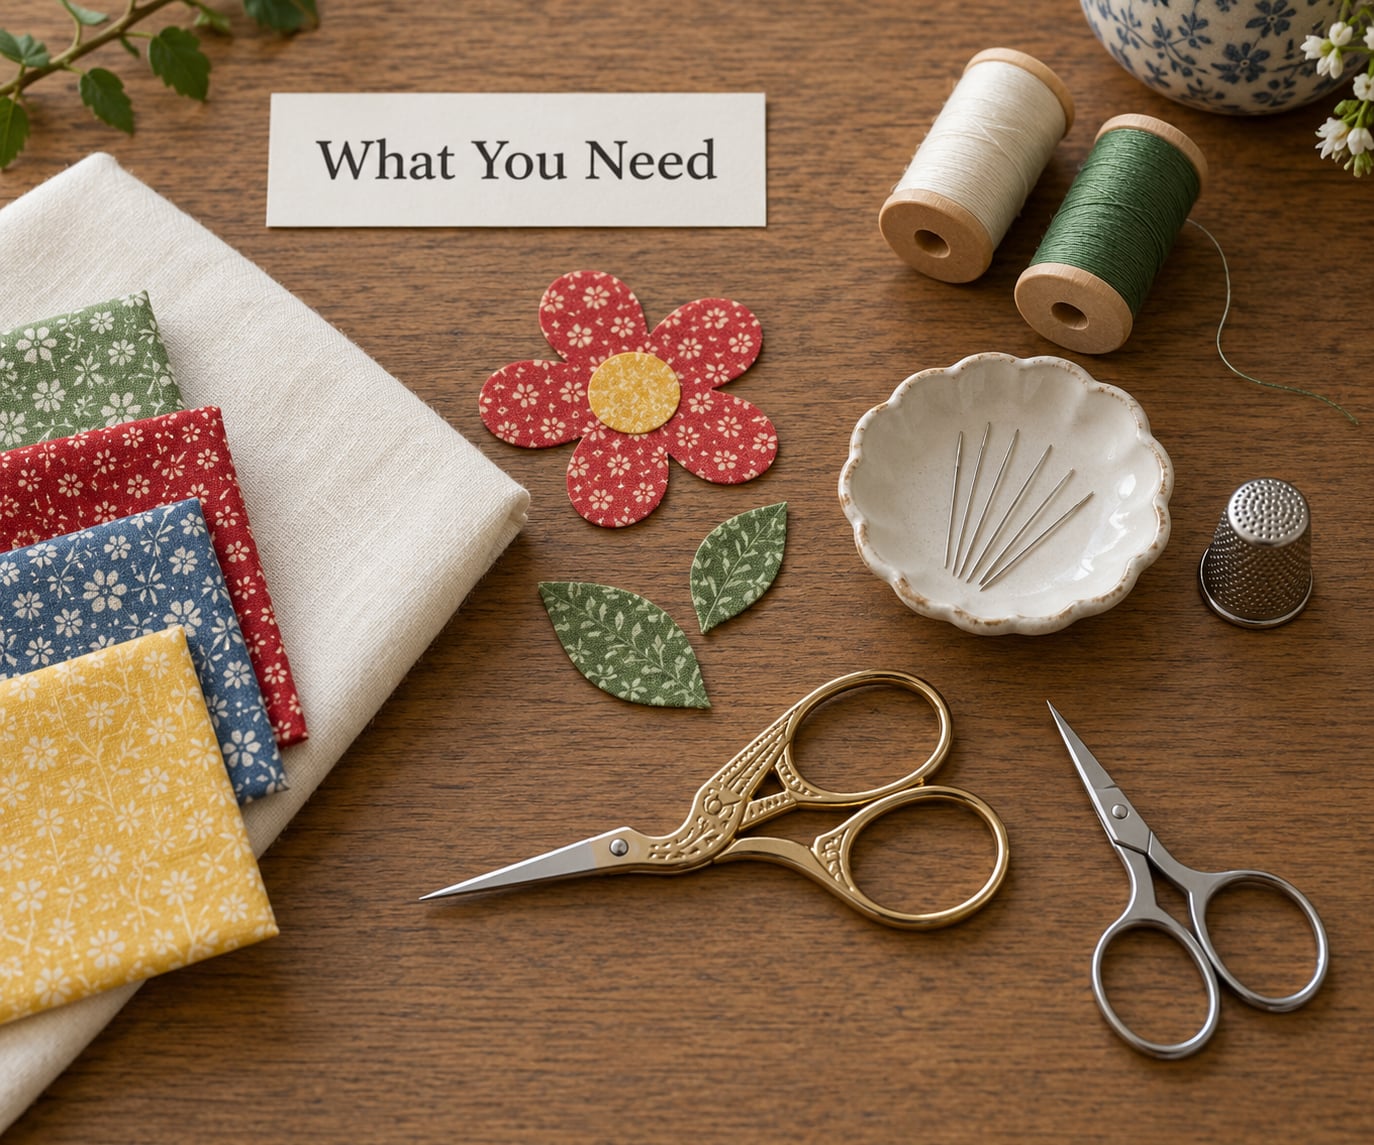
Six things get you started: a short sharp appliqué needle, fine thread in two weights, a thimble, sharp scissors, a card stock template and a marking tool. Everything after that list is a comfort, not a requirement.
- A short sharp needle, size 9 or 10. Needle sizing runs backwards — the higher the number, the shorter the needle. A short needle travels through a folded edge without punching through to the front, which is the whole reason the stitch line stays invisible. A long needle is the most common cause of stitches showing up where they should not.
- Two threads. Medium cotton thread, around 50 weight, for basting. Fine cotton or polyester thread, 100 weight, for the finished edge. Match the fine thread to the background colour or to the appliqué itself.
- A thimble. You will push a needle through two layers of folded fabric several hundred times on a single shape. A thimble is cheaper than a sore thumb.
- Sharp fabric scissors and small appliqué scissors. Dull scissors crush the edge, and crushed edges fray and refuse to fold cleanly.
- Card stock and a marking tool. A mechanical pencil or washable marker shows on pale and dark fabric alike. Card stock makes a template you can reuse a hundred times.
- Pins or a washable glue baste. Either holds the piece flat while you work. Glue baste is kinder to fingers on detailed shapes.
- An embroidery hoop, optional. It keeps a large background fabric taut and stops the whole block from stretching as you stitch. Skip it on small pieces.
These are the picks I would buy first if you were starting from nothing:
- Size 9 sharp needle — everyday needle turning on cotton and similar fabrics.
- Size 10 sharp needle — small pieces, points and lettering where you want a tiny catch.
- Size 7 or 8 needle — heavy fabric, denim, dense wool.
- 50 wt cotton thread — basting only: loose, visible, easy to pull out later.
- 100 wt fine thread — the finished turned edge, in a matching colour.
- Embroidery hoop — large backgrounds and curves, anything that wants to stretch.
For fabric, start with a tightly woven medium-weight cotton. It presses flat, folds cleanly and takes a small even stitch without fighting you. Loosely woven linen, cheesecloth and knits fray as you handle them and buckle under the fold. If you must use a fabric that frays, starch it or run a strip of freezer tape along the allowance before you cut.
Step-by-Step: How to Needle Turn Applique
Seven steps, in this order: prepare the base, trace the shape, cut with allowance, secure the piece, lay a working stitch line, turn the edge, then secure and finish. Do not reorder them, because each one depends on the last.
1. Prepare and stabilize the base fabric
Wash and press both fabrics before you cut anything. Fabric shrinks in the wash, and a base that shrinks after you finish leaves puckered edges that no amount of pressing will fix. Press the appliqué fabric on the right side too, because a crease you trace over becomes a bump you fight later.
Stretch the base fabric into an embroidery hoop or frame if the piece is large, and pull it just tight enough to be flat. Over-tightening stretches the weave, and the appliqué then sits on a surface that will never lie flat again. It worked when the hoop fabric showed no ripples across the centre and the edges stayed put after you let go.
2. Trace and cut the applique shape
Trace your template onto the right side of the appliqué fabric with a marking tool, then cut 1/4 inch outside the line you drew. That 1/4 inch is the seam allowance you will turn under, so leaving less than that gives you nothing to fold and no way back. Plan your tracings with at least a 1/4 inch gap between neighbouring shapes so the allowances do not merge.
When you reach this step, accuracy matters more than speed. Cut the curve in one continuous motion rather than nibbling at it with short snips, and if you place a card template on the right side of the fabric and cut around it, you get the allowance for free.
You are done when the allowance measures a full 1/4 inch all the way around the shape.
3. Position and secure the applique
Place the appliqué piece right side down on the background so the right side ends up facing out after turning. Slide it into position, then pin through the allowance only, pushing pins in at an angle so they will not be in your sewing path. On curved shapes, pin at the curve first and work outward.
Then baste with your 50 weight thread using a loose running stitch through the allowance. Two things matter here: leave the basting thread unknotted, and never knot or stitch it tight. Every experienced quilter makes the same point about this — knotted basting has to be cut out with a seam ripper later, and that costs you far more time than the basting saved. It worked when a gentle tug on the thread lifts the whole allowance without dragging the piece.
4. Sew a straight running stitch
The working stitch line is a straight, evenly spaced running stitch that marks where the fold will sit. Use medium thread, small stitches about 1/8 inch long, and keep the line the same distance from the cut edge all the way around.
Consistency is what makes this step worth doing. An uneven line shows up later as a lumpy, wavy edge, because the fold follows the line you drew rather than the shape you cut. Use your finger as the gauge, or mark a stitch line with a seam gauge if you have one.
You are done when the line is smooth enough that you could not pick out the low spots by eye.
5. Turn and press each edge section
This is the part everyone dreads, and it is mostly patience. Take a pin or the needle itself and roll a few millimetres of allowance up and over onto the stitch line at a time, pressing the fold with your thumbnail as you go. Work in short sections, never trying to fold a whole side or an entire corner in one go — that is what creates a thick, lumpy roll.
Press each section flat as you finish it, from the edge inward, and leave the rest of the shape alone until you reach it. Pressing the whole piece early sets creases in fabric you have not turned yet, and those creases fight the fold.
Use a pin to nudge the allowance around an inner curve, where the fabric naturally wants to bunch. It worked when the rolled edge is even in thickness along its whole length and no raw edge peeks out at the fold.
6. Secure the turned edge
Stitch over the turned edge from the wrong side of the allowance, catching tiny bites through the raw edge and a few threads of the background fabric only, about every 1/8 inch. This is often called a ladder stitch, and its job is to hide the raw edge inside the roll while anchoring the appliqué to the base.
Keep the bites shallow and your tension gentle. Pulling hard draws the base fabric up into small puckers, and a needle that passes through the appliqué instead of the background leaves a row of marks on the front that defeats the purpose of the technique. Stop at curves, turn a curve in two or three bites rather than one long one, and work your way around the shape until you are back at the start.
You are done when the raw edge is fully enclosed and you can run a fingertip along the seam without catching on anything.
7. Finish the applique and inspect the result
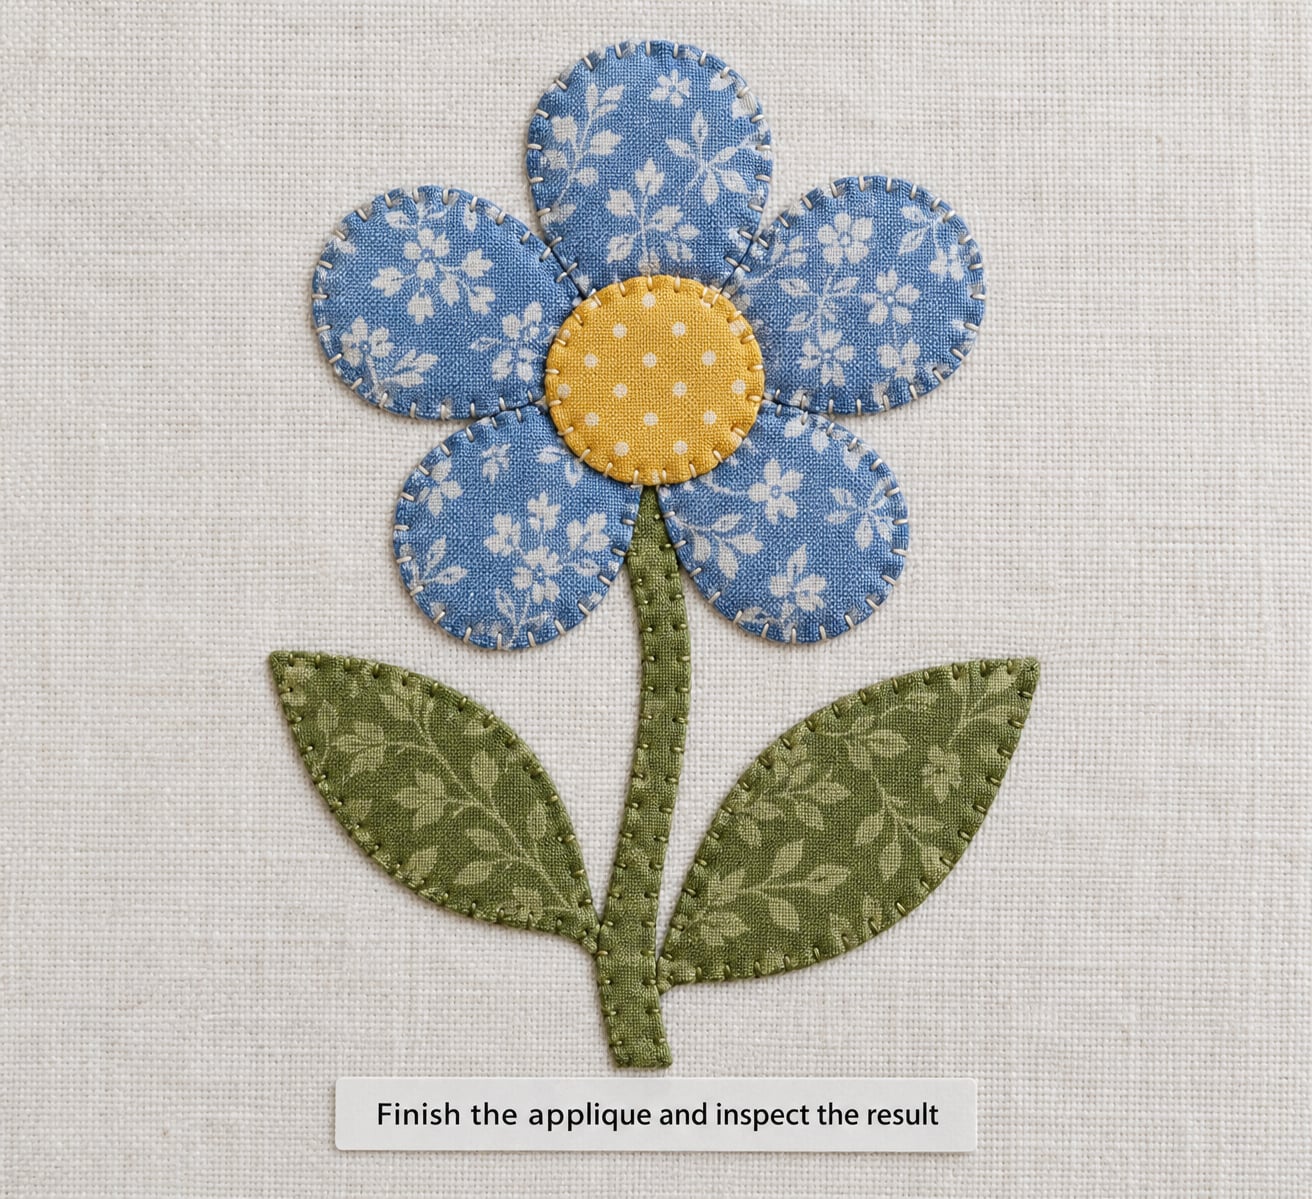
Knot off at the back with a small stitch or two, trim the thread close, then pull out the basting. Cutting the basting stitches and sliding the needle through them is far quicker than ripping them out. Press the finished piece from the wrong side first, then from the right side over a towel so the seam line does not flatten into a hard ridge.
Then inspect the work properly, before you call it finished. Look for gaps where the fold opened, puckers along a curve, an allowance that is noticeably wider on one side than the other, loose threads and any visible marks on the right side. A gap is fixed by catching the raw edge with a few more ladder stitches. A wide spot means the stitch line drifted, and it can be trimmed back once it is secured.
That inspection is the real difference between a piece that looks hand-made and one that looks machine-perfect in the wrong way.
Common Mistakes and How to Fix Them
Nearly every needle-turn problem traces back to one of eight things, and they cover almost everything that trips people up when they learn how to needle turn applique. Here they are with the fix for each.
- Leaving less than 1/4 inch of seam allowance. There is nothing left to fold, so the edge frays and cannot be turned. Cut further out before you start, not during.
- Using a long needle. It punches through the back of the fold and puts visible stitches on the front. Move to a size 9 or 10 — remember, the higher the number, the shorter the needle.
- Turning a whole corner in one go. That builds a thick lump. Turn corners in two or three small steps, pressing flat between each, and clip inside corners so the fabric can fold.
- Knotting or stitch-tightening the basting. You will tear the background fabric getting it out. Baste loose, leave it unknotted, then cut and slide it out.
- Stitching through the appliqué instead of the background. Marks appear on the right side. Lift your needle position so each catch takes only a few background threads.
- Skipping clipping and notching. On curves, clip almost to the stitch line at regular intervals; at points, notch deeply. Fabric cannot bend around a curve if the allowance is still a solid ring.
- Stitching too tightly. Tight thread puckers the base. Use a fine thread and let the needle do the work.
- Ignoring fraying as you work. Edges that fray mid-process are impossible to fold. Starch the fabric, use freezer tape on the allowance, or choose a tighter weave.
Tips for Smooth Results
- Turn in small bites. Two or three millimetres at a time, pressed flat between each. Almost every lumpy edge comes from turning too much at once.
- Clip curves generously. Little snips every 1/4 inch let the allowance hug the curve. Points need deeper notches so the fabric has room to fold without blunting the tip.
- Match fabric weights across the shape. A heavy appliqué on a light background will always pucker. Test with two layers in your hand first.
- Cut small pieces last, and label them. Pin them to the base immediately. Tiny shapes with inner cutouts get lost faster than you expect.
- Large shapes need more support, not more tension. If the base stretches as you stitch, add a light stabiliser behind it before you start.
- Try reverse appliqué as a shortcut. Putting the seam line exactly on the fold means there is no allowance to turn at all — the easiest entry point for a first piece.
- Light badly lit work and you will stitch badly lit stitches. A magnifier is not a luxury at this scale; the stitch is genuinely tiny.
- Budget your time honestly. Most beginners underestimate by three. Small shapes run 10 to 20 minutes each once you are practised, and a full hour for the first one is normal.
Frequently Asked Questions
What are the three types of appliqué?
Machine appliqué stitches raw edges down with a zigzag or satin stitch, usually over fusible web. Fusible appliqué bonds the shape to the background with iron-on web and is the fastest option. Hand or needle-turn appliqué turns the raw edge under with the needle and secures it by hand, giving an invisible stitch line and precise control of curves and points.
What is needle-turned appliqué?
Needle-turn appliqué is a hand-sewing technique in which the appliqué piece’s seam allowance is folded under and stitched down to the background fabric a few stitches at a time, hiding every stitch inside the fold. The result is a smooth, seamless edge with no visible stitching on the right side and no fusible web. You need a short needle, a fine thread and about an hour for a first shape.
What type of thread is best for needle turn appliqué?
A fine cotton or polyester thread in the 100 weight range, in a colour matching the background or the appliqué, keeps the stitch line invisible. Use a heavier 50 weight cotton thread only for basting, and leave it unknotted so you can pull it out later. If you use 100 weight thread, make your quilter’s knot with eight to ten wraps or it will slip out.
What type of stitch is best for sewing appliqué?
The needle-turn stitch, sometimes called a blind or lap stitch, is the best choice. The needle emerges just outside the appliqué edge, travels a short distance along the fold, and catches only a few threads of the background fabric. Securing the turned edge with a ladder stitch over the raw edge gives the same invisible result on curved shapes.
What are common appliqué mistakes to avoid?
The usual problems are a seam allowance under a quarter inch, using a long needle instead of a short size 9, turning a whole corner in one go, knotting the basting thread, stitching through the appliqué instead of the background, skipping clipping and notching on curves, and stitching too tightly. Each one is avoidable with a slow, even hand.
What are some good patterns for needle turn applique?
Start with simple geometry such as squares, half-triangles, circles and scalloped borders, then move to leaves, lettering and scenic shapes. You can also draft your own template on card stock: draw or trace the shape, leave at least a quarter inch around it, cut out the card, and pin it to the right side of your fabric to trace around.
Start with a simple shape on a small square of tightly woven cotton, cut a full quarter inch of allowance, and turn the edge in small bites. Once the fold feels routine, curves and points stop being difficult and simply become slower.