A mitered quilt binding corner is two strips of binding meeting at a clean 45-degree point instead of overlapping and bunching. To get one, sew your binding to within a quarter inch of the corner, backstitch, fold the strip straight up at a 45-degree angle, fold it back down so the raw edges line up with the next side of the quilt, then pick up your needle and sew the next side. It takes about ten minutes per corner, and almost every problem you will hit comes from one of those five moves going slightly off.
The honest part: the first corner on a quilt usually looks worse than the fourth. Binding is a skill that rewards repetition, and the gap between a lumpy corner and a crisp one is usually pressing, pinning, and a slightly longer stitch near the turn.
Table of Contents
- What You Need
- Step-by-Step
- Fold and align the first binding corner: place the strip with the raw edges matched
- Create the first miter fold: stop a quarter inch early and fold straight up
- Fold the opposite side and join the miter: bring the strip down onto the next edge
- Pin and sew the miter securely: check from both sides, then stitch slowly
- Press, trim, and repeat: open the seam toward the binding, then move on
- Common Mistakes
- Corners that bunch, pucker, or will not lie flat
- Binding seams that land on a corner
- Uneven finished width from over-lapping or under-lapping
- Bulky corners on thick quilts
- Visible stitches on the wrong side
- Tips for Neeter Mitered Corners
- Frequently Asked Questions
- Why won’t my mitered quilt binding corner lie flat?
- How do I fix a bumpy quilt binding corner I already sewed?
- Do you sew around the edge of a quilt before binding?
- Should I stop a quarter inch or five eighths inch before the corner?
- How do I miter quilt binding corners by hand?
- Do I have to miter the corners at all?
- Conclusion
What You Need
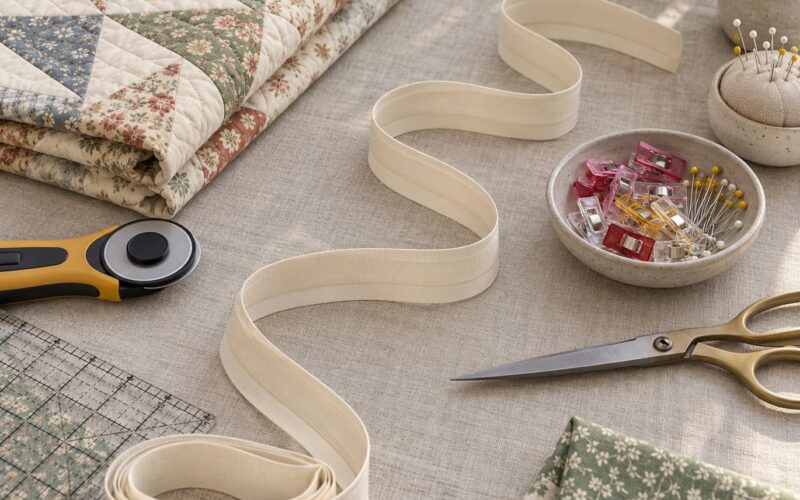
You need very little, and most of it you already own. The list matters less than having the binding pressed flat before it goes near the machine, because creases you iron in now stay there through every fold.
- Binding strips cut to width. For a 5/8 inch finished binding, cut strips 2-1/4 to 2-3/4 inches wide; wider strips give you more fabric to work with at the corner.
- Enough length. Measure the quilt perimeter, then add 8 to 10 inches for a comfortable joining tail. A 60 inch throw needs roughly 4 strips joined end to end, since strips run about 42 inches from a 45 inch fabric width.
- Sewing machine with a walking foot, set to a quarter inch seam allowance.
- Sharp scissors or a rotary cutter and a small cutting mat for trimming stray threads and bulky corners.
- Pins — the fine-sewing kind, not the giant plastic ones that will not go through a folded corner.
- Iron and a pressing mat or thick towel. Optional in theory, essential in practice.
- Matching thread, plus a bobbin thread that matches your quilt backing so stitch holes disappear on the back.
Before you sew a single inch, lay the finished binding strip out loose along the entire quilt and check that no joining seam lands on a corner. If one does, shift the starting point. This one habit prevents the most common alignment problem, and quilters on community boards mention it more than any other trick.
Step-by-Step
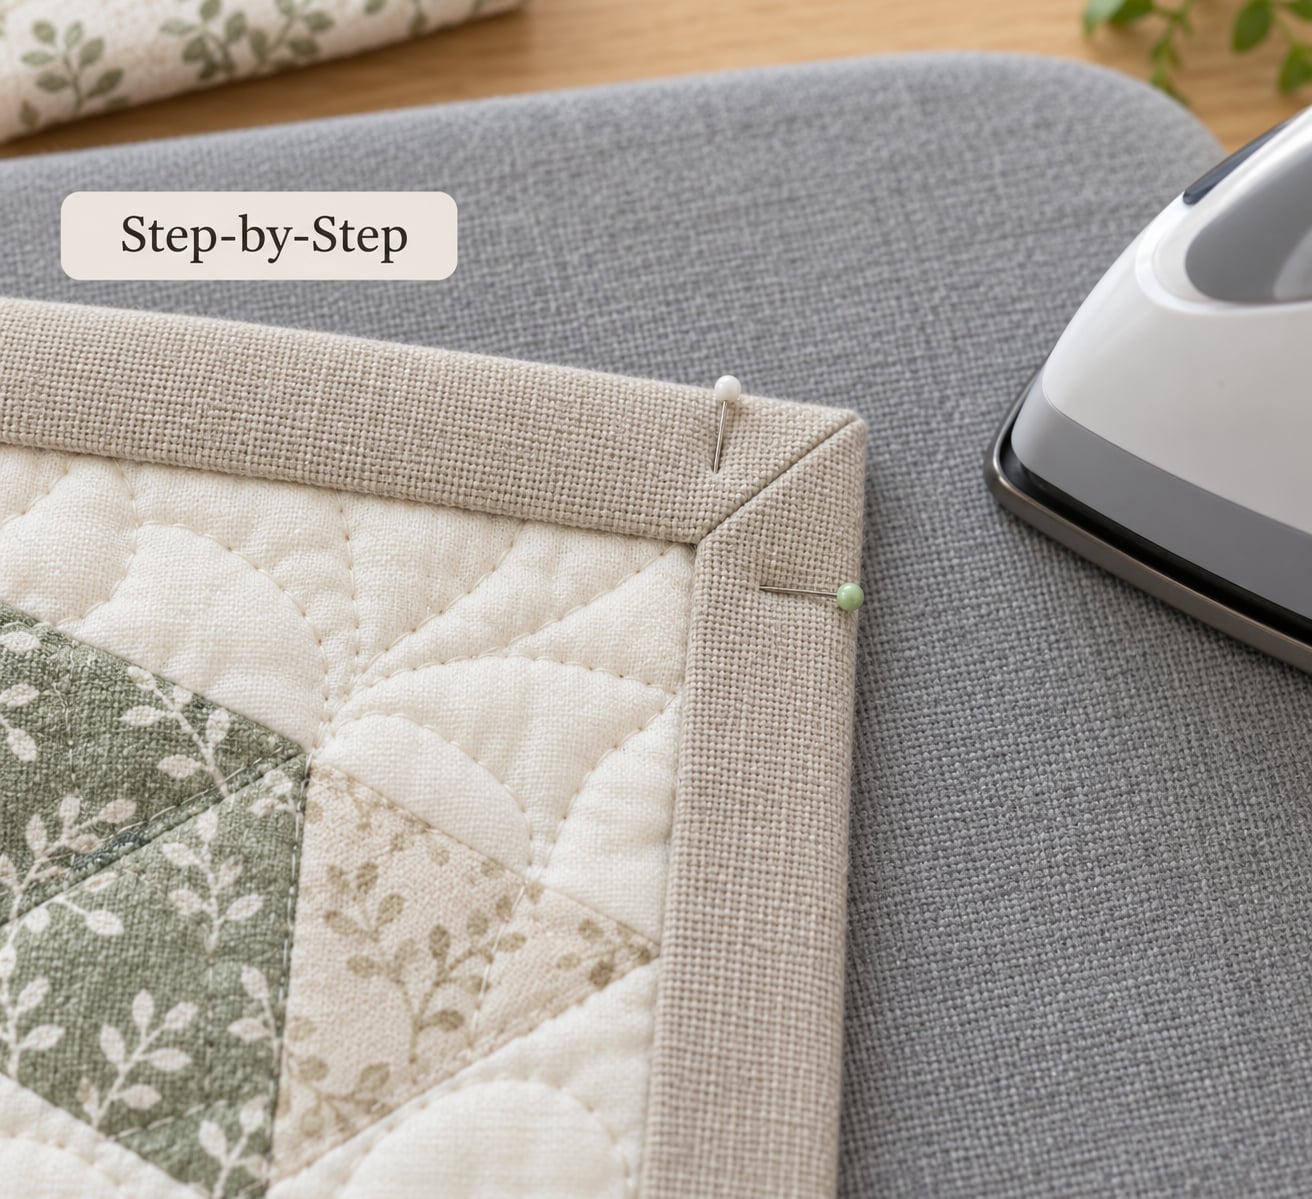
Work in this order for every corner on the quilt, starting in the middle of one side rather than in a corner. Starting mid-side means the joining seam ends up somewhere flat and out of sight.
Fold and align the first binding corner: place the strip with the raw edges matched
With the binding strip right sides together, align the raw edge of the binding with the raw edge of the quilt, about a quarter inch in from the edge. The binding should extend past the corner by roughly the width of the strip plus a quarter inch. Pin at the start and again about a foot before the corner, then sew.
Create the first miter fold: stop a quarter inch early and fold straight up
Sew to within a quarter inch of the quilt corner, then backstitch a few stitches and cut the thread. Bring the binding straight up away from the quilt at a 45-degree angle and press firmly, creating a diagonal crease. The fold should point straight out from the corner, and the crease should land exactly on the corner point of the quilt.
That 45-degree fold is the whole trick. A square corner has 90 degrees of fabric, and the binding is straight, so the extra fabric has to go somewhere. The diagonal crease absorbs it and splits it evenly into both edges, which is why the corner lies flat instead of rippling. If your crease runs shallow, the corner will be short on fabric and gap. If it runs steep, you will have excess and a lumpy edge.
Fold the opposite side and join the miter: bring the strip down onto the next edge
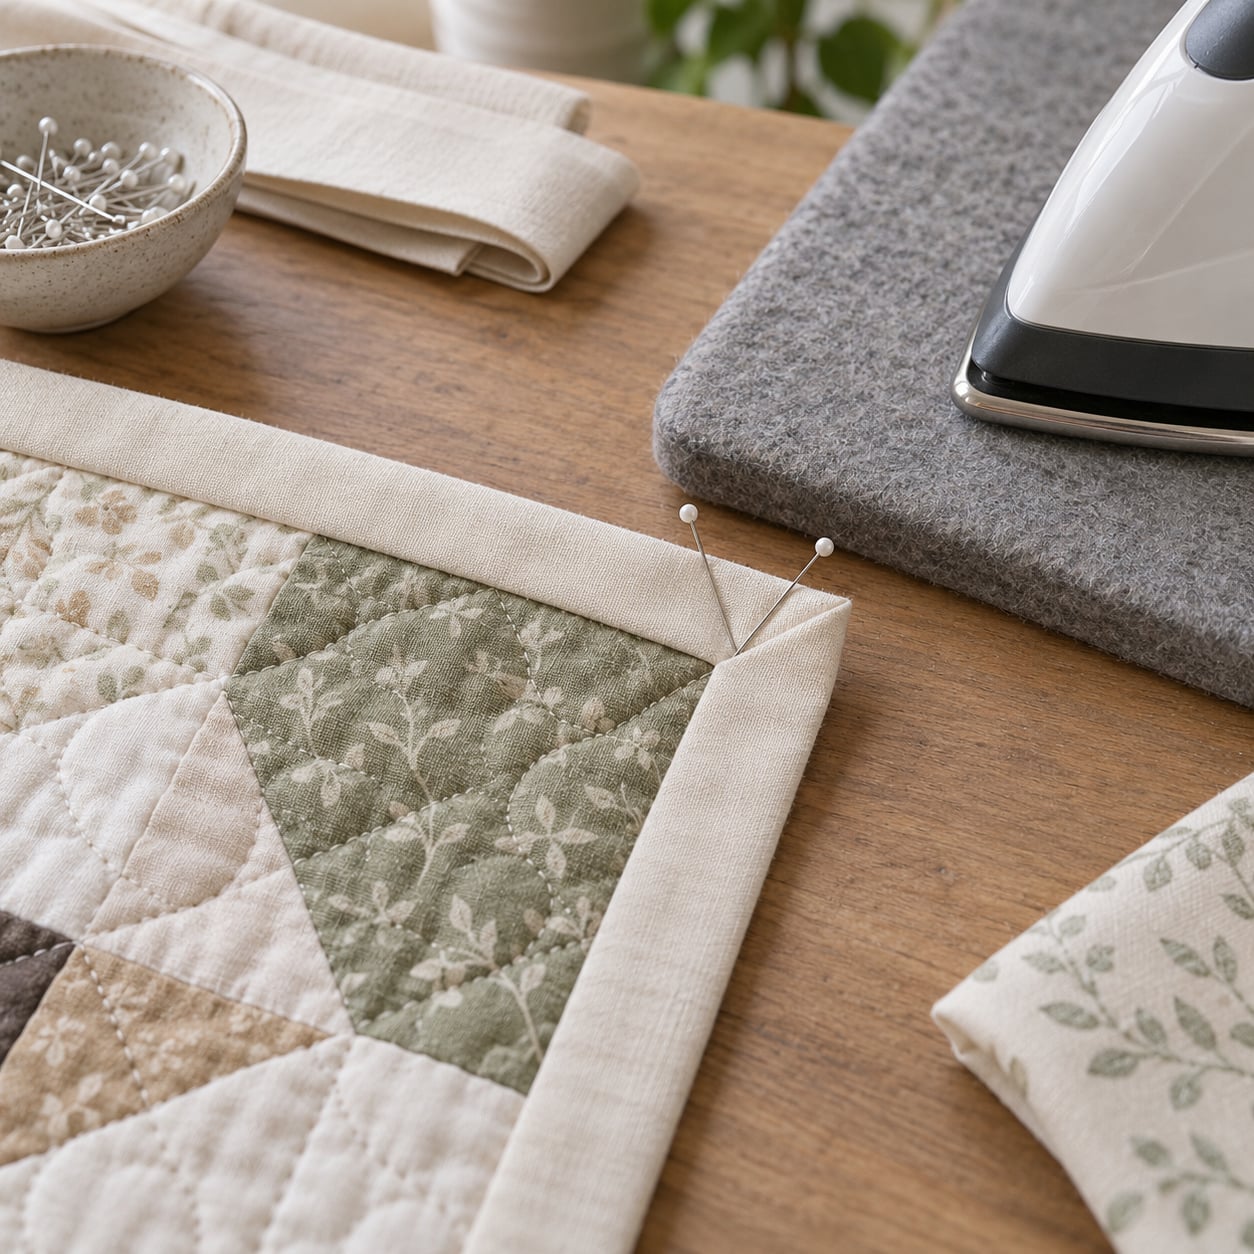
Now fold the binding back down on itself so the raw edge of the binding lines up with the raw edge of the next side of the quilt. The diagonal crease from the previous step should run from the corner point into the quilt, and the two raw edges should meet at that line. Finger-crease the diagonal to make sure both sides match before you pin.
Pin and sew the miter securely: check from both sides, then stitch slowly
Pin through the corner with two or three pins, crossing the diagonal rather than running along it. Turn the quilt over and confirm the binding is an even width on both sides of the corner. Then sew from the top raw edge of the new side toward the corner, using a stitch length of about 1/8 inch — the short stitch keeps the turn from stretching out as you sew past it.
Press, trim, and repeat: open the seam toward the binding, then move on
Stop sewing, clip the thread, and press the corner open with the seam allowances flipped toward the binding rather than toward the quilt center. Trim any stray threads or excess bulk. That is one corner done. Repeat the same five moves on the other three corners, keeping the strip taut but never stretched as you sew.
Common Mistakes
Almost every corner problem traces back to one of a handful of causes. Here is what to look for, why it happens, and what to do about it — several of these you can fix while the quilt is still in front of you.
Corners that bunch, pucker, or will not lie flat
A corner that ripples on the front usually means the diagonal crease was folded at the wrong angle or the binding was pulled tight as you sewed. Unpick the corner with a seam ripper, press the strip flat, and redo the fold with the crease running precisely from the corner point outward at 45 degrees. If the binding shifts sideways as you sew, add a pin every few inches and guide the fabric with your hands rather than pulling it.
If the corner looks fine on the front but refuses to lie flat on the back, the problem is different: the excess seam allowance is sitting under the binding. Press it open, trim the bulky layers slightly with sharp scissors, and hand-stitch from the back with smaller, more deliberate stitches so the corner has room to spread.
Binding seams that land on a corner
This is the one you can prevent entirely. Lay the strip out loose around the whole quilt first and reposition the start so no join falls at a corner. If you have already joined the ends and the seam sits on a corner, unpick it and shift the joining point to the middle of a side — the miter you already made will be ruined otherwise.
Uneven finished width from over-lapping or under-lapping
Either the diagonal crease stopped short of the corner point, or it ran past it. Press the corner open and measure: the binding should be the same width on both sides of the diagonal. If it is wider on one side, the crease was off-center. Redo the fold with the crease starting at the exact corner point of the quilt.
Bulky corners on thick quilts
Two layers of binding plus four layers of quilt and batting add up fast. Trim the seam allowance down slightly with scissors after pressing, keep your batting thinner than usual, or cut your binding strips a quarter inch narrower than the standard width. A hand-stitched back takes longer but keeps the corner flat; a machine-stitched back compresses it but adds bulk.
Visible stitches on the wrong side
Fill your bobbin with thread that matches the quilt backing, and slightly loosen the bobbin tension. Most of the reason stitches show on the back is thread tension, not the binding itself.
Tips for Neeter Mitered Corners
Small habits, and they add up fast. First, press at every stage — the fold, after sewing, and again at the end. A miter you pressed properly before sewing stays crisp; one you only press at the end may never fully flatten.
Second, pin generously and pin across the diagonal. Most corner failures are pinned too loosely, not folded wrong.
Third, drop your stitch length to about 1/8 inch for the inch or so on either side of the corner. The shorter stitch reduces the pull that makes corners pucker as you sew past them.
Fourth, use a walking foot. It feeds the quilt and binding together at the same rate, which is the difference between binding that tracks the edge and binding that creeps. If you see the binding creeping toward you, stop and re-align before you reach the corner.
Fifth, check every corner from both sides before moving on. Turning the quilt over takes five seconds and catches width problems while they are still cheap to fix.
Sixth, on curved edges, miter the same way but work in short sections and re-check the diagonal frequently — the angle of the quilt edge changes continuously, so a 45-degree fold that was right ten inches ago may not be right now. On sharp points, sew the two sides in separately and join them with a small hidden seam instead of forcing a single miter through the point.
And one last thing worth saying honestly: plenty of quilters skip mitered corners entirely and use a single-fold wrapped corner instead, because the raw edge is enclosed and nothing shows. Both finishes are legitimate. Mitered corners look traditional and crisp from the front; wrapped corners are faster and forgiving on thick quilts. If your mitered corners keep frustrating you, the wrapped finish is not a failure — it is a choice.
Frequently Asked Questions
Why won’t my mitered quilt binding corner lie flat?
The diagonal crease almost always missed the corner point, or the binding was stretched as you sewed. Unpick the corner, press the strip flat, and fold again with the crease running from the exact corner point outward at 45 degrees. If the front looks right but the back is lumpy, press the seam open and trim the excess allowance before restitching.
How do I fix a bumpy quilt binding corner I already sewed?
Use a seam ripper to remove only the stitching on the corner, leaving the fold intact. Press the binding flat, trim any bulky layers, and refold the diagonal with the crease anchored at the corner point. Re-pin with three pins across the diagonal and sew at a shorter stitch length. Most botched corners take about ten minutes to redo.
Do you sew around the edge of a quilt before binding?
If you have layered a quilt top, batting and backing, sew around the perimeter a quarter inch in from the raw edge, through all three layers, before adding binding. This stabilises the edge so it cannot stretch or grow as you sew the binding on. If you are binding a single-layer quilt top, skip the step and just clip the curve of the corners gently.
Should I stop a quarter inch or five eighths inch before the corner?
Stop a quarter inch before the corner point for a standard quarter inch seam allowance. The five eighth inch stop point you will see in some instructions belongs to a different stage of the process, the final stitch that attaches binding to the back. The rule is simple: leave exactly one seam allowance of unstitched binding at the corner, then backstitch.
How do I miter quilt binding corners by hand?
Pin the folded corner as you would for machine sewing, then work a running stitch through the folded edge and the quilt backing, staying close to the fold and leaving about one eighth inch unstitched at the corner. Keep the stitches short and even, and pull each one snug rather than tight. Press the corner open at the end so the miter point stands proud.
Do I have to miter the corners at all?
No. A single-fold wrapped corner encloses the raw edge and shows no seam, and many quilters prefer it for thick quilts where a miter adds bulk. Mitered corners give the traditional crisp point and an even binding width all the way around. Choose whichever finish you can sew evenly, because a slightly imperfect miter is more noticeable than a clean wrapped corner.
Conclusion
Do this first: sew to within a quarter inch of the corner, backstitch, and press that 45-degree fold before anything else. That one crease, anchored exactly on the corner point, is what makes how to miter quilt binding corners work at all. Press after every stage, pin across the diagonal, keep your stitch short through the turn, and check each corner from both sides. Four repetitions of the same five moves will give you a binding that sits flat all the way around.