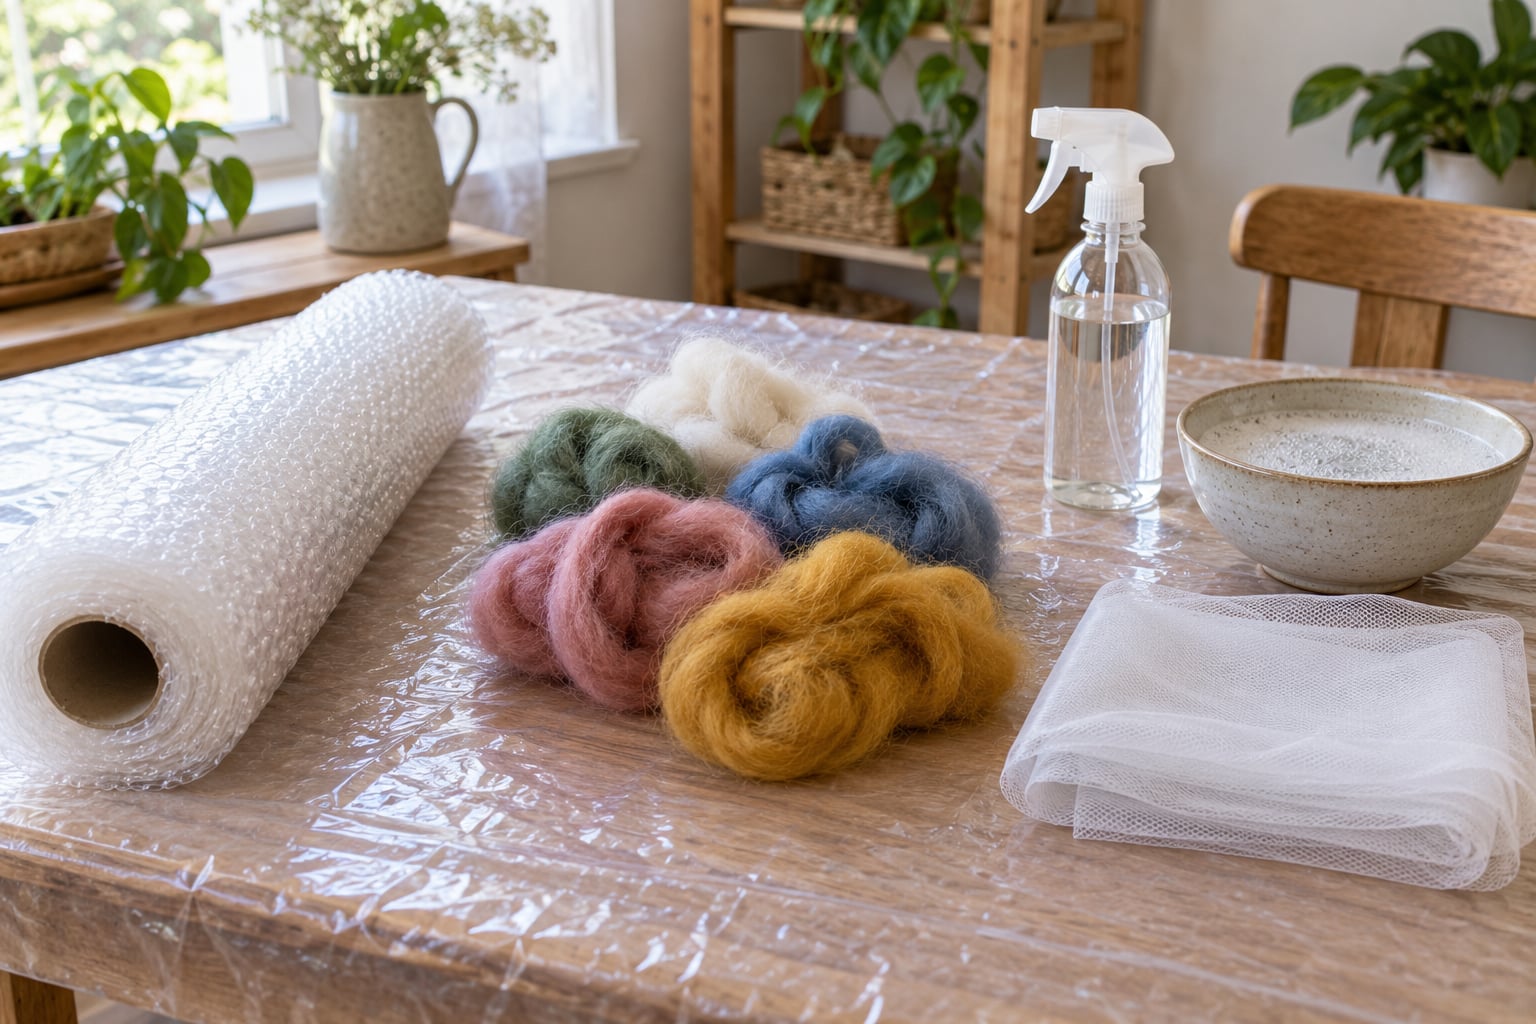
To felt wool at home, you need three things: heat, moisture and agitation. Warm soapy water opens the wool fibres, rubbing and rolling makes them snag and lock together permanently, and the finished piece shrinks by roughly 20 to 30 percent. A bubble-wrapped kitchen table, a spray bottle and some wool roving are genuinely all you need.
There are three different jobs people mean when they say felting, and the right method depends on what you are making. Wet felting turns loose wool into flat sheet fabric. Needle felting stabs wool with a barbed needle to build 3D shapes. Machine felting fulls a knitted or crocheted garment into a dense solid.
A first project takes 30 to 45 minutes of actual work plus drying time. The technique is forgiving in one direction: you can keep adding wool as you go. It is unforgiving in another, because over-felted wool shrinks hard and there is no undo. That is the only mistake worth worrying about, and the pinch test below catches it before it happens.
Table of Contents
- What You Need
- Which wool felts, and which one never will
- Plan your size before you start
- Step-by-Step: How to Felt Wool at Home
- 1. Prepare the Wool and Work Surface
- 2. Wet the Wool Gently
- 3. Rub and Full the Fibres
- 4. Add More Wool for Your Shape
- 5. Rinse, Press, and Shape the Felt
- 6. Dry the Felt Flat
- Common Mistakes
- Tips for Smooth, Durable Felt
- Frequently Asked Questions
- Can you felt wool by hand?
- What soap should I use for wet felting?
- How many layers of wool do I need for wet felting?
- Why is my wool not felting?
- Can I felt wool without a washing machine?
- Conclusion
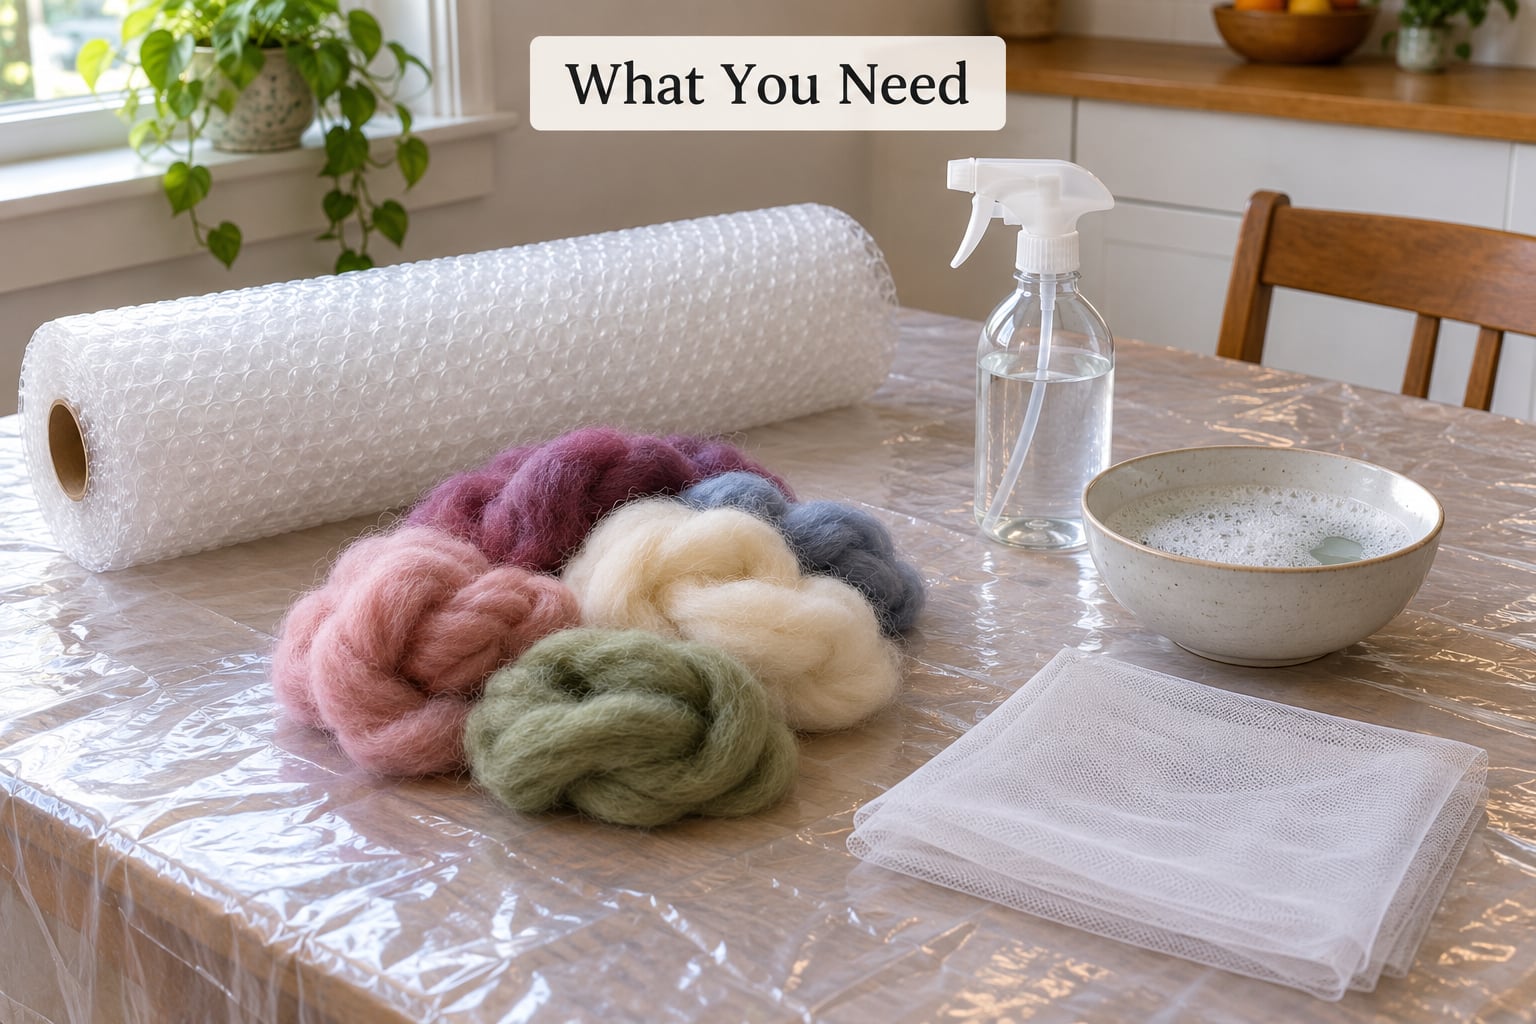
What You Need
The core kit is short. Everything else on this list is a substitute that costs less or saves mess.
- Wool roving — loose, carded wool fibre. A 4 oz skein covers roughly a 12 inch square of one layer.
- Bubble wrap — the friction surface. Bubble side up, so the bumps push into the wool from underneath.
- A mesh or tulle cover — a piece of netting laid over the wool so your hands can rub without the fibre lifting into your palms.
- A spray bottle — a repurposed vinegar bottle or a seedling sprayer works perfectly.
- Warm water and mild soap — a few drops of dish detergent per bowl, or a gentle olive oil hand soap. Soap is what lets the fibres slide instead of just getting wet.
- A waterproof surface — a plastic tablecloth, a shower curtain, or the floor of a bathtub.
- A towel — to roll the piece over for fulling.
Hand carders are optional. Pulling roving apart into a thinner, flatter cloud with your fingers is slower but works, and beginners often get better results doing it that way. If you want to card, a dog slicker brush from a pet shop does the same job for a fraction of the cost of carding paddles. A bamboo matchstick blind or a sushi mat replaces a dedicated mesh roller.
Which wool felts, and which one never will
Only wool-family fibres felting reliably. Sheep wool, mohair, alpaca, llama and rabbit all have the tiny scales that catch and lock. Everything else, including alpaca blends sold as novelty yarn, depends on what is blended in.
Check the label before you start. Superwash wool is treated so it will not felt in a washing machine, and many knitters discovering that halfway through a project is a common and expensive surprise. Acrylic, nylon and polyester do not felt at all, and a wool blend containing 30 percent or more of them will barely move.
The squeeze test takes two seconds. Pull a tuft firmly between your thumb and finger. If it makes a fine, dense, cohesive sheet instead of springing apart, it felts. If it stays airy and loose, save your time and pick different fibre.
Plan your size before you start
Felt shrinks by about 20 to 30 percent across both dimensions, which means an area loses closer to 40 percent of itself. If you want a finished mat 10 inches across, lay your roving out roughly 12 to 13 inches across. Measuring once here saves an unhappy surprise at the end.
Step-by-Step: How to Felt Wool at Home
1. Prepare the Wool and Work Surface
Lay bubble wrap bubble-side-up across your table, extending past all four edges. If you are working over a sink or in a bathtub, put a plastic sheet or shower curtain down first.
Pull about 4 ounces of roving apart and stretch it out into a thin, wide cloud. The layer should be about a quarter inch thick and roughly three times wider than it is tall, like a fringe. Tangles and thick strips are what create lumps later, so spend a minute here even though it feels like nothing is happening.
Do not cut roving with scissors. You will see shiny, plastic-looking lines where the fibre was severed and those strips will refuse to blend.
How to tell it worked: your layer should look evenly fluffy, with no visible thin spots or dense ropes. Hold it up to a window and check for gaps.
2. Wet the Wool Gently
Spray warm soapy water over the whole layer until it is thoroughly damp but not dripping. The colour darkens noticeably as it wets, and that darker patch is your guide — wet that whole patch, not just the middle.
Work the water in with the flat of your palm using slow, wide circles. You are sliding the fibres flat and spreading them outward, not pushing down. Too much pressure here compacts the centre while the edges stay loose, which is where a lot of beginner lumpiness comes from.
Cool-to-warm water works. Water hot enough to burn your hands is too hot and can felt the fibres unevenly on contact, so aim for sink-warm or a little warmer.
How to tell it worked: the wool holds its shape as one piece and no dry pale patches remain. Lift an edge gently; it should feel heavy and cool.
3. Rub and Full the Fibres
Lay your tulle or mesh cover over the wool and start rubbing the flat of your palm in small circles, working outward from the centre to the edges. The mesh stops the wool sticking to your skin and lets you apply pressure evenly.
This rubbing stage is called pre-felting. You are not trying to shrink the piece yet — you are nudging the fibres into contact so they can bond. Most beginners spend 5 to 10 minutes here, working over the entire surface, not just the soft centre.
Now do the pinch test. Pick up a small corner, squeeze it firmly between thumb and forefinger, and hold it for a few seconds. If it holds together as one dense sheet instead of flaring back into fluff, the fibres are joining. If it springs open, keep rubbing. Stopping too early is the single most common reason a finished piece delaminates later.
Fulling is the shrinking stage. Lift the piece, wrap it tightly in a towel, and roll it back and forth under your palms for about five minutes, pressing hard as you go. When the towel is damp all the way through, do the tabletop trick: bunch the piece in your hand and throw it onto the table 20 to 30 times. Each impact shocks the fibres into each other. That sounds unserious and it works remarkably well.
How to tell it worked: measure your piece. It should have pulled in noticeably from the size you laid out, roughly a quarter in each direction.
4. Add More Wool for Your Shape
For a thicker piece, lay a fresh layer of roving over the surface and lay the next layer in the opposite direction, so the fibres cross at right angles instead of running parallel. Overlap each new row by about half an inch so there is no ridge line where the edges meet.
Aim for three or four layers for a sturdy mat, and keep each one thin and even. Thick layers trap air, and air pockets become weak spots that split open under use.
To build height, add thin layers around the outside edge rather than building upward in the middle. A bowl form started as a flat mat gets its shape this way: wrap the fibre up the sides, then add a final layer across the rim.
How to tell it worked: nothing should be visible from the wrong side. If you can trace individual layers with your fingers, the bond has not started between them yet.
5. Rinse, Press, and Shape the Felt
Rinse in cool water until the suds are gone. Work gently with your hands, not under a tap, because a hard jet can push the layers apart.
A rinse with a little white vinegar in cool water neutralises any soap left in the fibres. Skipped rinses are the number one reason hand felted pieces come out stiff and itchy later.
Press out the water by laying the piece flat under a dry towel and pressing down with your palms. Do not wring it. Scrape any remaining soap suds off your hands with a plastic card before you pick the felt up — this is also how you find and press out dry pockets that would otherwise pull apart.
Resist items like a leaf outline or a pine cone shape go in before the final layers are added, so the fibre wraps them. They stay locked inside the felt rather than sitting on top of it.
How to tell it worked: the piece should feel dense with no gaping holes, and squeezing it should leave no water dripping from the edges.
6. Dry the Felt Flat
Lay the piece flat on a towel in a dry room with some airflow. A flat mat takes 24 to 48 hours. Turning it over halfway helps both sides dry evenly.
Do not hang flat pieces, and do not dry them with heat. A wool piece that is still damp is weak, and letting it hang or sit on a radiator pulls it out of square and can cause edges to curl. Reshape it gently while damp, press the corners flat, and leave it alone.
For dimensional pieces like balls, bowls and slippers, reshape while damp and support them inside with tissue paper so they hold their form. Reshape any piece at any point during drying if it starts to pucker.
How to tell it worked: the felt is finished when it is completely dry to the touch and room temperature all the way through. Cool spots mean damp is still trapped inside.
Common Mistakes
Nearly every felting problem traces back to one of six things. Here is what to look for and what to do about it.
The wool will not felt at all. Almost always superwash wool or a synthetic blend. Confirm with the squeeze test before blaming your technique, and pull a fibre off the finished piece to check whether the scales are still there.
Lumps and thin spots. The roving was laid too thick or too unevenly, or you pushed down hard while wetting instead of sliding outward. Fix it by pre-felting longer before fulling, using a mesh cover, and always checking for thin areas against a window.
Dry pockets inside the layer. Air was trapped between layers and the fibres never reached each other. Press flat under a towel after rinsing, work each layer into the one below before adding the next, and keep layers thin.
Visible ridge lines. Successive rows overlapped too little or too much. Overlap by about half an inch and always lay alternate layers at right angles to the one below.
The piece is hard and board-like. You have over-felted it, and this cannot be reversed. Stop fulling the moment the piece feels dense and springs back slowly rather than staying soft and springy.
The felt feels stiff and scratchy weeks later. Soap residue. Rinse longer than you think you need to, finish with a vinegar rinse, and dry fully before handling.
Tips for Smooth, Durable Felt
Test a small sample first. A 3 inch square of the same wool takes ten minutes and tells you everything about how the fibre behaves before you commit to anything larger.
Choose coarser wool for durable outer pieces and fine merino for smooth, dense ones. Carding fine fibre more than necessary makes it slippery and hard to pull into a cloud.
Keep the water warm and the soap mild. Strong detergent leaves more residue, and very hot water felts the surface before the middle catches up.
Use steady pressure rather than speed. Slow circles of even pressure outpace fast scrubbing, which mostly moves wool around without bonding it.
Finish edges last. Wrap a thin layer around the perimeter and rub it hard, since the edge is always the first place a piece frays apart.
Frequently Asked Questions
Can you felt wool by hand?
Yes, and hand felting is the original method. Lay wool roving on bubble wrap, wet it with warm soapy water, cover with mesh and rub in small circles with the flat of your palm. Warm water and friction make the fibre scales catch and lock. Roll in a towel and then hit the piece against a table 20 to 30 times to finish the fulling. No machine or special equipment needed.
What soap should I use for wet felting?
A few drops of mild dish detergent per bowl of warm water works well, and a gentle olive oil hand soap is a good second choice. Soap is not optional: it loosens the fibre scales so they can slide past each other and then catch. Avoid laundry detergent and anything heavily scented or oily, since residues make the finished felt stiff and scratchy against skin.
How many layers of wool do I need for wet felting?
Three or four thin layers give a firm, durable sheet. Each layer should be roughly a quarter inch thick and laid at right angles to the one beneath, with about half an inch of overlap. Thickness matters more than count: two thick layers trap air and create weak pockets, while four thin layers bond into one even piece.
Why is my wool not felting?
Check the fibre first. Superwash wool is treated to prevent felting, and acrylic, nylon and polyester will never bond, no matter how long you rub. If the wool is ordinary sheep, alpaca or mohair, the usual causes are water that is too cold, not enough soap, or rubbing too lightly. Squeeze-test a tuft before you start and you will know within seconds.
Can I felt wool without a washing machine?
Yes. Wet felting by hand in a sink or bathtub works exactly as it does at a table: lay bubble wrap in the basin, build your layers, wet and rub them, then roll the piece in a towel and throw it against the basin side to full it. Machine felting suits knitted garments, but loose wool and fabric sheets need no machine at all.
Conclusion
Start with three things this week: pull apart a small square of roving and squeeze-test it, wet it slowly with warm soapy water until the colour darkens evenly, then rub in small circles under mesh until the pinch test holds. Once that sample comes together the same way every time, size up to a mat, a bowl or a flat piece for a wall.