Teaching a beginner quilting class comes down to four jobs: pick one project small enough to finish in a single session, pre-cut every fabric piece before anyone arrives, demonstrate each technique hands-only, and define clearly what finished looks like. Most first-time teachers overcomplicate it. A three-hour afternoon, six to eight students, one rotary cutter per pair, and a project made of strips and squares will do more for beginner retention than any complicated pattern.
The reason to bother planning carefully is that beginners quit quilting for predictable reasons. Their blocks come out mismatched, the project feels too big, or nobody showed them how to press a seam properly and now everything is wavy. Fix those three things and a room full of nervous beginners turns into people who go home and start a second project.
I have watched this go wrong in both directions: classes that ran beautifully because every piece was pre-cut, and classes where one over-eager helper finished other people’s blocks for them and nobody learned anything. Both stories show up repeatedly on quilting forums, and both are avoidable with a plan.
Table of Contents
- What You Need
- What Each Student Should Bring
- What You Provide
- How Much Room and How Many Students
- Your Three-Week Prep Timeline
- Step-by-Step: How to Teach a Beginner Quilting Class
- Set a Beginner-Friendly Learning Goal
- Prepare a Simple Practice Project
- Demonstrate Each Technique Slowly
- Let Students Practice Before the Full Project
- Guide the Class Through a Small Finishable Quilt
- Finish With Feedback and a Take-Home Project
- What to Do When a Student Has Never Sewed
- How to Teach a Beginner Quilting Class Online
- Using a Helper Without Letting Them Take Over
- Common Mistakes
- Mismatched Blocks
- Bulky, Lumpy Seams
- Rushed Cutting
- A Project That Swamps the Class
- Unfinished Projects at Home
- Frequently Asked Questions
- How long should a beginner quilting class be?
- What is the easiest quilting project for a beginner class?
- Do I need to be an expert quilter to teach this class?
- What materials should I provide for a beginner quilting workshop?
- How many students can I teach in one quilting class?
- How do I help beginners who struggle with straight seams?
- Do I pre-cut the fabric for students, or does that remove the learning?
- Start With One Session and One Finished Project
What You Need
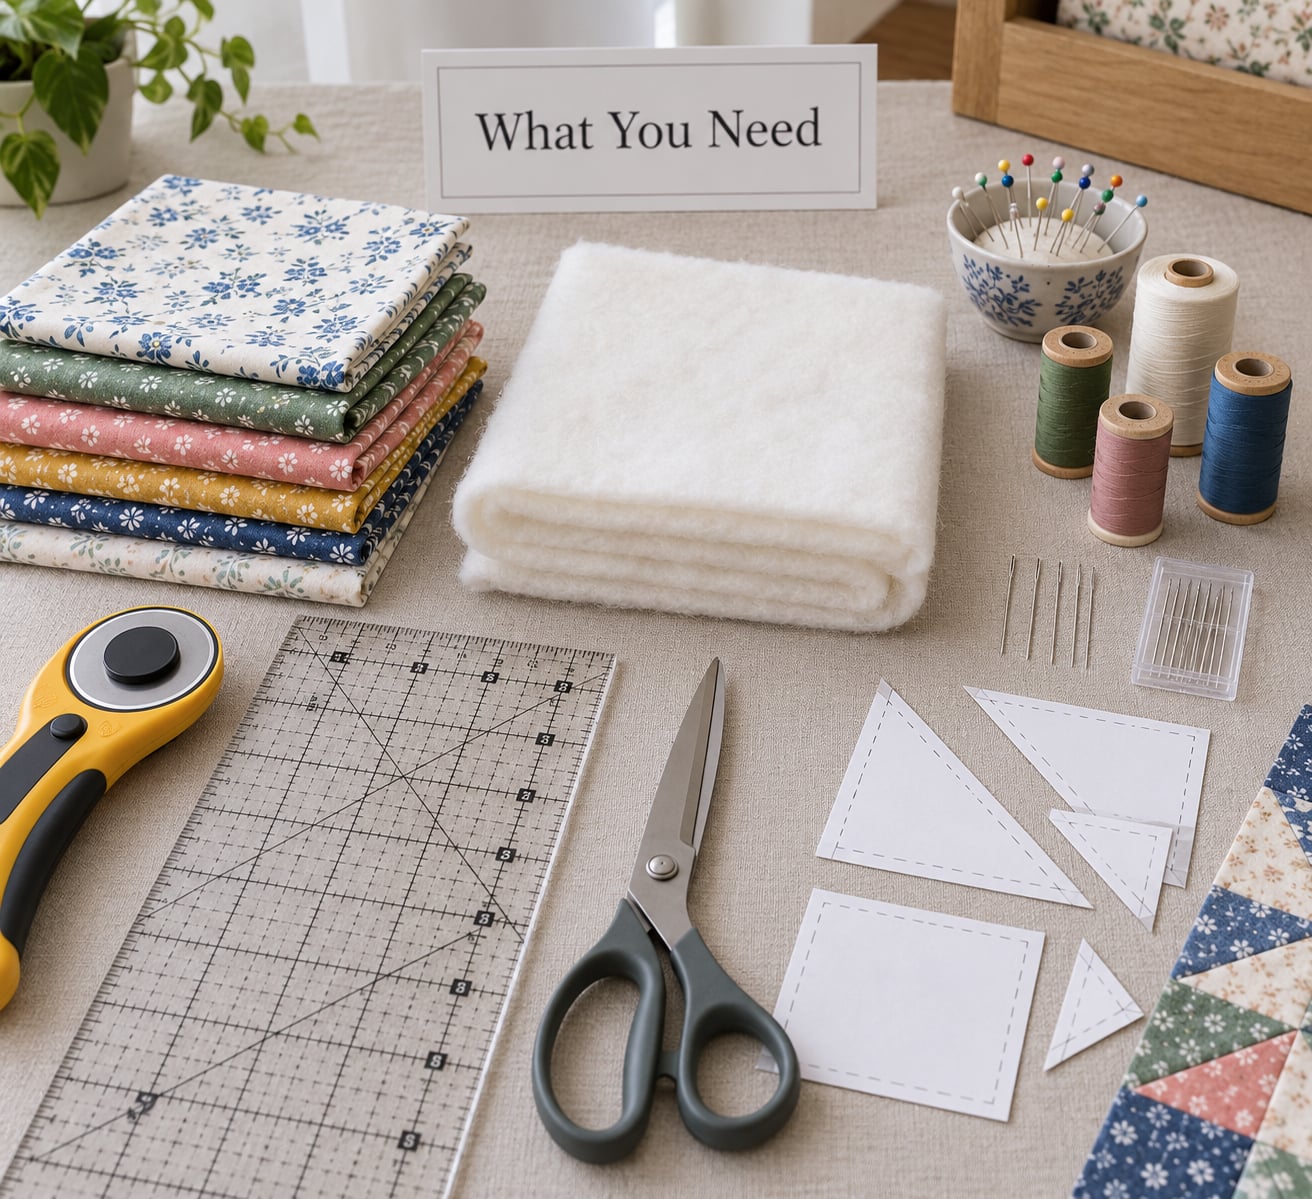
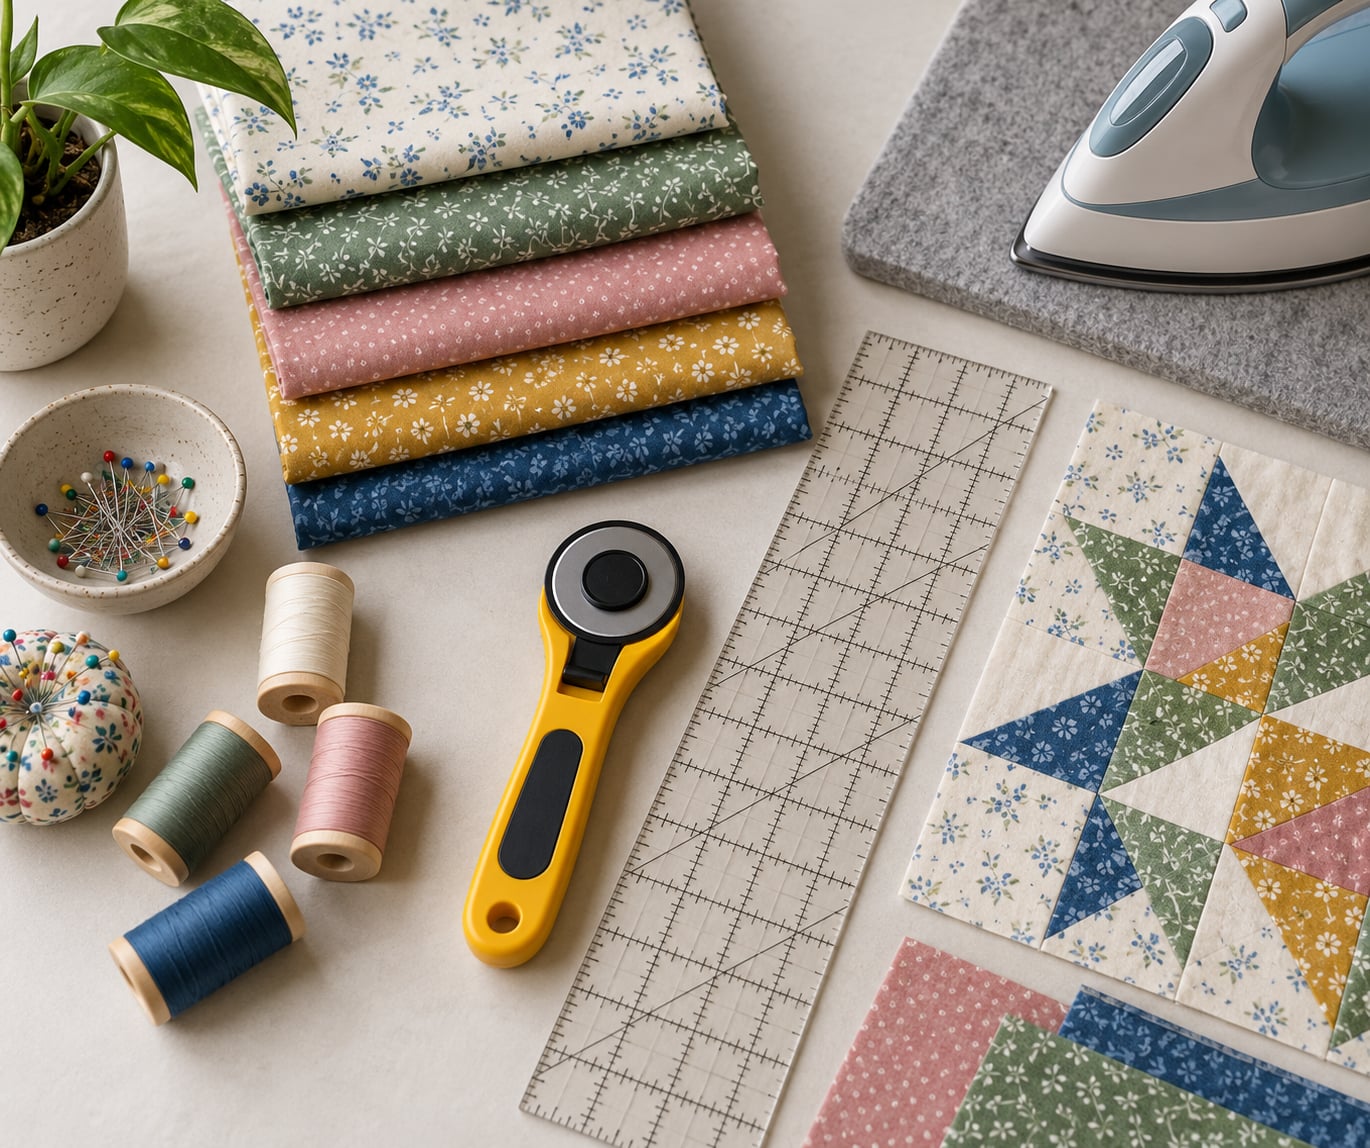
You need far less than most first-time teachers buy. A first class needs a cutting surface, a way to make an accurate quarter inch seam, and a pressing setup. Everything else is optional, and buying extras for a group that has never touched a sewing machine is the most common way to run out of money and out of attention.
What Each Student Should Bring
Ask students to bring their own machine if they have one, plus a small basic kit. Beginners who own machines often arrive with unfamiliar feet and thread tension, so send a short list a week ahead rather than relying on the day of.
- A working sewing machine, foot pedal, and power cord, tested the night before
- Standard presser foot and a walking foot if you plan to teach chain piecing
- Thread: all-purpose cotton in white, black, and one neutral
- A cutting mat, 18 by 24 inches at minimum
- A rotary cutter with a fresh blade and a self-sealing ruler at least 6 by 24 inches
- Pin cushion, sewing pins, and stiletto or turning tool
- Sharp fabric scissors and a small pair of snips
- Iron with a spray bottle and a pressing mat or thick towel
- Seam ripper
What You Provide
Provide the things students are most likely to fail to bring and most likely to need identical versions of: fabric kits, spare blades, extra needles, and the pattern. Machines, irons, and cutting mats can live at the shop or studio if the venue allows it.
Print the per-student supply list in your own words. A typed page with the exact fabric cuts written on it saves you fifteen minutes of explanations and removes the guessing that eats class time.
| Item | Quantity per student | Provided by |
|---|---|---|
| Pre-cut fabric kit | 1 set | Teacher |
| Rotary cutter | 1 | Student or teacher |
| Self-sealing ruler | 1 (minimum 6 by 24 inches) | Student |
| Cutting mat | 1 (18 by 24 inches or larger) | Student or teacher |
| Iron | 1 per 4 students | Teacher or venue |
| Seam ripper | 1 | Student |
| Pins and pin cushion | 1 set | Student |
| All-purpose thread | 3 spools | Student |
| Printed simplified pattern | 1 per student | Teacher |
| Spare rotary blades | 1 spare per 3 cutters | Teacher |
How Much Room and How Many Students
Plan for eight students in a two-hour drop-in and ten or twelve in a longer workshop with a helper. The limit is not space, it is how many machines you can reach before a beginner makes a mistake and does not know how to recover. One experienced teacher on the Quiltingboard ran a two-hour session for five or six people with a braided table topper and described the relaxed pace as the reason it worked.
Set tables in a U shape so the demo station faces the room and every student can see your hands. Put the irons at one end near a wall outlet, not in the center of the table. Beginners generate steam, and a cramped center table makes for wet fabric and small accidents.
Your Three-Week Prep Timeline
New teachers report having about three weeks to prepare, and that is plenty for a single-session class. Spread the work rather than doing it all on the weekend.
- Three weeks out: choose the project, write your own simplified pattern with step-by-step photos, test the project end to end yourself.
- Two weeks out: buy and wash fabric, cut every piece, bag each kit with a label, and write the student supply list.
- One week out: run the whole class once with a helper playing the student, timing each step.
- Two days out: confirm machines, charge irons, set the room, and print one spare pattern per two students.
Step-by-Step: How to Teach a Beginner Quilting Class
A beginner quilting class follows the same eight moves every time, whether it runs for two hours or across four sessions. Write them down in order and the day stops feeling improvised.
- Scope the class to piecing only, or piecing plus finishing, and tell students in advance which one you are covering.
- Set one learning goal that every student reaches, even the slowest and the most nervous.
- Choose a project built from strips, squares, or simple shapes that can be finished in a single sitting.
- Pre-cut and bag every kit the week before, labelled with the student name.
- Demonstrate hands-only at the front, slowly, with no talking while your hands move.
- Let students repeat each step on scrap fabric before they touch the real project.
- Build the project in short rounds, checking measurements and seam consistency as you go.
- End with pressing, feedback, and one achievable next project before the clock runs out.
Set a Beginner-Friendly Learning Goal
Set the goal as one finished piece, not one perfect piece. Tell students at the start that they will leave with a completed quilt top, a table runner, or a tote bag, and that the piece is theirs to keep whether it matches your sample exactly or not.
Being honest about skill levels matters more than you would think. Teachers on quilting forums describe advertising beginner classes and getting two students who had never sewn at all, one of them arriving with a brand new machine still in the box. Define beginner quilting as piecing only, and state in your listing that students must be able to thread a machine and sew a straight line before class starts.
Prepare a Simple Practice Project
Pick a project where every unit is the same shape, so accuracy is visible and fixable. Strip piecing is the most forgiving first project because the seams are all identical and a mistake shows up as one wonky strip instead of a whole ruined quilt.
Good first options are a rail fence or log cabin panel from strips, a nine-patch sampler from pre-cut squares, a table runner in a single session, or a simple tote bag from layered rectangles. Skip anything with curves, appliqué, or more than six different pieces in one block. One quilter took a twelve-block sampler class, felt buried by it, and abandoned the quilt. A simpler rail fence first would have kept her quilting.
Pre-cut generously. Cut strips one inch longer than the pattern calls for and let students trim to size as part of the lesson. A beginner with a dull blade who cut a strip short is having a bad time, and you will spend that session fixing a mistake instead of teaching piecing.
Demonstrate Each Technique Slowly
Show every technique with your hands only first, and say nothing while they watch. Beginners learn watching far better than listening, and the second time you demonstrate, you explain what you already showed them.
- Square up the fabric by pulling the selvage and cut edge against each other with your palm, then pressing out the bow.
- Place the self-sealing ruler with its 6 inch side along the edge and cut with the rotary cutter in one smooth motion, rotating the mat instead of the fabric.
- Lay the right sides of two pieces together, align the raw edges, and pin perpendicular to the seam with the pin tips touching.
- Set the seam guide or presser foot so the fabric edge runs along the 1/4 inch line, and hold the fabric so it cannot pull to the left of the foot.
- Sew, keeping the edge aligned the entire length, and backstitch at both ends.
- Press the seam open with the seam allowances going in opposite directions, then trim stray threads.
Two measurement tricks do most of the work. First, teach the seam from the ruler, not the machine foot: have students sew a test strip, measure it, and adjust until the seam is exactly 1/4 inch. That is the approach teachers credit to Eleanor Burns and it is the fastest way to get a room of blocks to match. Second, tape a visible mark on the mat or a sticky note on the table showing a reference measurement, so students have a backup when the printed guide slips.
Let Students Practice Before the Full Project
Give every student a stack of 4 by 5 inch scrap squares and have them practice on those first. This is the step that saves the project. Cutting a strip that is slightly wrong costs nothing when the fabric is a scrap and it costs a ruined kit when it is not.
Run the practice in three short rounds. Round one is measuring and rotary cutting strips. Round two is chain piecing several pairs back to back, then snipping the connecting thread. Round three is pressing those seams open and squaring the unit up against the mat grid. Each round takes about eight minutes, and by the end students know how the machine behaves before you hand out the good fabric.
Guide the Class Through a Small Finishable Quilt
Work in short rounds with a check at the end of each one. Announce the milestone, let everyone work, then walk the room and check one thing per student: right sides facing, seam allowance consistent, edges lined up with the block.
Assemble units the way the project requires. Chain piecing is faster and students finish more, but only after they can sew a reliable straight seam on their own. If seams are wandering, stop and have everyone sew a single seam, measure it, and correct it before continuing.
Press as you go rather than saving all pressing for the end. Once a block is assembled and pressed wrong, the mistake is baked into three layers of seams and the whole thing gets discarded.
| Session | Focus | Project milestone | Length |
|---|---|---|---|
| 1 | Machine handling, fabric prep, rotary cutting, accurate quarter inch seam | Practice strips sewn and measured | 2 hours |
| 2 | Strip piecing, chain piecing, pressing | All strips sewn into rows | 2 hours |
| 3 | Joining rows, squaring up the block | Completed quilt top | 2 hours |
| 4 | Basting, quilt sandwich, simple quilting, binding | Finished small quilt | 3 hours |
If you only have one session, cut this down to cutting, a quarter inch seam, strip piecing, and pressing, and finish with the completed quilt top. That is exactly the piecing-only scope a quilter on Reddit chose for a three-hour team building session, cutting fabric into ten inch squares in advance and supplying mats and irons.
Finish With Feedback and a Take-Home Project
End with fifteen minutes you actually plan for, because most classes lose their last half hour to students packing up. Have students hold up their piece, name one thing that worked, and name one thing they would do differently. That habit is the difference between a nice afternoon and a student who comes back.
Give one achievable next project and keep it small. A table runner, a second block in a different colorway, or a simple binding exercise works. Avoid handing out a big quilt for homework. Beginners who finish something small come back for the next class; beginners handed a wall quilt quietly stop.
What to Do When a Student Has Never Sewed
Some students in every beginner class cannot operate a sewing machine. Have a triage plan instead of improvising. Spend the first twenty minutes of class on machine handling for everyone, then move anyone still struggling onto hand piecing for the day and pair them with a helper for machine work in a later session.
Do not send them home. A student who leaves feeling useless does not register again. Have them cut fabric, press seams, and do all the non-machine assembly, which is most of a strip-pieced project anyway. One teacher handled exactly this situation by getting two complete beginners through the basics, then telling them plainly which sessions they actually needed next.
How to Teach a Beginner Quilting Class Online
Online quilting classes work, but only if you change your demonstration method rather than your content. Use a document camera or an overhead phone mount pointed straight down at the work surface, and put a plain sheet of paper under the fabric so your hands disappear behind the fabric instead of the background.
Demonstrate more often than you would in person, because nobody can walk over and look. Say the step number before every action, keep a written pattern in the chat window, and build in a short demo video for each technique so students can replay it while sewing. Use breakout rooms of two or three for the practice rounds, since a lone student at a camera gets no correction.
Online formats suit a beginner quilting workshop built on prepurchased kits delivered beforehand, with the piecing steps done live. It does not suit free-motion quilting or anything where hand pressure and fabric feel matter.
Using a Helper Without Letting Them Take Over
One helper doubles your reach, and one over-helpful helper can lose you a whole class. A teacher on the Quiltingboard described losing an entire session because the helper ran around demonstrating shortcuts: nobody finished their block and several students were irritated enough to never return.
Brief the helper before the day with three rules. They follow the same pattern the students have. They do not take a piece out of a student’s hands. They do not answer questions the teacher is already answering. Give the helper one specific job, such as running the pressing station, and let them do it.
Common Mistakes
The same handful of errors cause most beginner frustration. Each one has a cause you can diagnose in seconds and a fix you can show once.
| Symptom | Cause | Fix |
|---|---|---|
| Blocks end up different sizes | Seam allowance drifting, usually a third inch or closer | Stop and measure a test seam; adjust the guide before any more piecing |
| Seam allowance inconsistent along one edge | Fabric being pulled toward the presser foot as it feeds | Teach students to hold the fabric flat and guide, never tug |
| Fabric bows or cups after pressing | Seams pressed all in the same direction | Press seams open in opposite directions on each side |
| Blocks look lumpy when joined | Seams not matched or pressed before joining | Match the intersections with a pin before sewing rows together |
| Everything skews diagonally | Cutting against the grain without straightening the fabric | Fold fabric in two and cut on the fold after squaring the edges |
| Seam ripper refuses to work | Blade angle across the stitch rather than along it | Slide the blade under the stitch and lift as you pull |
| Student overwhelms midway | Project too large or too many techniques at once | Cut the project down to the finished block and save the rest |
| Student finishes before the clock | Pre-cut kit saved them time | Move to pressing, adding a border, or binding early |
Mismatched Blocks
Mismatched blocks start as an inconsistent seam allowance, not a cutting problem. Measure a seam early rather than at the end of the project. One test strip caught in two minutes beats three blocks ripped out at hour three.
Bulky, Lumpy Seams
Bulky seams come from pressing. Every seam gets pressed before the next piece is added, and adjacent seams press in opposite directions. Iron in under a minute per block, and tell students the iron station is part of the job, not an optional extra.
Rushed Cutting
Rushed cutting comes from underestimating how long the first round takes. Build in a spare fifteen minutes in your timing plan, cut strips slightly long, and hand out spare blades. A dull rotary blade is the quiet reason students think they cannot cut straight.
A Project That Swamps the Class
An overwhelming project comes from too many blocks or too many techniques in one sitting. Beginners do not need a lap quilt in a two-hour drop-in. They need one block they can finish, which is the whole point of the session. If a student is lost, reduce the project rather than adding help.
Unfinished Projects at Home
Unfinished projects at home come from asking too much after class. Give one achievable next project, show it finished, and tell students when you meet again. Roughly a third of class value happens after people go home, and it is the part you control least.
Frequently Asked Questions
How long should a beginner quilting class be?
Two hours works for a single project that students finish on the day, such as a strip-pieced table runner or a small panel. Three hours gives you room for machine handling practice, cutting, piecing, and pressing without rushing. Four sessions of two hours is the better choice if you want to cover basting, quilting, and binding.
What is the easiest quilting project for a beginner class?
A project made from identical strips, like a rail fence or log cabin panel, is the easiest. Every seam is the same width, so one error is easy to spot and easy to fix. Nine-patch squares and simple tote bags from layered rectangles also work well. Avoid curves, applique, and patterns with more than six pieces per block.
Do I need to be an expert quilter to teach this class?
No. You need solid beginner sewing machine skills, accurate cutting and seam habits, and the ability to slow down and repeat yourself. Most successful first teachers are confident quilters, not professional ones. Rehearse the full class once with a helper playing the student, and your own sample block finished will carry the rest.
What materials should I provide for a beginner quilting workshop?
Provide the pre-cut fabric kits, the printed simplified pattern, spare rotary blades, extra needles, and thread in neutral colors. Ask students to bring their own machine, cutting mat, ruler, rotary cutter, scissors, pins, seam ripper, and iron. If the venue has no irons, bring one per four students, since pressing is not optional in a piecing class.
How many students can I teach in one quilting class?
Eight students is a comfortable maximum for one teacher over two hours, and ten or twelve works for a three-hour workshop with a helper. The limit is how quickly you can reach someone who has made a mistake and does not know how to recover. Beginners walking between machines cannot see your demonstration, so seat them in a U shape facing you.
How do I help beginners who struggle with straight seams?
Have them sew a test strip, measure it with a ruler, and adjust until the seam is exactly 1/4 inch, then sew another. Make the correction in front of the room so nobody feels singled out. Add a visible reference mark on the table or mat as a backup, and remind them to hold the fabric flat and guide it rather than pulling it.
Do I pre-cut the fabric for students, or does that remove the learning?
Pre-cut the pieces students cannot recover from, such as long strips and backing squares, and cut them slightly larger than the pattern calls for. Leave squares, strips, and the cutting itself for students who can safely learn from a mistake. Cutting scraps on scrap fabric is practice; cutting the real kit is pressure.
Start With One Session and One Finished Project
If you want to know how to teach a beginner quilting class without burning yourself out, start narrow: one project, six students, two hours, and every kit pre-cut a week ahead. Teach cutting and the quarter inch seam hands-only, let students practice on scraps, and make sure everyone holds a finished piece before they pack up.
Everything else is a second class. Running the whole session once with a helper playing the student will tell you more about your plan than any amount of reading about teaching.