Gel medium is acrylic medium with the pigment taken out. It dries to a clear, flexible film, which means the same product glues your papers down and then seals them. To use gel medium for collage you paint a thin layer onto the back of each piece and the surface beneath it, press everything flat, then add one more thin coat on top. Active work takes about twenty minutes; the drying does the rest.
The method is forgiving enough for a first collage, but most disappointing results come from one thing: too much medium. Everything below is aimed at keeping coats thin and getting the pieces to sit flat, which is the part beginners find hardest.
Table of Contents
- What You Need
- Step-by-Step
- 1. Prepare the Collage Surface and Materials
- 2. Choose the Right Gel-Medium Consistency
- 3. Apply a Thin First Layer
- 4. Place and Smooth the Collage Papers
- 5. Build Additional Layers
- 6. Let the Collage Dry and Finish the Surface
- 7. Common Mistakes
- Frequently Asked Questions
- Can I use gel medium on paper?
- What type of gel medium is best for collage?
- How long does gel medium take to dry on paper?
- Should I use matte or gloss gel medium for collage?
- Can I mix gel medium with acrylic paint?
- Do I need to seal a collage made with gel medium?
- Your First Gel-Medium Collage Session
What You Need
You need a gel medium, a prepared support and three or four tools. Anything beyond that is optional, and you can absolutely get a finished collage with the core list.
- Gel medium. Matte, gloss or soft gel. Matte hides brush marks and takes paint well, gloss leaves a glassy depth, heavy gel anchors the thickest materials.
- A support. Canvas board, MDF or wood panel, heavy card, or your own paper if it has been primed.
- Primer for absorbent supports. Gesso or a thin coat of white acrylic seals the fibres so moisture cannot swell and buckle them.
- Brushes and tools. A foam brush for thin, even coats. A stiff synthetic flat brush when you need more coverage. A palette knife or silicone scraper for heavy gel. A brayer for a level, streak-free finish.
- Water and a rinse jar. Rinse brushes as you go and drop a little water into dried-out gel so it stays workable.
- Your collage materials. Torn or cut paper, photographs, tissue, fabric, found objects.
- Optional extras. A clean sheet of paper or wax paper to press into, a fan or drying rack, a sheet of clean paper for your work area, and a varnish for later.
How you choose between them comes down to sheen and thickness. Matte gel dries slightly cloudy and softens the surface, so it disappears into the work and is the best choice if you plan to paint over the top. Gloss gel dries fully transparent and shiny, so it deepens colour and gives photographs and gel prints a wet, finished look. Heavy gel is thick, holds fabric and found objects, and keeps brush marks as texture. Soft gel sits between gloss and heavy: flexible enough for fabric, less mirror-like than gloss.
Before committing to a large piece, make a small test. A 10 by 10 centimetre scrap panel with three or four of the materials you plan to use tells you in twenty minutes whether the medium clouds on your paper and whether your ink runs. That test costs almost nothing and it has saved me more ruined panels than any other habit.
Step-by-Step
This is the sequence I work in, and it holds whether you are collaging photos, torn book pages, tissue or fabric scraps.
1. Prepare the Collage Surface and Materials
Knowing how to use gel medium for collage really starts before the medium comes out of the bottle. Clean the support and let it dry completely, then brush off any loose dust, fibre or flaking paint. A dirty surface is the number one reason papers peel later, and the fix is nearly impossible once you have sealed over it.
Prime anything absorbent. Card, MDF, unprimed canvas and thin paper all drink water and swell, which is what makes collage buckle. One or two coats of gesso, dried fully, closes those pores.
Pick your materials with compatibility in mind. Glossy magazine pages, cheap newsprint and uncured handmade paper all behave differently when wet, so test them if you have not used them before. Fibres should be clean, but there is no need to wash your papers unless the manufacturer says to. Washing can remove sizing, and sizing is often the thing keeping a page from bleeding.
Last thing: lay down a clean sheet to protect your table, and put your materials within arm’s reach. You have a short working window once the medium goes on.
2. Choose the Right Gel-Medium Consistency
Match the consistency to the paper and to what you want the finished surface to look like. Lightweight papers and photographs want thin matte or soft gel applied like paint. Fabric, leather, tiles and thick found objects want heavy gel pushed on with a palette knife. Gel prints and tissue want thin gloss or matte so the imagery stays readable.
Think about paper weight too. Heavy card sits flat on its own and needs almost no medium. Thin paper depends entirely on the gel to hold it, so a slightly thicker coat with good burnishing beats a whisper-thin coat that never grips.
And decide now whether you will paint over the collage. If yes, matte. If you want the collage to stand as its own finished surface, gloss is more satisfying and easier to buff.
3. Apply a Thin First Layer
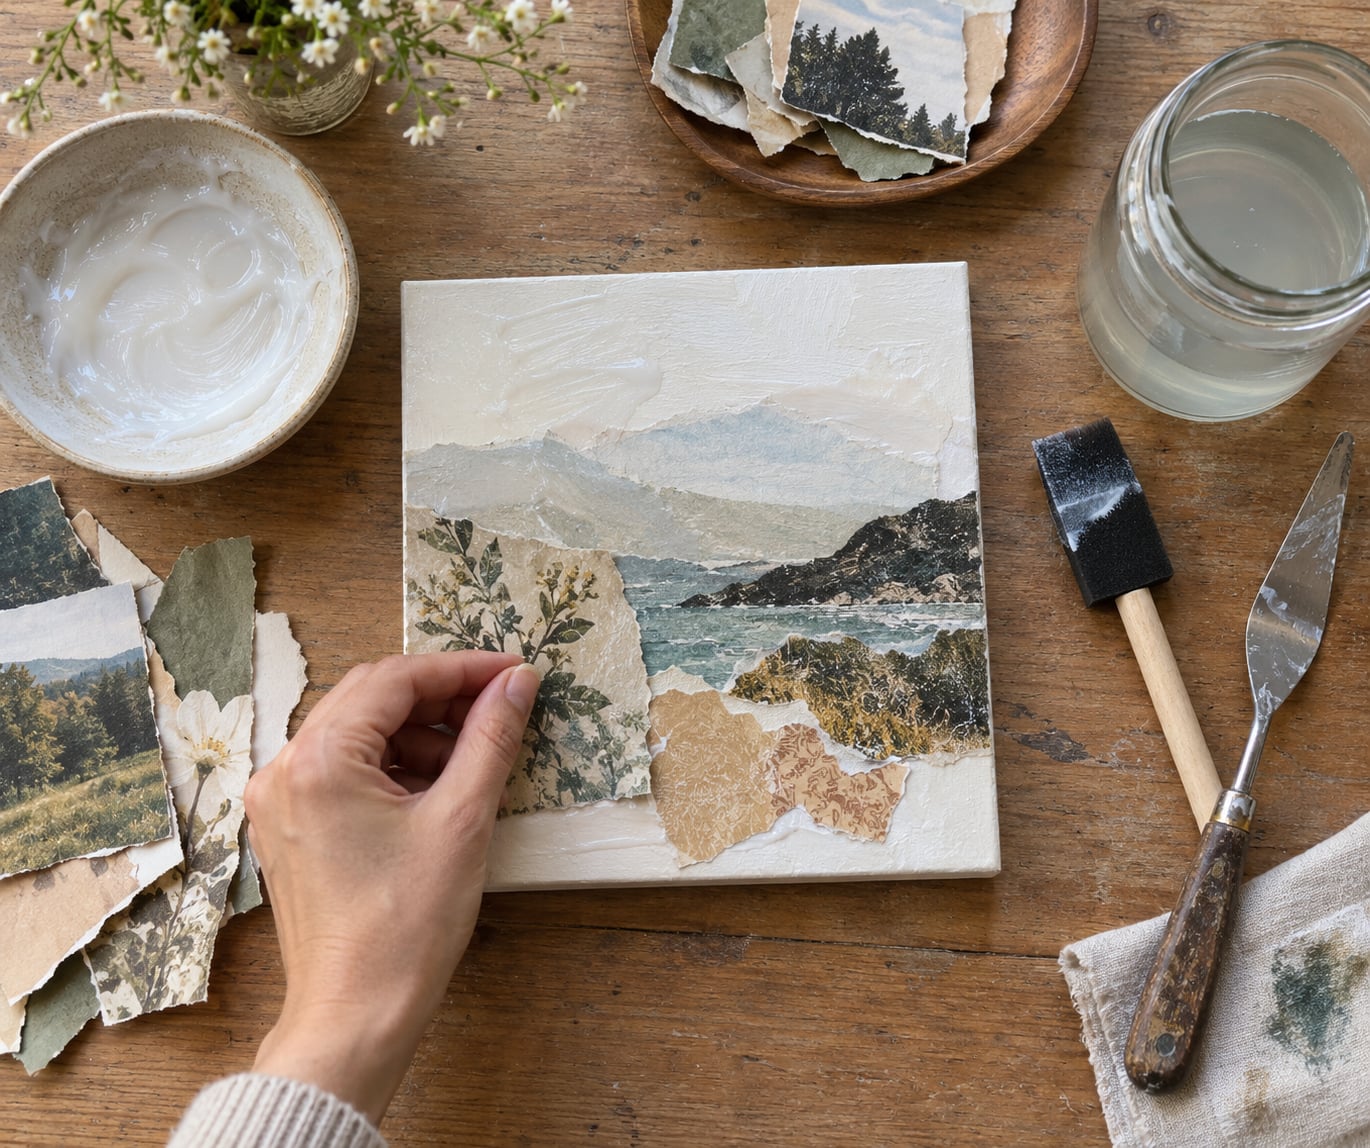
Coat the back of the collage piece and the surface beneath it. Coating both sides roughly doubles the bond, because the medium soaks into fibres instead of sitting on top of them.
A foam brush gives you the thinnest, most even coat with the least effort, which makes it the best tool for beginners. A stiff synthetic flat brush covers more area quickly. A palette knife works for heavy gel, and scraping the blade flat across the surface takes off the excess ridges.
Work edge to edge in one direction, then cross lightly to even it out. Wipe off anything that beads or streaks. A successful first layer looks continuous and level, with no visible brush hairs, and it is thin enough that you cannot see the support through it.
4. Place and Smooth the Collage Papers
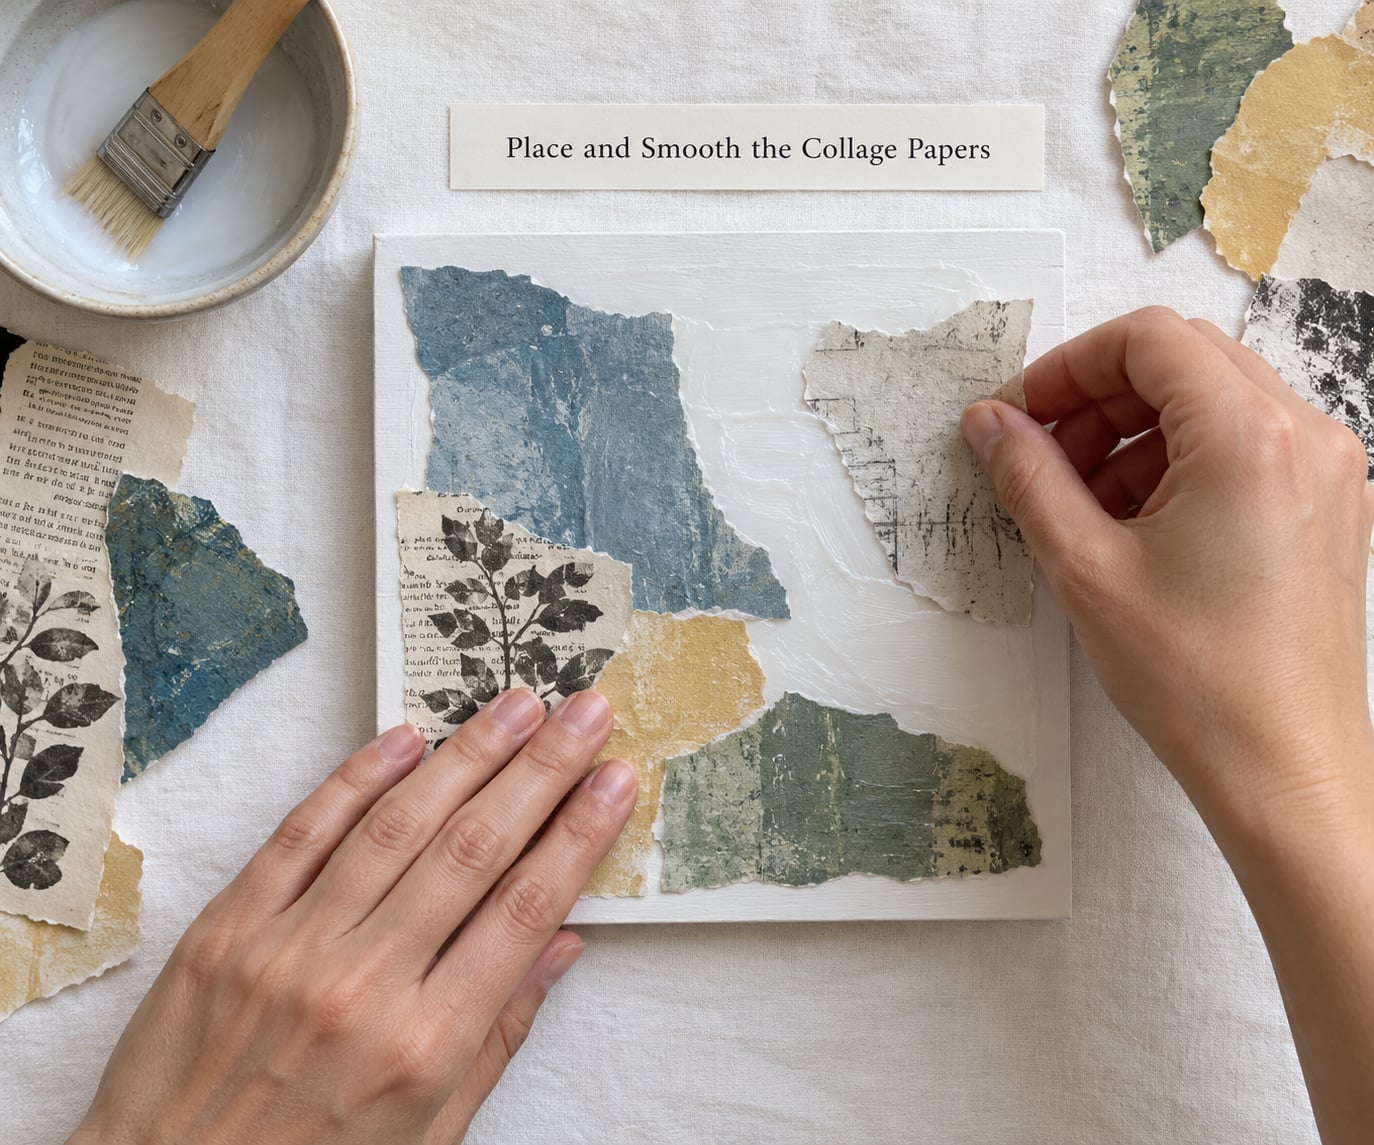
Lay the paper into the wet medium rather than brushing medium over paper already placed. It is faster, and the paper sits flatter because you control where it lands.
Tearing usually beats cutting for collage because the fibrous edge grabs the medium, but both work. Start at the centre and press outward with light pressure, working from the middle toward the edges every time. Push out from the centre, never in from the edge, or you drag a wrinkle across the whole piece.
For extra smoothness, lay a clean sheet of paper or wax paper over the top and burnish with the flat of your hand or a brayer. Lift the sheet while it is still damp.
Then stop. Overworking is the classic beginner mistake: once the paper’s fibres start moving under the brush, you are tearing it, and torn fibres lift later. One pass to place, one pass to smooth, done.
5. Build Additional Layers
Add the next layer when the previous one is dry to the touch but not fully cured. If you lay a new piece on medium that has only skinned over, it will lift. If you wait for full cure, the bond is weaker, so dry-to-touch is the right moment.
Work around the tacky zone rather than across the whole panel at once. A wide panel drying flat often has a dry band at the edges and a damp middle. Check by touching the edge lightly with a knuckle, not a finger, so you leave no print.
Keep some paper texture visible. You do not want every layer buried under opaque white medium. Leave a few edges proud, let a torn margin show, and let the top piece overlap the one beneath by a visible margin so the collage has depth instead of looking printed flat.
6. Let the Collage Dry and Finish the Surface
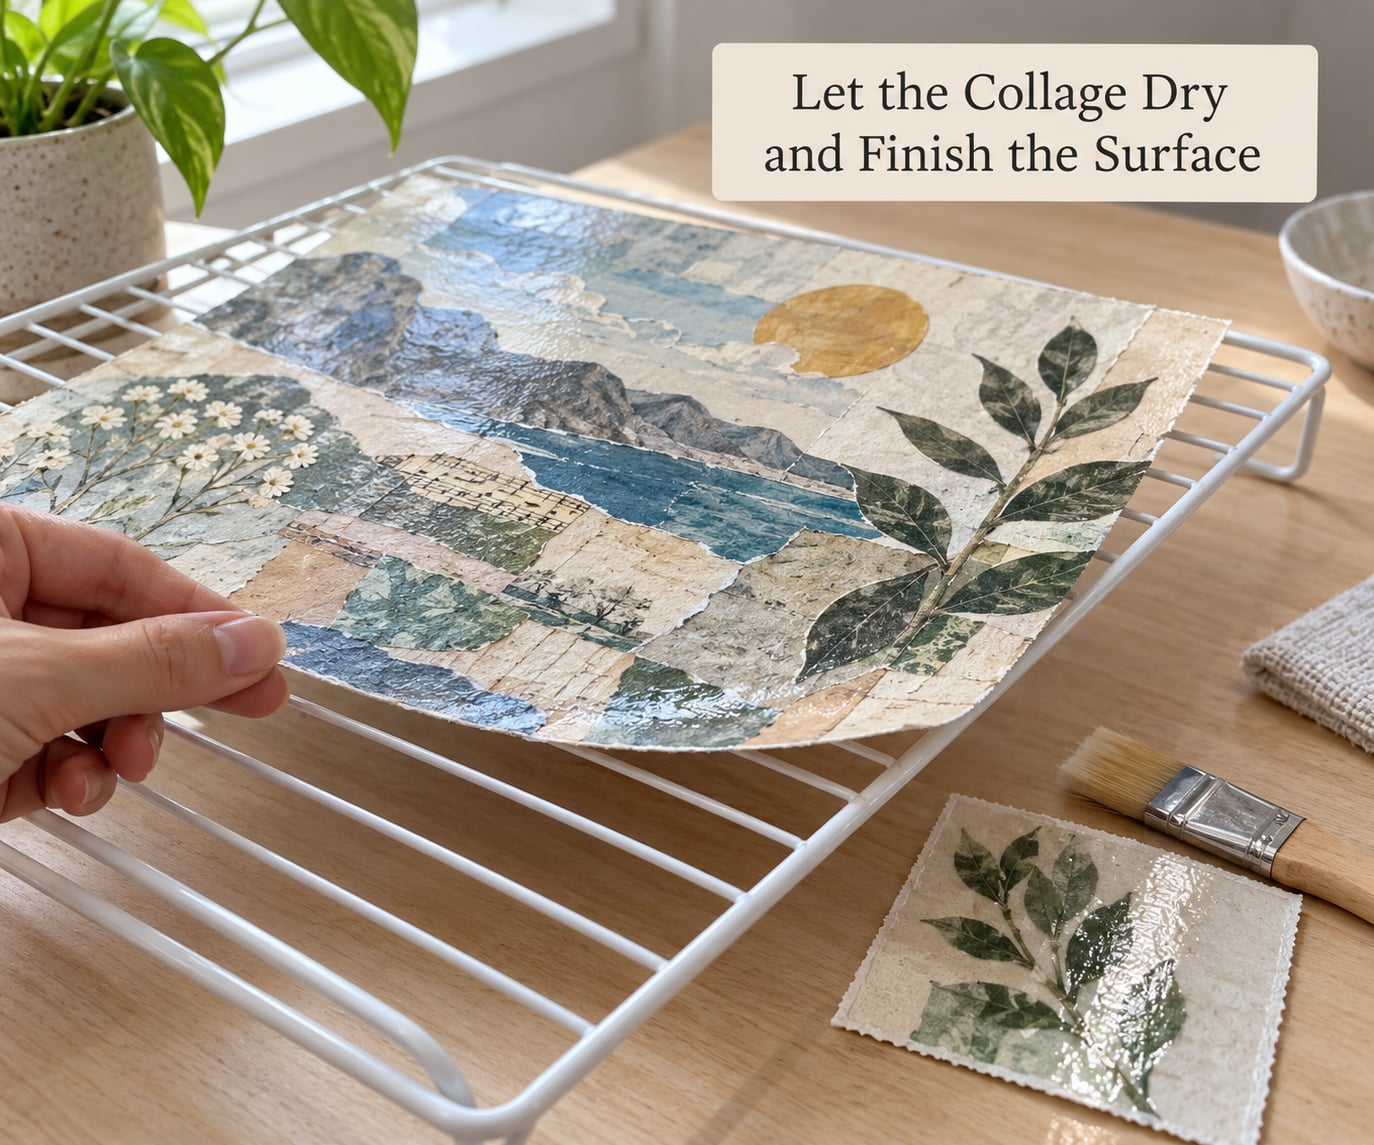
Lay the panel flat and leave it alone. Gel medium cures best when it can dry from both sides rather than sticking to whatever is sitting on top of it, so a flat sheet on a rack is better than standing the work up in an easel.
Give it airflow and keep dust off it. A sheet of clean paper resting on corner supports will do, or a fan set a few feet away will speed things along. Avoid a heater directly on the panel, since fast surface drying can trap moisture underneath and leave a tacky film.
Dry to the touch is not the same as cured. Touch-dry means it will not rub off your finger; cured means the film has hardened enough to take a varnish. A thin coat usually reaches touch-dry in about 30 minutes to an hour and hardens properly over the next day or two. Thick coats and humid rooms take much longer. Always check the label, because dry times differ between formulas and a labelling change is the main reason two people’s results disagree.
Once cured, a final thin coat of matte or gloss medium across the whole surface unifies the separate papers into one piece and takes the scuffing off your fingertips. A varnish goes on only after that final coat has cured, and it is optional.
7. Common Mistakes
Ridges and brush marks. You applied too much and did not scrape or wipe off the excess. Use a foam brush, load it lightly, and pass a palette knife or scraper over the surface to flatten it.
Wrinkles and bubbles. The paper buckled because moisture had nowhere to go. Prime the support, use thinner coats, and press from the centre outwards as you lay the piece down. Bump or puncture stubborn bubbles once the surface is dry rather than smearing them.
Peeling or lifting edges. The coat was too thin, or only one surface got coated, or the paper is smooth and glossy. Coat both faces and give it more burnishing.
A permanently tacky finish. The coat was thick, the room was humid, or a heater forced the surface to skin over before the water left. Thin coats, airflow and patience are the fix.
The collage went milky. You used matte gel over light papers in a thick layer, which turns cloudy. Use thinner coats, switch to gloss where you need transparency, or embrace matte and paint over it.
Ink bleeding or feathering. Cheap print, newsprint and some marker inks dissolve when wet. Test first, press rather than rub, and consider sealing the printed side on its own before collaging.
Sealer applied too early. Trapping moisture under varnish keeps the surface sticky for months. Wait until the medium is fully cured, not merely touch-dry, and use thin coats.
The habits that make results repeatable are simple: thin coats, both sides coated, centre-outward pressing, flat drying, and a test swatch when you are working with unfamiliar paper.
Frequently Asked Questions
Can I use gel medium on paper?
Yes, and paper is a very workable collage support. Prime it first with gesso or a thin coat of white acrylic so the fibres cannot swell and buckle as the medium dries. Coat the back of each element as well as the surface, which roughly doubles the bond. Use thinner layers than you would on panel, and lay the finished work flat while it dries.
What type of gel medium is best for collage?
For most paper, photographs and prints, a matte gel or matte medium is the most forgiving: it bonds well, hides brush marks and takes paint over cleanly. Gloss gel suits a deep, sealed, glassy look and holds thicker items such as fabric and found objects. Heavy gel manages the heaviest elements, and soft gel stays flexible for fabric and gel prints.
How long does gel medium take to dry on paper?
A thin coat on an absorbent surface usually feels dry to the touch in 30 minutes to an hour and is firm enough to handle within a few hours. Thick coats, humid rooms and non-absorbent supports take much longer. Touch-dry is not the same as cured; full hardness usually develops over 24 to 72 hours. Check the product label, because times vary by formula.
Should I use matte or gloss gel medium for collage?
Choose matte if you plan to paint over the surface or want the paper itself to stay the focus. Choose gloss if you want a deep, luminous, sealed look and no further paint on top, and gloss is easier to buff and often takes ink while still wet. Many artists use matte for the adhesive layers and finish the whole piece with one unifying gloss coat at the end.
Can I mix gel medium with acrylic paint?
Yes. Gel medium thins and lightens acrylic paint without ruining it, which is how you build a glaze, a wash or a faded background. Mix roughly equal parts paint and medium for a soft glaze, or more medium for a thin wash. Thick gel can also be tinted back to a gel-like consistency, which makes it useful for impasto, texture and palette-knife work.
Do I need to seal a collage made with gel medium?
A sealing coat is worth adding. One thin pass of gel medium across the whole surface unifies the separate papers visually and takes the scuffing off your fingertips. Let the collage dry first, then apply that final coat thinly so it stays clear. A varnish is optional and goes on only after the sealing coat has fully cured, otherwise moisture gets trapped and the surface stays tacky.
Your First Gel-Medium Collage Session
Keep the first session small and the results will teach you more than a long project would. Start with a matte medium, because it forgives the most and shows you the least about application technique until you know what a thin coat looks like.
Make a test swatch on scrap card with the three papers you actually plan to use, then leave it flat and come back to it tomorrow. That one test tells you which materials bleed and how the finish looks before you have anything at risk.
For the real piece, coat both the panel and the back of each paper, keep the coat thinner than feels right, press from the centre outwards, and stop once the paper is flat. Lay it down flat, cover it from dust, and wait. Once it is cured, add one thin unifying coat and leave it alone again.
That is the whole method. Once it clicks, the same thin-coat technique carries straight over to image transfers, gel prints, fabric collage and sealing finished paintings.