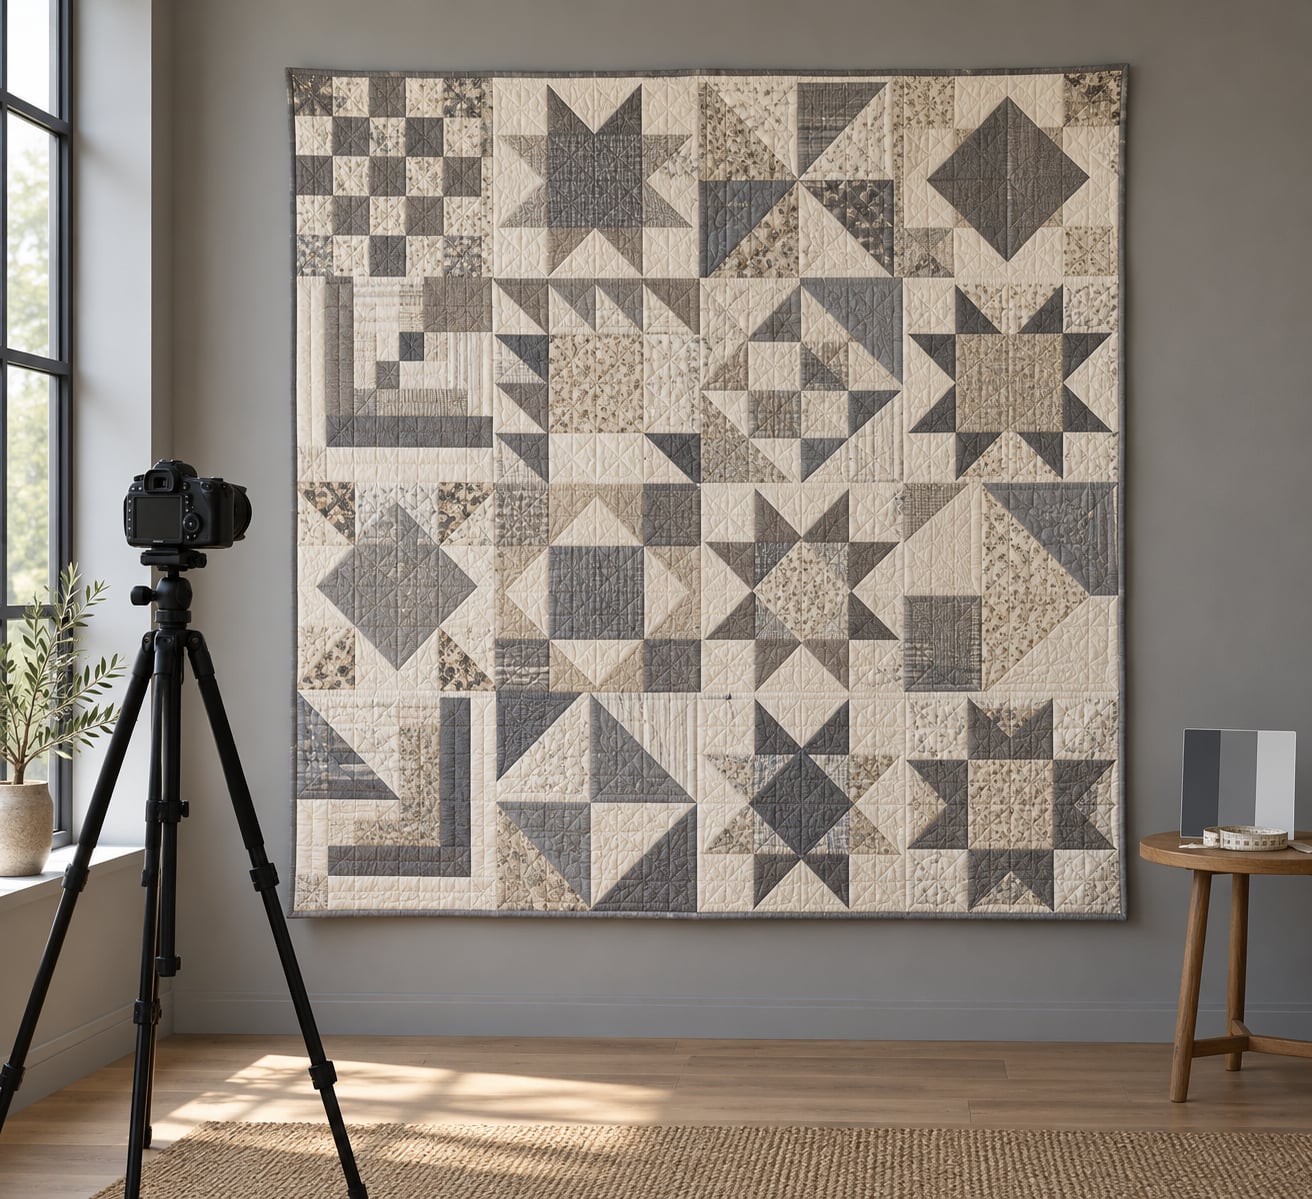
Glare on a quilt happens when light bounces off the raised loft of the batting, a satin print, or a metallic thread and lands straight in the lens. Stop it by hanging the quilt flat, lighting it with one large soft source at about 45 degrees off-axis, turning off every other light in the room, and shooting from a tripod at ISO 100 and f/8. The setup takes about ten minutes once you know the order of operations.
Glare is a room problem before it is a camera problem. Once light stops bouncing off the quilt toward your lens, a phone camera and a full-frame camera give you nearly the same image.
Textiles make it harder than flat artwork, and for a specific reason. A quilt reflects at two scales at once — the loft of the batting and the weave of every individual print. A source placed dead-on flattens stitching and colour in the same breath, so you lose texture and accuracy together. Five changes, done in this order, fix most of it:
- Hang the quilt flat on a matte, neutral surface and get the camera parallel to it.
- Turn off flash, and use only one light source in the room.
- Move that source to roughly 45 degrees to the quilt instead of overhead.
- Diffuse it with a white sheet or foam board so no small bright edge shows.
- Shoot from a tripod on a 2-second timer, at ISO 100, f/8, in RAW.
Here is the full workflow, and where each step usually goes wrong.
Table of Contents
- What You Need
- Step-by-Step: How to Photograph a Quilt Without Glare
- Prepare the Quilt and Camera Position
- Control Reflections with Large, Soft Light
- Angle the Quilt, Camera, and Filters
- Set Focus, Exposure, and Color
- Use a Polarizer When the Fiber Requires It
- Photograph Construction and Surface Details
- Review Images and Repeat the Shot
- Common Mistakes
- Common Mistakes and Quick Fixes
- Frequently Asked Questions
- Can I use flash when photographing a quilt without glare?
- How do I photograph a quilt in a room with mixed lighting?
- What should I do with shiny fabric that still reflects the light?
- How can I keep quilt colors accurate in photographs?
- Can I fix glare later in photo-editing software?
- Final Check Before You Shoot
What You Need
None of this is expensive, and half of it you already own. The list matters because each item solves a different failure: support kills shake, diffusion kills the hotspot, matte surfaces kill the second reflection, and the polarizer kills what light and angle cannot.
- A camera or phone with manual control. Any camera will shoot the picture. The exposure lock on a phone matters more than the megapixel count.
- A tripod or a stack of books. Quilters who shoot their own work name the tripod plus the 2 or 5 second self-timer as the single biggest quality upgrade, and most people agree. A copy stand is even better if you want framing you never have to adjust twice.
- A matte, neutral surface. A design wall, a sheet of foam board, or a wall painted a flat neutral grey. Glossy white board is a mirror that reflects your light back at you.
- Light control. A north-facing window or an overcast sky gives you a free giant softbox. A white sheet on a clothes rail or a foam board panel diffuses a lamp when the weather will not cooperate.
- A grey card or colour reference card. Photograph it in the same frame as the quilt. Artist photography forums recommend exactly this, because it lets you correct colour years later when the original file is gone.
- A measuring tool. Tape and a level, so a quilt hanging slightly crooked can be straightened and then repeated identically for detail frames.
- A lens cloth. Fingerprints on a lens are a permanent hotspot that no filter removes.
- A circular polarizing filter (optional). Worth buying for a satin or metallic-thread quilt. Skipping it is fine for a cotton flannel backing and cotton prints.
Step-by-Step: How to Photograph a Quilt Without Glare
Prepare the Quilt and Camera Position
Clean the quilt first, following its care label, and let it dry fully. Washing or fresh pressing leaves a temporary shine on the surface, and that shine photographs as glare for weeks after the quilt itself looks matte.
Remove every pin, and flatten the quilt gently rather than pulling hard on the binding. For a wall-hung quilt, use the same fasteners at the same points every time so the drape is identical across shots. Then set the camera exactly parallel to the quilt, with the lens centred on it, and take a test frame before touching any settings. If the quilting lines run slightly off vertical in that test, the whole session is built on bad geometry.
Control Reflections with Large, Soft Light
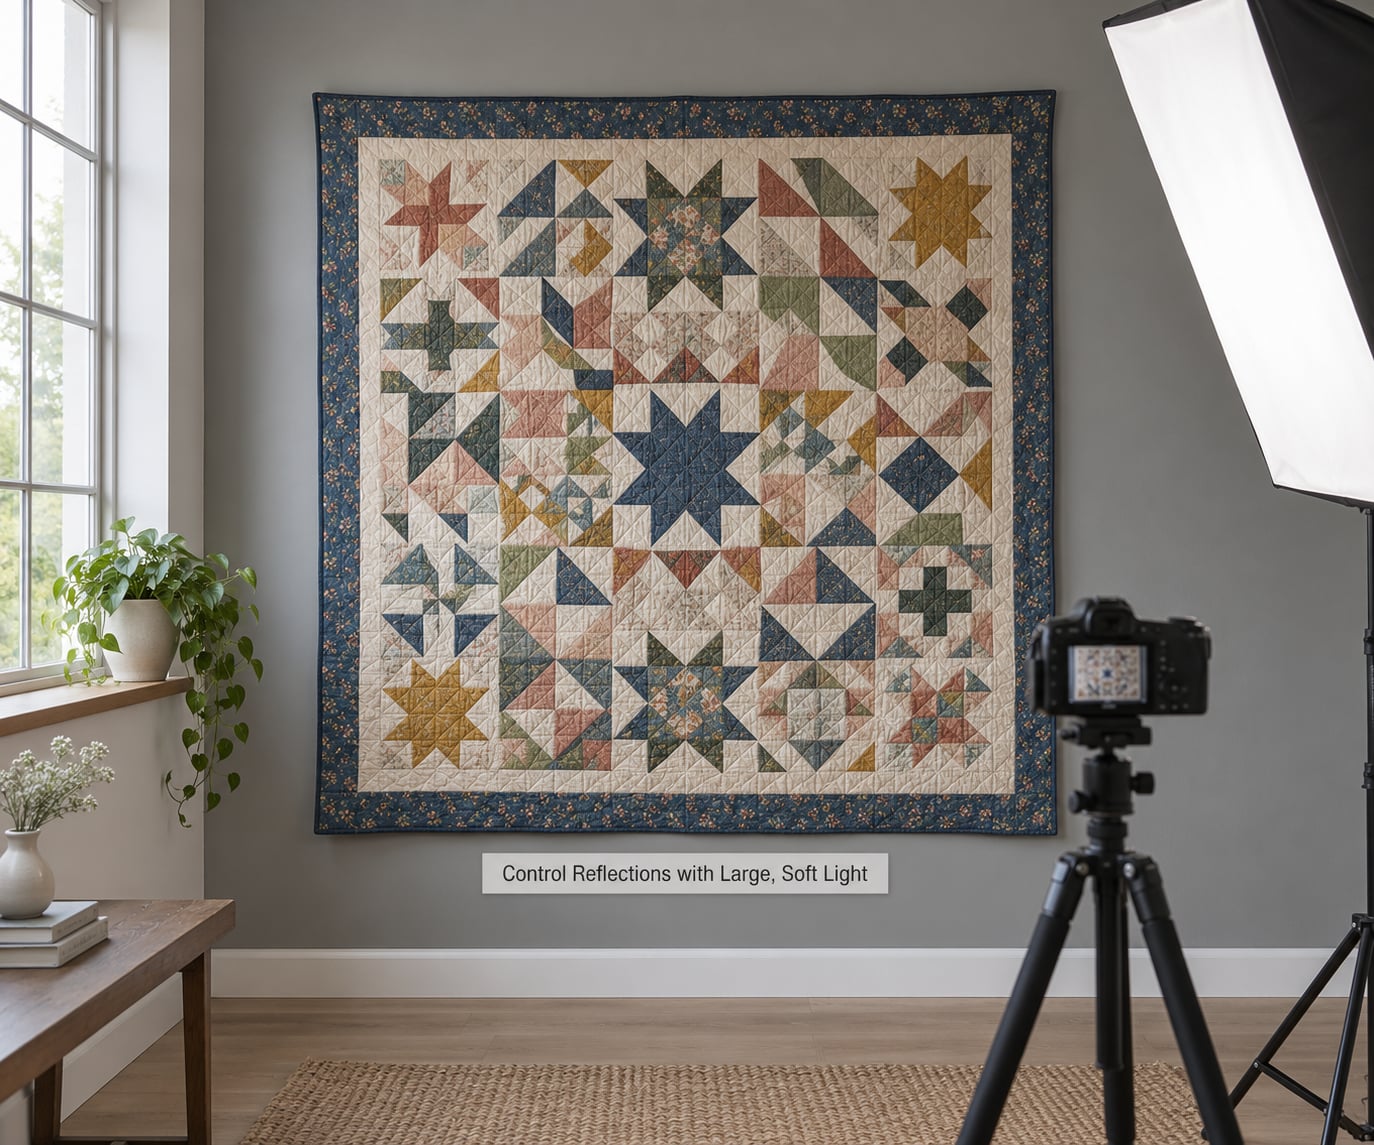
One big source beats two small ones every time. A soft source has no hard edge to reflect, so it produces an even wash instead of a moving hotspot as you walk around.
Hang the quilt perpendicular to a window so the light rakes across it at roughly 45 degrees. Direct sun makes small hard shadows in every ditch and fold, and bright patches where the quilt curves. Overcast daylight is the free version of a studio softbox, and open shade is second best.
Take a test image and check it before you change anything else. A hotspot that stays in the same place no matter where you move is a mirror reflection from a shiny surface; one that moves as you walk is your light source bouncing off the loft.
Angle the Quilt, Camera, and Filters
Reflections obey the law of reflection, so the simplest fix is geometry. Move your light a few degrees to one side of the mirror angle and the glare leaves the frame.
Two habits cause most of the trouble. Standing lights with bare bulbs put their image straight into the lens, and glossy protective film or glass in a display case always reflects. Take the glass off, or shoot at an angle the glass does not mirror back to you. For framed work hung in a bright room, hanging black velvet behind you is an old trick that works, because it absorbs the light that would otherwise bounce back into the shot.
Set Focus, Exposure, and Color
Put the camera on manual, ISO 100 or 200, and f/8 or f/11. Stop down enough for the whole quilt to be sharp front to back, then use a 2-second timer instead of touching the shutter button.
Focus on the middle of the quilt with single-point autofocus, then lock it. A medium focal length around 50mm equivalent keeps distortion low; a 24mm wide angle will bow the edges of a king-size quilt outward.
Set white balance to daylight or use a custom setting from the grey card in your test frame, so the blues do not go purple. Shoot RAW when you can. Watch the histogram and pull exposure down until the brightest batting highlights sit just under clipping, since clipped white is what people read as glare on a screen.
Use a Polarizer When the Fiber Requires It
A circular polarizing filter sits in front of the lens and rotates. Turning it until the image darkens and the sheen fades is the correct procedure, and the effect is strongest at one particular rotation angle.
Cross-polarization goes further: you put polarizing film over the light sources too, so arriving light and reflected light are at right angles to each other and the reflection is cancelled. Some studio photographers build a two-lamp setup with polarizing film over barn doors plus a rotating polarizer on the lens, which can tame glare on varnished paintings. That is more setup than most people need at home.
Know the limits. A polarizer costs you roughly two stops of light, so you slow the shutter or open up. It can darken and dull colours, flatten the sparkle that gives hand-dyed and metallic thread its life, and prevent the lens from focusing at its usual speed. Use it for the satin and metallic quilts; leave it off for the cotton ones.
Photograph Construction and Surface Details
Shoot the full quilt first, then work down. A bed quilt rarely fits one frame in a normal room, so shoot overlapping vertical and horizontal frames from the same tripod position and stitch them together later.
Then make the detail frames that make people believe the texture: piecing seams at a corner, an appliqué curve, close quilting where the loft and stitch density show, any labels and signatures, and the binding or edge finish at each of the four sides. Detail shots carry the quality signal, because a wide shot at phone resolution cannot show a half-inch seam.
Review Images and Repeat the Shot
Look at the full frame at 100 percent, not zoomed out. Five checks: any clipped white, any colour cast against the grey card, straight vertical lines at the quilt’s edges, sharp fibres in the middle third, and no moving hotspot.
When something is wrong, change the setup rather than the file. A reflection that depends on where you stood cannot be repaired in editing without inventing texture that was never there, and the missing detail will show up the moment someone prints the picture. Repeat the frame instead.
Common Mistakes
The pattern repeats across quilters who shoot their own work. Direct sun or overhead light first, then flash, then a tilted camera, then a filter as the last resort instead of the first move.
Check evenness with an incident light meter or by eye as you walk the length of the quilt. Quilters working on large pieces often carry an incident meter to confirm light falls evenly across the work, which is what avoids the bright centre and dark corners that ruin large shots.
Common Mistakes and Quick Fixes
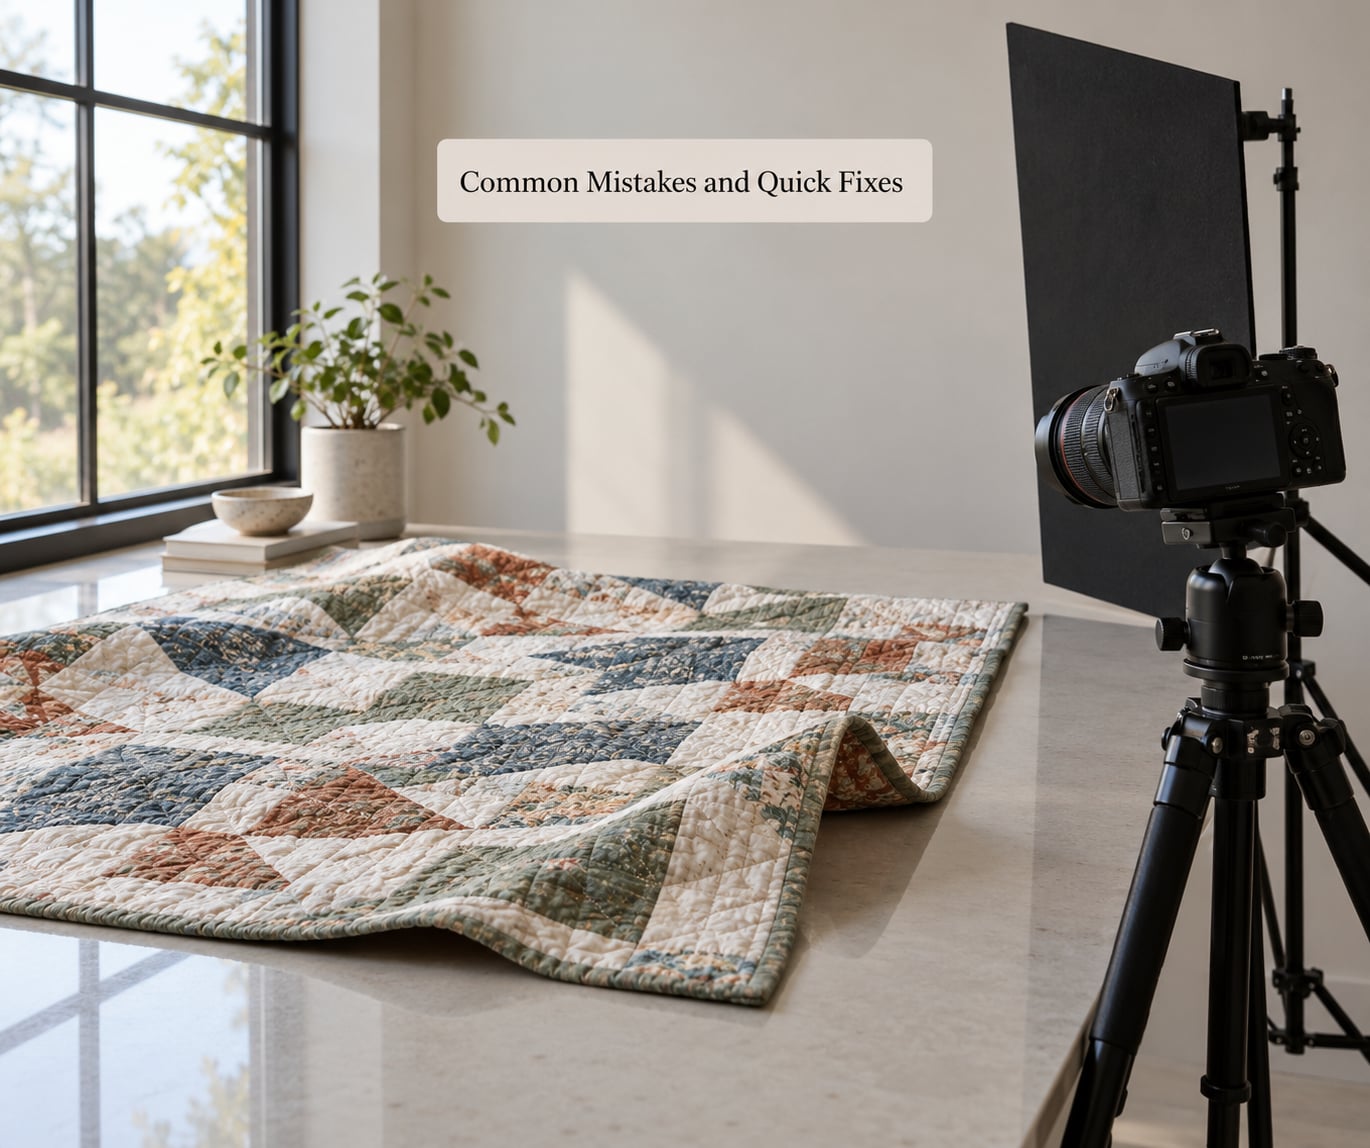
Almost every bad quilt photo traces back to one of these eight.
- Direct sunlight. It creates hard shadows in the quilting and bright patches where the surface curves. Move to open shade or wait for cloud cover.
- Mixed lighting. A window plus a ceiling light plus a lamp gives two colour temperatures and two shadow directions. Turn everything off but one source.
- On-camera flash. It fires from the lens axis, which is exactly the mirror angle. There is no flag that fixes it; use more ambient light instead.
- A tilted camera. Keystone distortion on one axis, pincushion on the other. Level the tripod and check a vertical seam in the test frame.
- Reaching for a filter first. A polarizer on a shot with no reflection just darkens and dulls. Fix the light angle before you touch glass.
- Leaving white balance on auto. The camera picks the tint of the room. Set daylight white balance or use the grey card.
- An unsecured surface. A quilt shifting between shots ruins any stitched multi-frame sequence. Use the same fasteners at the same points every time.
- Stopping at the wide shot. If the only image is the full quilt, texture is invisible. Shoot the seams, the quilting, and the edges.
When you cannot work out what is wrong, work down this hierarchy: shoot with the polarizer off and all artificial light off, then add the one source at 45 degrees. If a hotspot is still there, walk to one side and reframe. If the colours are still off, shoot the grey card again. If the quilt is still crooked, the camera is not level, and nothing else matters.
Outdoors, remember that open shade is blue and grass bounce is green. Both shift colour. That is fine for a social post and wrong for a pattern cover or a show entry.
Frequently Asked Questions
Can I use flash when photographing a quilt without glare?
Not on the quilt. On-camera flash fires from the lens axis, which is precisely the angle that mirrors light back into the sensor, so it produces a hotspot dead centre. Off-camera flash works because you can move the head to 45 degrees and bounce or diffuse it, but once you are set up to do that, a large soft window or a diffused lamp is easier and gives more even light across a big quilt.
How do I photograph a quilt in a room with mixed lighting?
Turn every source off but one. Pick the window, or one lamp, close the curtains and blinds, and make sure no standing light or television is bouncing. Mixed sources give two colour temperatures and two shadow directions at once, which is why the quilt looks flat in one corner and warm in another. Recheck your white balance after the change, because removing a warm bulb shifts the whole image cooler.
What should I do with shiny fabric that still reflects the light?
Move the light off-axis first, then rotate a circular polarizer on the lens until the sheen drops. For satin, metallic thread, or a resin applique, a light tent built from white foam board or a bed sheet diffuses the source so no single bright shape reflects. Expect a polarizer to cost about two stops of light and to flatten sparkle, so use it on the shiny quilt rather than across the whole set.
How can I keep quilt colors accurate in photographs?
Shoot RAW and set white balance manually to daylight, or take a custom reading from a grey card in the same frame as the quilt. Keep that reference card in the documentation set so colour can be corrected years later. Avoid open shade, which is blue, and grass bounce, which is green, both of which shift hue. Pull exposure down slightly if highlights clip, because clipped white fabric reads as glare on screen.
Can I fix glare later in photo-editing software?
Partly, and not fully. You can lower highlights, add local contrast to pull stitching back out of a hotspot, or clone out a reflection in a flat area. You cannot reconstruct fibre detail that a blown highlight destroyed, and cloning across texture usually reads as plastic once someone prints it. Treat editing as the last step, after you have moved the light, diffused it, and reshot the frame.
Final Check Before You Shoot
Start with one wide test frame and do not move on until it is right. Keep the camera parallel to the quilt, kill every light except one, put that source at 45 degrees, and diffuse it.
Then look for one thing only: a hotspot that moves when you walk. If it does not move, it is a reflective surface, and you fix it by moving the light or adding the polarizer. Once the wide frame is clean, drop the tripod lower for your detail shots and repeat the same geometry so every frame in the set matches.
Glare almost never comes from the camera. It comes from a light source sitting at the mirror angle, and that is a problem you can solve in the room before you press the shutter.