The fastest way to organize fabric scraps by color is to set a size threshold, separate the pile into nine or ten color families using rainbow order, then store each family in its own labeled bin so you can see everything you own without digging. Most people finish a first pass in an evening, and the system holds up for years.
Scraps, fabric remnants, leftovers, offcuts. Whatever you call them, they are the pieces of quilting fabric or yardage left over after a project, and they quietly swallow up more closet space than anything else in a sewing room. The trouble is not the sorting itself. It is that a scrap pile has no address, so six months later you buy a bolt of the exact blue you already own twice.
Sorting by color solves that. Once every scrap lives in a labeled bin, you can spot a gap in your stash, pull a color without ransacking a basket, and actually finish something. This guide covers what to gather, five different color systems you can pick from, where multi-color prints go, which container fits which scrap size, and how to keep the whole thing from falling apart in 2026.
Table of Contents
- What You Need
- Step-by-Step: How to Organize Fabric Scraps by Color
- 1. Clear and Prepare the Fabric Scraps
- 2. Choose a Color Grouping Method: Five Ways to Organize Fabric Scraps by Color
- 3. Sort Scraps Into Color Categories
- 4. Subdivide by Value, Pattern, or Fabric Type
- 5. Label and Store Each Color Group
- 6. Maintain the System Over Time
- Common Mistakes That Break a Color System
- Frequently Asked Questions
- What is the easiest way to organize fabric scraps by color?
- Should I sort fabric scraps by exact shade or by color family?
- What containers work best for storing small fabric scraps?
- How do I organize fabric scraps that are more than one color?
- Should I separate fabric scraps by material or fiber type?
- How do I keep a fabric scrap collection from becoming disorganized again?
- Conclusion
What You Need
You need almost nothing to start, and you need less than you think. Here is the honest list:
- Clear, shallow bins or boxes. Clear matters more than any other feature. You want to see the color of a bin without pulling it off the shelf.
- A marker and a roll of painter’s tape or label stickers for naming each container.
- A large flat surface. A bed, the dining table, or the floor. Sorting works best spread out, not dumped into a bag.
- Ziplock bags in two or three sizes for strings, thin strips, and anything too small to stack neatly.
- Acid-free cardboard pieces or cereal-box panels to build dividers inside a bin.
- A rotary cutter, quilting ruler, and cutting mat if you plan to cut anything down to standard sizes.
- One “undecided” basket and one donation bag. Both are temporary and both earn their keep.
- Optional: a small color swatch card, a swatch from each bin, or a printed rainbow order strip taped inside the lid so you remember what “purple” means to you.
Skip the specialty storage furniture until the system proves itself. Forum regulars consistently use clear plastic drawer sets, plastic shoeboxes, even an old CD tower for ziplock bags, and they report the same result: the container matters far less than the labeling.
Step-by-Step: How to Organize Fabric Scraps by Color
1. Clear and Prepare the Fabric Scraps
Gather every scrap you own into one place. Not the ones in your sewing machine tray, not the ones behind the ironing board, all of them. Pulling from multiple hiding spots is the only tedious part, and doing it once means you sort the whole stash instead of re-sorting a fragment next month.
Then set a size threshold, because “scrap” means something different to everyone. A useful set of standard sizes:
- Strings: too narrow or too short to piece. Roughly under 1 inch wide, or pieces only a few inches long.
- Fat eighth: 9 by 22 inches.
- Fat quarter: 18 by 22 inches.
- Anything larger: yardage and half yards, which deserve their own storage rather than a scrap bin.
Remove anything that is not fabric: paper labels, pins, cardboard templates, batting scraps. Do not iron during sorting. Bins crush and wrinkle fabric anyway, so pressing every piece at the start is wasted effort. Press at the moment you use a scrap instead.
Do not cut anything down yet either. Mary Marcotte’s rule applies: cut only when the cut obviously makes sense. A 10 by 30 inch piece is already more useful than eight scraps you invented need for.
2. Choose a Color Grouping Method: Five Ways to Organize Fabric Scraps by Color
There is no single correct order. There are five systems that work, and the best one is the one you will still be using in a year. Each needs a different number of bins, which matters more than most people expect.
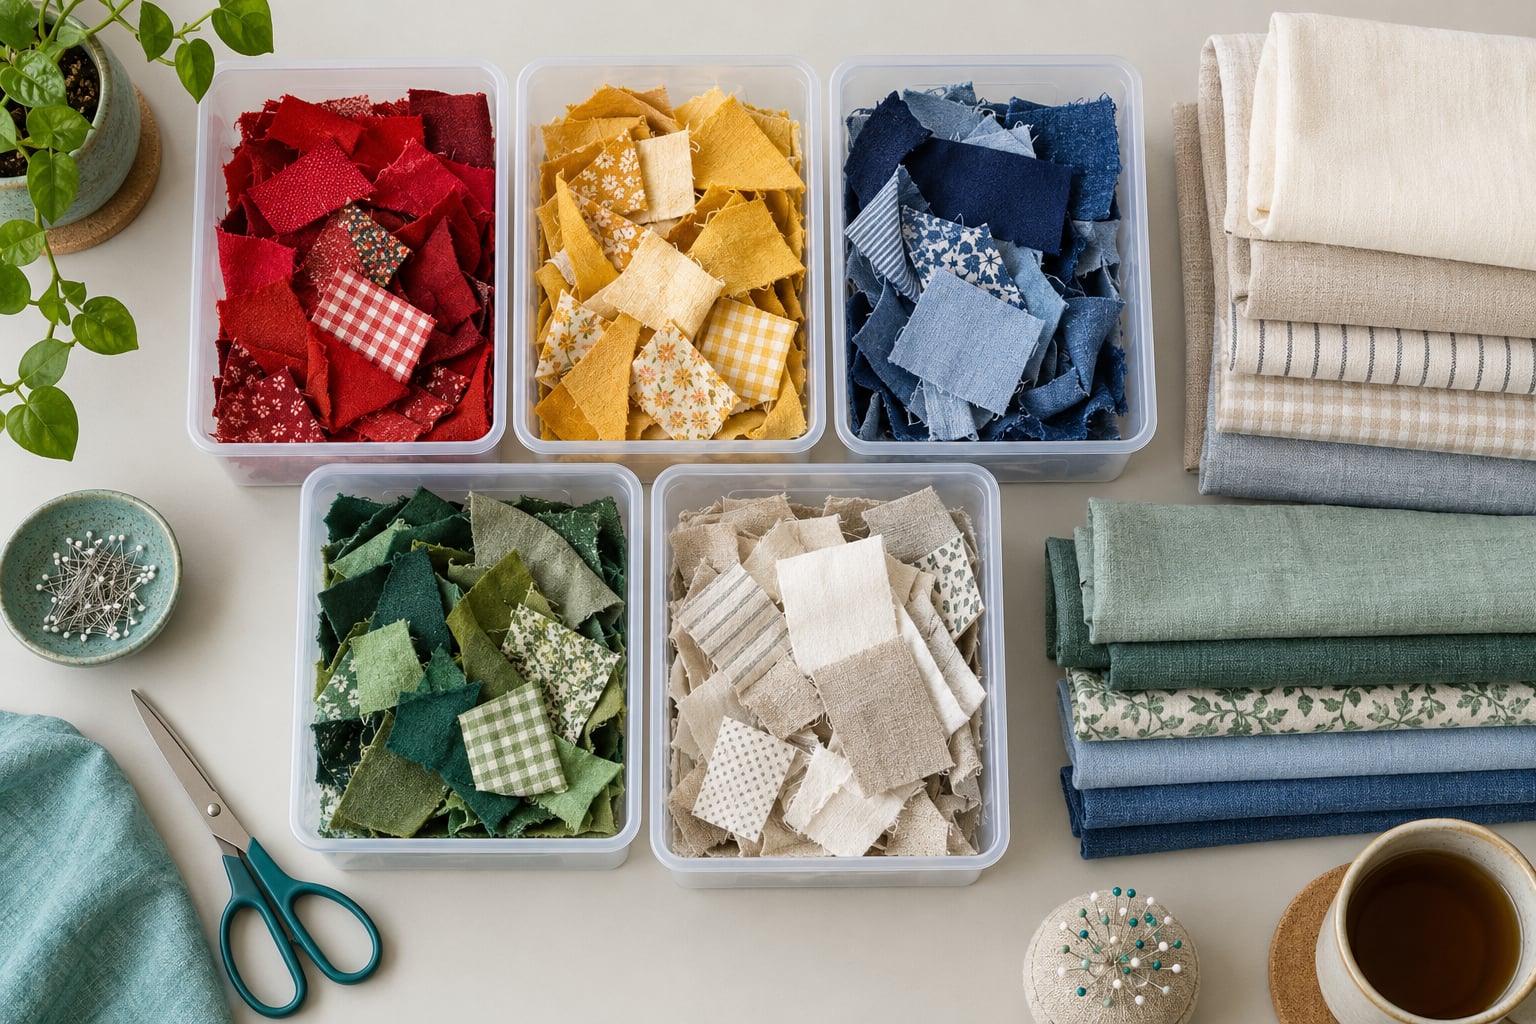
- Rainbow order (ROYGBIV). Red, orange, yellow, green, blue, violet, plus pink, brown, black, and white. About ten bins. The most popular system by a wide margin, because finding a color takes no thinking at all.
- Warm and cool. Two to four bins if you add a “warm neutral” and “cool neutral.” Fewest bins, easiest to maintain, slightly harder to locate a specific blue.
- Neutral-first. White, cream, gray, black, and brown up front, then the rainbow behind them. Best for quilters who use large expanses of background fabric.
- Size first, then color within each size. One tub for fat eighths, one for fat quarters, one for larger pieces, each divided into color compartments. More containers, but nothing gets buried under a pile of larger pieces.
- Dominant color with background bins. Color by whatever dominates the print, and add separate bins for prints on white and prints on black. This is the system several readers in quilting forums converged on independently.
Rainbow order with a couple of custom additions is the sweet spot for most people. Mary Marcotte extends it with teal and turquoise and splits neutrals into white and off-white, which is exactly the kind of small adjustment that makes a system fit your actual stash rather than an imaginary one.
3. Sort Scraps Into Color Categories
Work one piece at a time. Hold the scrap up, find the color that occupies most of it, and drop it in that bin. Speed comes from not deliberating.
Multi-color prints are where sorting stalls, and the reason people describe it as “where, oh where, do you go?” Use the dominant-color rule: the background color decides the bin, not the motif. A floral on pale blue goes with blues even if the flowers are hot pink, because most of that fabric is blue and you will want it with your blues.
Then handle the two special cases. Busy prints on a white background go into a prints-on-white bin, because the white dominates. Prints on black or dark navy go into a prints-on-dark bin for the same reason. Novelty prints with no obvious background go in a general bin or straight to the project caddy.
When a scrap genuinely fits two families, pick one and move on. Time spent agonizing over a 4 by 5 inch piece is the exact time that keeps piles unsorted for years.
4. Subdivide by Value, Pattern, or Fabric Type
A single-color bin feels chaotic once it holds two dozen pieces, and then you are back to digging. The fix is one extra layer, applied only where it earns its place.
- By value. Split each color into light, medium, and dark, or at minimum into light and dark. Value matters more to a quilt than hue does, and a single bin mixing pale pink with deep crimson is genuinely hard to use.
- By pattern type. Solids in their own compartment, prints in another, stripes with the prints. Solids are the workhorses for improv piecing and they disappear fastest.
- By fabric type. For garment sewists, keep quilting cottons separate from linen, knits, denim, and interfacing scraps. Different drape and fiber content means different projects.
- By size. Strings, strips, and small odd shapes each get a ziplock bag inside the color bin, so they do not tangle or fray under everything else.
Add a subdivision only when you can name a project that needs it. A system with three levels of labels is satisfying on day one and abandoned by month three.
5. Label and Store Each Color Group
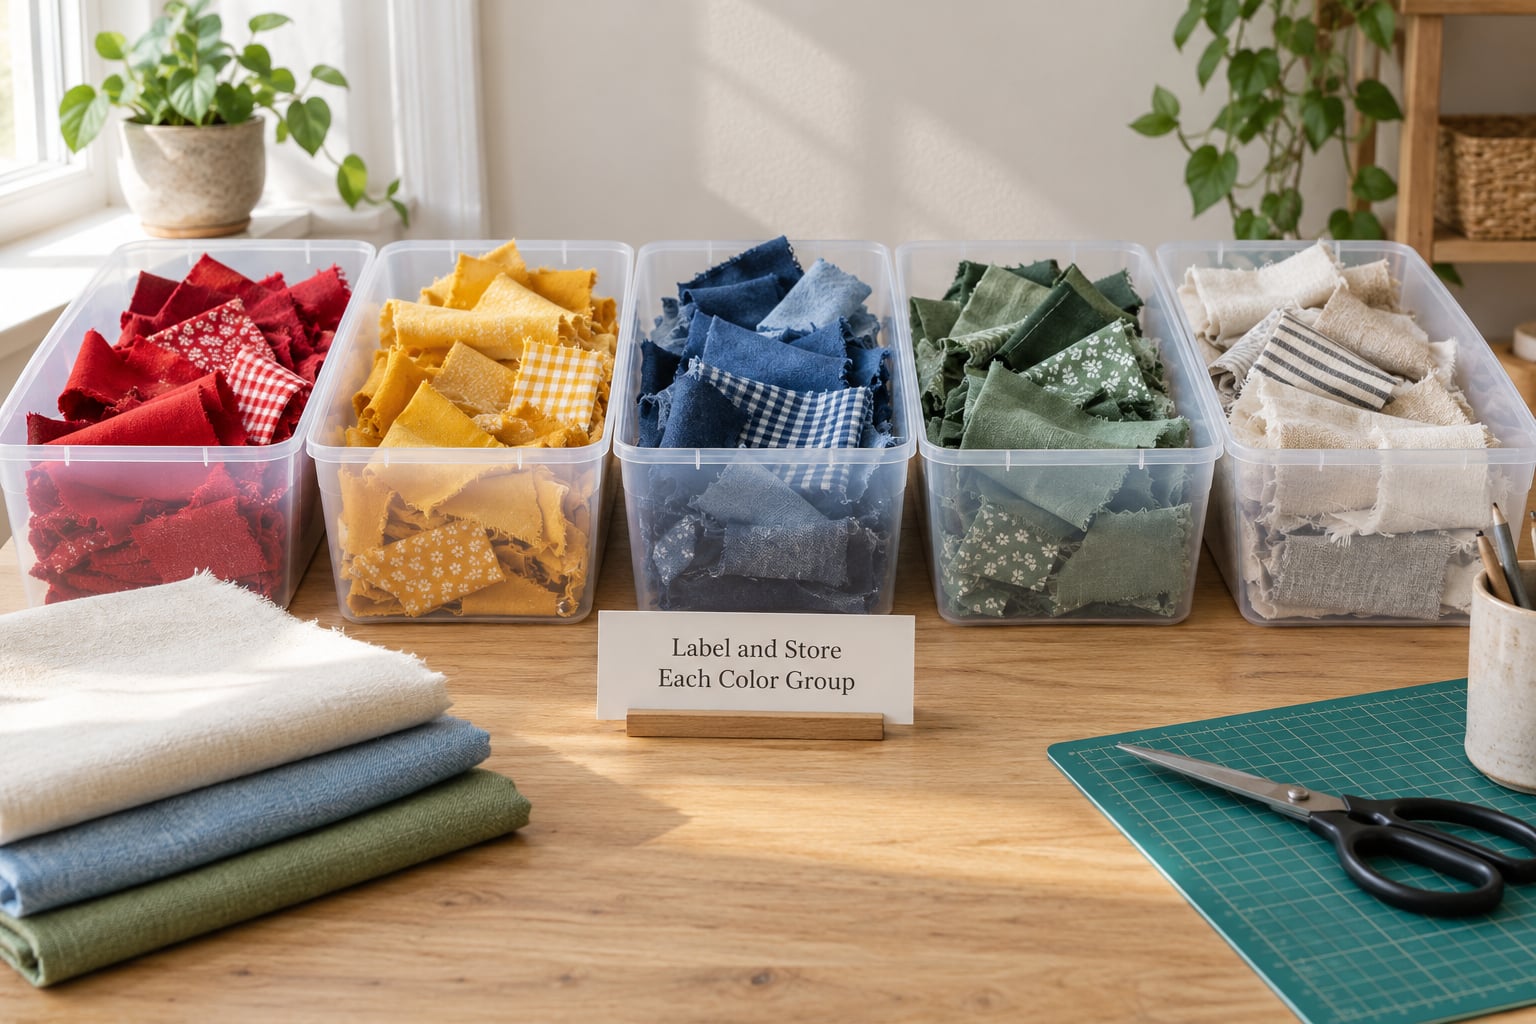
Match the container to the size of the pieces. This is where most systems fail, because a big bin of small scraps is useless and a small bin of fat quarters does not close.
| Scrap size | Container that works | Why |
|---|---|---|
| Strings and thin slivers | Ziplock bag per color, bags stood upright in a tote | Keeps them from sifting to the bottom and tangling; you pull one bag, not one scrap |
| Small pieces under 4 inches | Quart ziplock bags sorted by color in one tote | The most common forum solution, and it scales |
| Fat eighths, 9 by 22 inches | Shallow bin or cardboard divider panel | Rolling or standing them stops thin pieces collapsing into a heap |
| Fat quarters, 18 by 22 inches | Stackable clear tote, one per color family | Flat storage keeps the folds crisp |
| Larger pieces and yardage | Shelf space or separate yardage storage | Too big to bury in a scrap bin, and you will lose them there |
| Many colors, few containers | One drawer unit with dividers per color family | Cheapest way to add “bins” when you are short on them |
Label every container with the same words every time. Color family first, then value or size: “Blues, dark, FQ” reads faster than “navy scraps.” Painter’s tape and a Sharpie do the job; masking them over later makes labels removable when a bin changes purpose.
Then arrange the bins themselves in rainbow order left to right on the shelf. Most people forget this, and it is the difference between a system you use and one you admire. Snuggles Quilts adds one habit I would not skip: photograph each bin from above once you fill it, so you can check what you already own before buying more.
6. Maintain the System Over Time
A color sort that is never maintained becomes a color sort with six new piles on top. A short weekly routine is enough.
Every time you finish a project, pull the leftovers and sort them straight into the bins. Ten minutes at the machine beats an evening six months later. Keep one basket beside your machine for this, and empty it into the system whenever it fills.
Once a quarter, do a scrap audit. Put every piece on the table and apply three rules in order:
- Pivot. If a piece fits a project you already planned or are actively piecing, it goes into a working caddy, not back in the bin.
- Keep. Anything larger than a fat quarter or in a color you are actively building a quilt in stays.
- Donate or hand off. Strings, offcuts from projects six months ago, and fabrics you have never used go to a quilting group swap, a thrift store, or a friend’s scrap pile.
Throwing fabric away feels like a moral failure, and that feeling is why bins stay full of things you will never touch. A community swap box solves most of the guilt: everything goes somewhere, and someone else uses it.
Finally, merge rather than buy. If a color bin is always empty, combine it with its neighbor. Ten bins where two hold almost nothing is worse than four bins where all four are full. Store per-color ziplock bags inside a single tote instead of buying one bin per hue when you are short on containers.
Common Mistakes That Break a Color System
Building too many categories. Ten hues became twenty-seven when you split each color three ways by value and pattern. Fix: cap it at ten color bins plus one for prints on white and one for prints on dark. Two subdivisions maximum.
Unlabeled containers. Clear bins full of unknown contents are just more clutter. Fix: label at the moment you fill the bin, never later.
Sorting by one shade only. A bin with pale blue, navy, and denim in it is not a blue bin, it is a blue guessing game. Fix: add a light and dark subdivision once a bin feels hard to search.
Ignoring fabric type. Quilting cottons mixed with denim and knit scraps make every future project harder. Fix: separate by material if you sew garments as well as quilts.
Ironing everything while you sort. It is the single most wasted hour in the process, because the bins wrinkle everything anyway. Fix: press at time of use.
Cutting scraps down reflexively. Cutting everything into uniform sizes destroys triangles, points, and oddly shaped pieces that are the best raw material for improv piecing and appliqué. Fix: cut only when a standard size is actually needed.
Sorting by collection or designer. It works beautifully right up to the fifth project, then scraps from six quilts sit in six different places. This is why quilters tend to migrate to color sorting. Diary of a Quilter described the switch to pure color sorting as liberating, and reported being far more inspired to use the fabric afterward.
Waiting for a free weekend. A huge pile is psychologically enormous. Fix: sort in 20-minute bursts, one color at a time, and stop when the timer goes. Most people finish faster than they expect.
Frequently Asked Questions
What is the easiest way to organize fabric scraps by color?
Start with rainbow order and one bin per color family, and do not subdivide anything on the first pass. Set a size threshold first, so strings, fat eighths, fat quarters, and larger pieces get separated as you go. Sort busy multi-color prints by their background color rather than the motif, and label each bin the moment you fill it. Once the bins are labeled and standing on a shelf in rainbow order, add value or pattern splits only where a bin feels hard to search.
Should I sort fabric scraps by exact shade or by color family?
By color family. Exact shade sorting produces far too many bins for the number of containers most people own, and it creates bins you will never open. A quilt reads as a color family, not as a specific Pantone, so reds can sit together happily. If you need finer control, split each family into light, medium, and dark, which is the same value logic that matters most visually in a finished quilt.
What containers work best for storing small fabric scraps?
Quart ziplock bags, one per color, stored upright inside a single clear tote. This is the most common approach in quilting forums because it handles strings and small offcuts that would otherwise sink to the bottom and tangle. For pieces under four inches, the bag approach scales to any size of stash. Clear plastic drawer sets work well too, and cost nothing more than the fabric you are already storing.
How do I organize fabric scraps that are more than one color?
Use the dominant-color rule: the background color of the print decides the bin, not the motif. A floral on pale blue goes with the blues even when the flowers are hot pink, because most of the fabric is blue. Prints on a white background go in a dedicated prints-on-white bin, and prints on black or dark navy go in a prints-on-dark bin. Novelty prints with no clear background get their own general bin.
Should I separate fabric scraps by material or fiber type?
Yes, if you sew garments as well as quilts. Denim, knit, linen, and quilting cotton behave very differently in a project, and mixing them makes every bin harder to use. Keep them in separate containers, sorted by color within each material. If you only quilt, a single system by color and value is plenty, since fiber content rarely changes which project a piece belongs in.
How do I keep a fabric scrap collection from becoming disorganized again?
Use a ten-minute weekly routine plus a quarterly audit. After every project, sort the leftovers straight into the bins instead of leaving them in a pile. Once a quarter, empty the bins onto a table and apply three rules: pivot pieces that fit a current project, keep anything larger than a fat quarter, and donate or swap the rest. That last step matters most, because a full bin of things you never touch is what turns a system back into clutter.
Conclusion
Start with one action: pull every scrap into one pile, pick a size threshold, and set out ten bins in rainbow order. Do not cut anything, do not iron anything, and do not worry about where the awkward multi-color prints go, because the dominant-color rule handles them.
Label each bin as you fill it and stand them on a shelf in order. That is the whole system, and it is enough to end the cycle of buying fabric you already own twice. Once you have lived with it for a few months, add subdivisions only where a bin is genuinely hard to search, and merge any bins that stay empty. A color system that stays simple is one you will still be using in 2026.