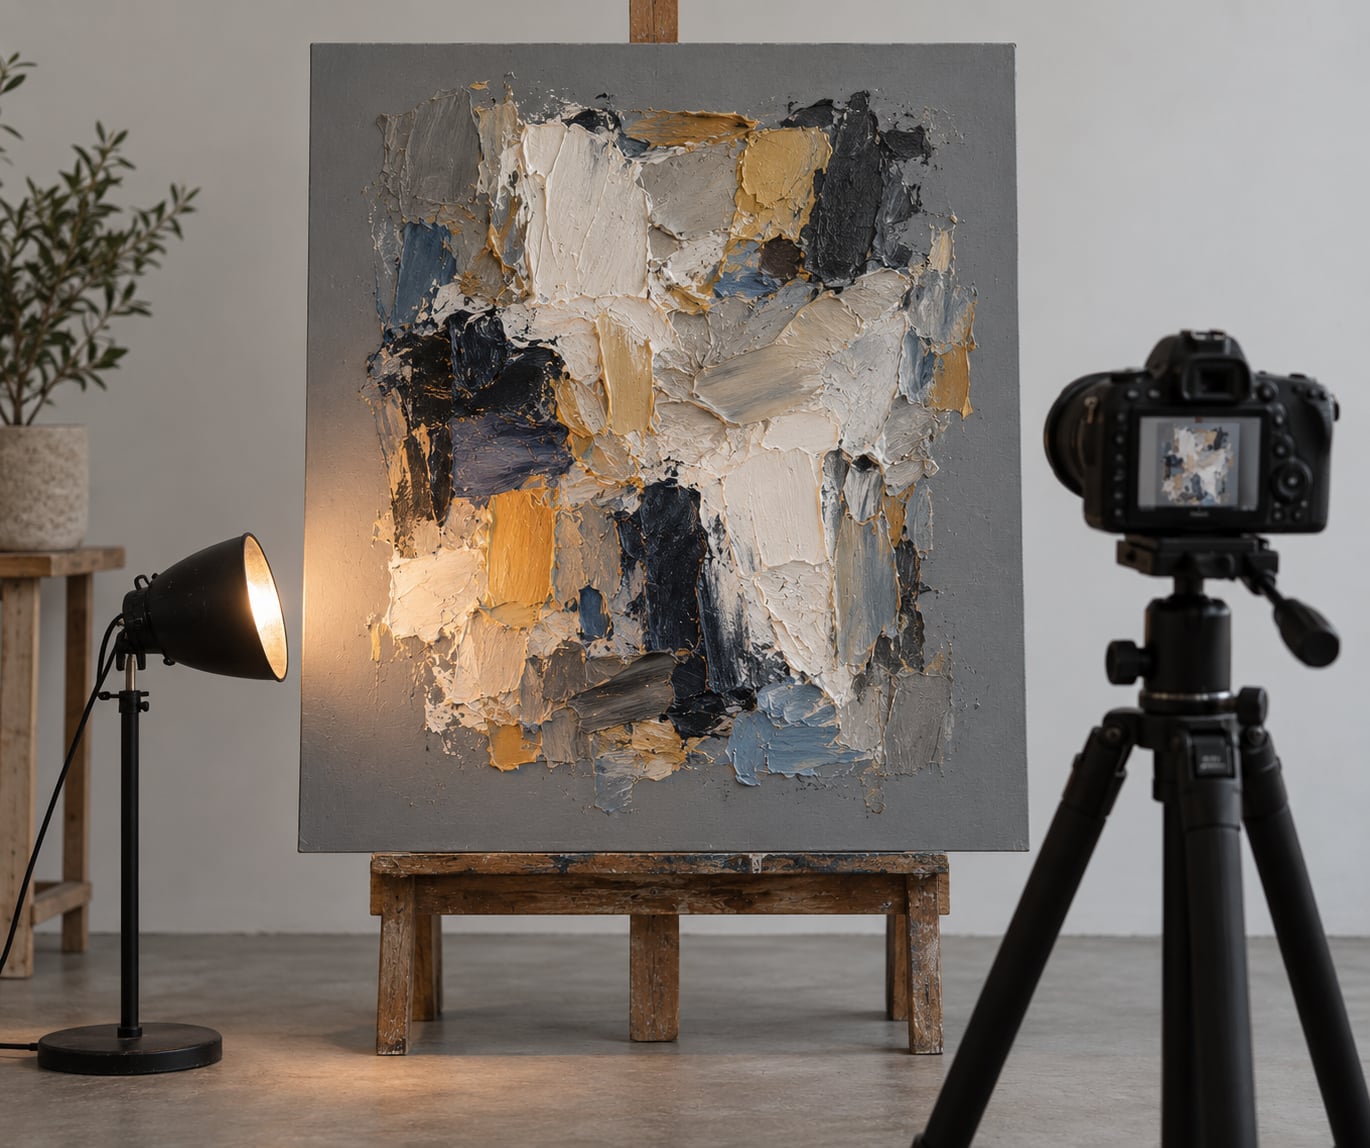
Getting how to photograph textured artwork right comes down to one thing, and most people get it backwards: light straight at the surface erases the texture. To make impasto ridges, palette knife marks and canvas weave read as real relief in a photograph, drop your light to a raking angle of roughly 30 degrees to the surface and shoot a second frame that way alongside the normal straight-on colour shot. Twenty minutes, one lamp, and a phone covers it.
Flat frontal light fills in the small shadows sitting in the valleys between paint ridges. The result is a photo of a heavily textured piece that looks like a smooth printed poster, which is the exact complaint raised again and again in the artist forums I read while putting this together.
- Texture is revealed by cast shadow, not by resolution. Move the light, not the megapixels.
- Shoot two frames: an even frontal shot for colour and composition, a raking shot for relief.
- Raking light sits at about a 30 degree angle to the surface, roughly the 10 o’clock position on a clock face.
- Get the camera sensor parallel to the artwork or the piece becomes a trapezoid.
- A grey card in the first frame buys accurate colour later in editing.
Table of Contents
- What You Need
- A camera, and any phone will do
- One movable light source
- Something to diffuse it
- A stable support and a neutral surface
- Optional but useful
- How to Photograph Textured Artwork Step by Step
- 1. Prepare the Artwork and Shooting Area
- 2. Control the Light
- 3. Set the Camera for Texture and Colour
- 4. Choose the Right Angle and Composition
- 5. Check, Refine, and Save Your Images
- Common Mistakes
- Frequently Asked Questions
- Can I photograph textured artwork with a smartphone?
- Should textured artwork be photographed flat or at an angle?
- What is the best lighting for photographing raised or three-dimensional art?
- How do I photograph textured artwork hanging on a wall without distortion?
- How do I keep the colors accurate in photographs of quilts and mixed-media pieces?
- Should I edit a textured artwork photo to make the texture more visible?
- Start with one extra frame
What You Need
Five things, and only one of them is the camera. Everything else is about getting the light into the right place and keeping the camera still while it sits there.
A camera, and any phone will do
Every current phone has more resolution than textured artwork needs. The two settings that matter are exposure lock and the 2x lens, which lets you back up far enough to avoid wide-angle distortion. Anything beyond that is a copy stand, a tripod, or a flat-field macro lens for the days you shoot a full day of work.
One movable light source
An adjustable desk lamp is genuinely enough. So is a single LED panel on a stand, or a window if you are willing to wait for the sun to move. What you cannot use is the light built into the camera, and mixing a daylight window with a warm lamp in the same frame is a fast way to get a painting that is part yellow and part blue.
Something to diffuse it
A bare bulb gives you hard black shadows that swallow brushwork. A sheet of white foam board, a frosted panel, or a cheap softbox between the lamp and the artwork widens the source and keeps the shadows soft. Most of the cheap diffuser builds here are a single sheet and some tape.
A stable support and a neutral surface
A tripod matters more than extra lens quality, because any movement during the exposure softens the very detail you are trying to show. A stack of books works in a pinch. For the surface, matte poster board in a neutral grey or white keeps the edges of the piece crisp and stops the background competing with the texture.
Optional but useful
A grey card or colour checker in the first frame gives you a neutral reference to correct the white balance later, which matters more for quilts and dyed textile work than most people expect. A flatbed scanner gives you a perfectly even, perfectly flat colour record of a piece with no surface relief, which makes it a useful archive shot and a poor texture shot.
How to Photograph Textured Artwork Step by Step
This is the process I run for any piece with real surface on it, in the order that wastes the least time when something needs fixing.
1. Prepare the Artwork and Shooting Area
Wipe the surface with a clean dry cloth and pick off stray fibres before anything else. Under raking light a single speck of lint throws a shadow big enough to look like a crater in the paint, and you will not notice it until you are zoomed in on screen.
Wait for the varnish to cure if the piece has any, and photograph acrylic before it is fully dry if you have to. Fresh varnish photographs glossier than the same varnish six months later, so a wet-looking image is sometimes just an impatient timeline. For photographs meant to be archived, wait; for a quick listing, shoot now and re-shoot later.
Lay the piece flat on a matte board for anything up to about 24 inches, or hang it for larger work. Flat is easier to align and easier to keep even. You know it worked when the four edges of the piece all sit at the same height in the frame with no keystoning.
2. Control the Light
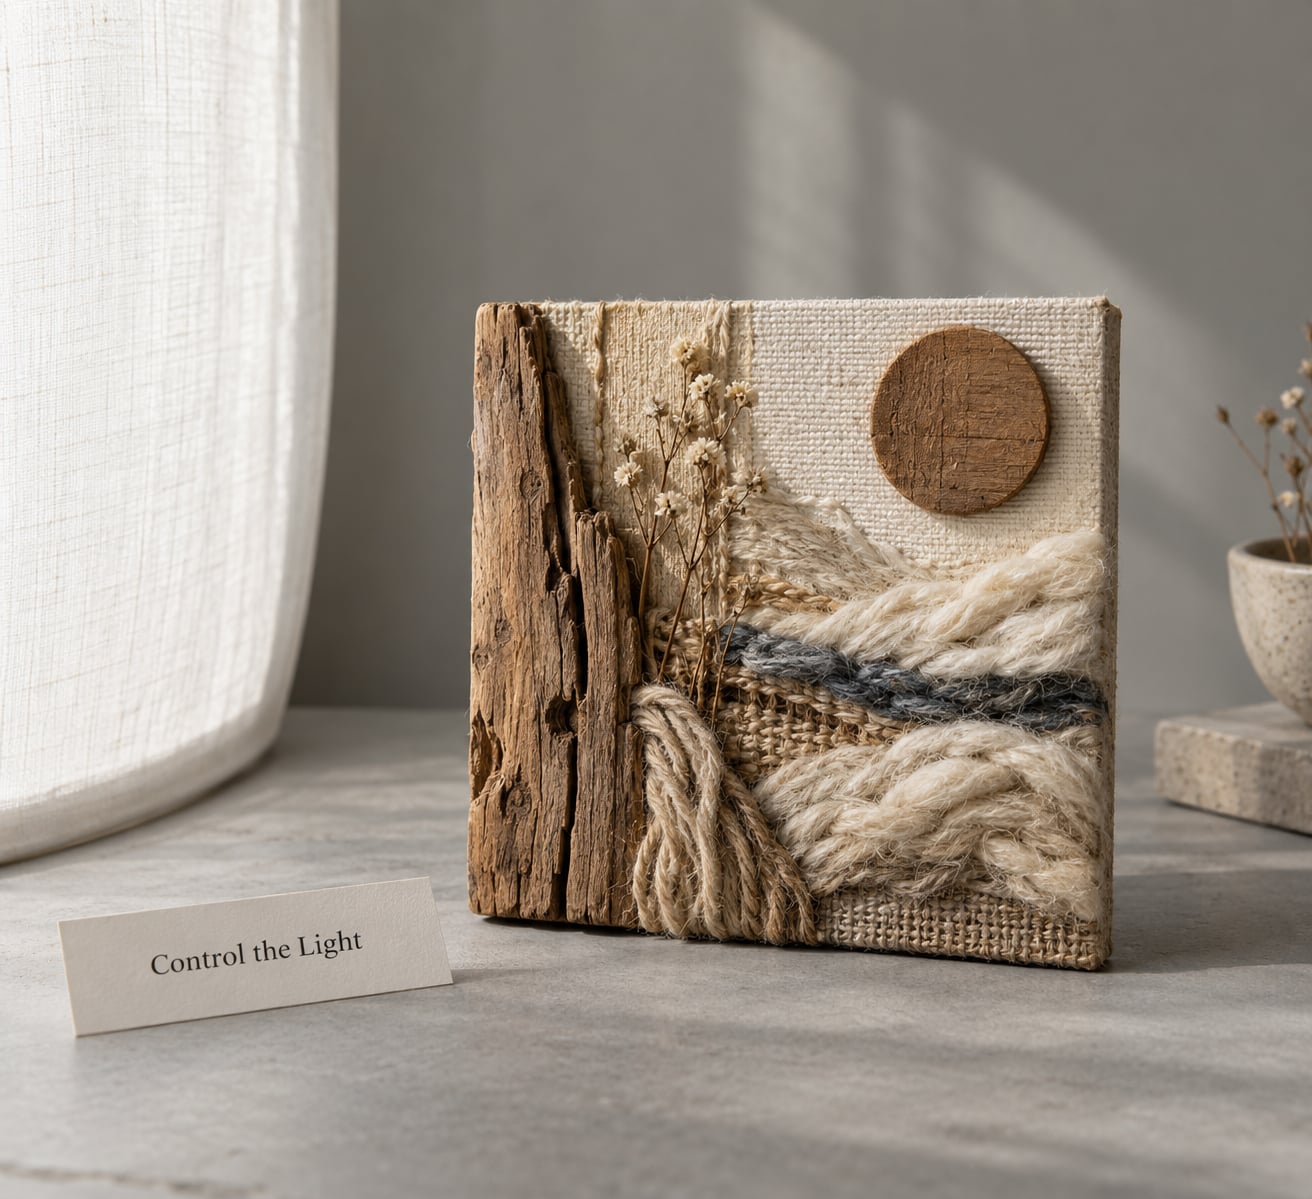
Soft directional light at a low angle is what makes relief visible. Put the lamp so it strikes the surface at about 30 degrees, which on a clock face means roughly the ten o’clock position, then soften the source with a panel or sheet so the shadows have soft edges rather than hard black lines.
The angle you need depends on how tall the texture is. Deep knife ridges and thick impasto need a steeper rake, closer to 20 or 30 degrees, because you want long shadows trailing across the surface. Shallow scumbling, dry brush and fine canvas weave need a gentler angle nearer 45 to 60 degrees, because a very low light on a shallow surface produces mostly shadow and very little readable detail.
| Surface | Light angle to the surface | What to watch for |
|---|---|---|
| Heavy impasto and palette knife work | 20 to 30 degrees | Long shadows between ridges; watch for glare on the ridge peaks |
| Dry brush and scumbling | 45 to 60 degrees | Too low and the whole passage turns to mud |
| Thin paint and glazes | 30 to 45 degrees, even and frontal for colour | Texture is subtle, so shoot a detail frame as well as the full piece |
| Textured gesso, plaster, sanded surfaces | 25 to 35 degrees | Very high micro-contrast, so diffuse more than usual |
| Metallic, mica and interference pigments | Even frontal, no polarising filter | Polarisation kills the effect these pigments exist for |
| Textile, fibre and quilted work | 30 to 45 degrees from one side | Quilting reads through shadow lines, not through colour |
| Collage with raised found objects | 30 to 40 degrees | Objects throw their own shadows; separate them from the background |
Keep every other light source out of the room. A window on the far side of the studio is enough to put a second, cooler shadow edge on the opposite side of every ridge, and the texture turns muddy. One light, one direction, per frame.
3. Set the Camera for Texture and Colour
Put the camera in manual and leave it there. The goal is a frame where the whole plane of the artwork is sharp, correctly exposed and colour-neutral, so the texture lives in the file rather than in a setting you have to keep remembering.
| Setting | Where to start | Reason |
|---|---|---|
| Mode | Manual | Auto exposure and auto white balance both drift between frames |
| ISO | Base ISO, 64 to 200 | On a tripod you have no need for a high ISO |
| Aperture | f/8, then f/11 for macro or small work | Enough depth of field to hold the whole plane of the piece sharp |
| Shutter | Whatever the tripod holds | Not a creative setting for a still object on a stand |
| White balance | Fixed daylight, or custom from a grey card | Stops the yellow cast that makes people think their work is wrong |
| Focus | Manual, or single autofocus point with a tripod lock | Autofocus hunts on low-contrast textured surfaces |
| File | RAW if you have room | Leaves white balance and shadows recoverable |
On a phone, the equivalents are tap to set focus, then long-press the screen to lock exposure and white balance. Use the 2x lens instead of the wide one, and switch off portrait mode, which blurs the edges of the piece on purpose. On a dedicated camera, the wide end of a kit zoom bends the edges of a flat artwork noticeably, which is why a normal or short telephoto lens beats it for reproduction.
Deep impasto creates a depth problem no single frame fully solves, because the ridge peaks sit much closer to the lens than the valleys behind them. At f/11 the peaks are sharp and the low areas soften. The fix is focus stacking: shoot six to ten frames moving focus in small steps from front to back, then blend them in software. It is a fiddly half hour for the biggest textured canvases and completely unnecessary for a 12 inch panel.
4. Choose the Right Angle and Composition
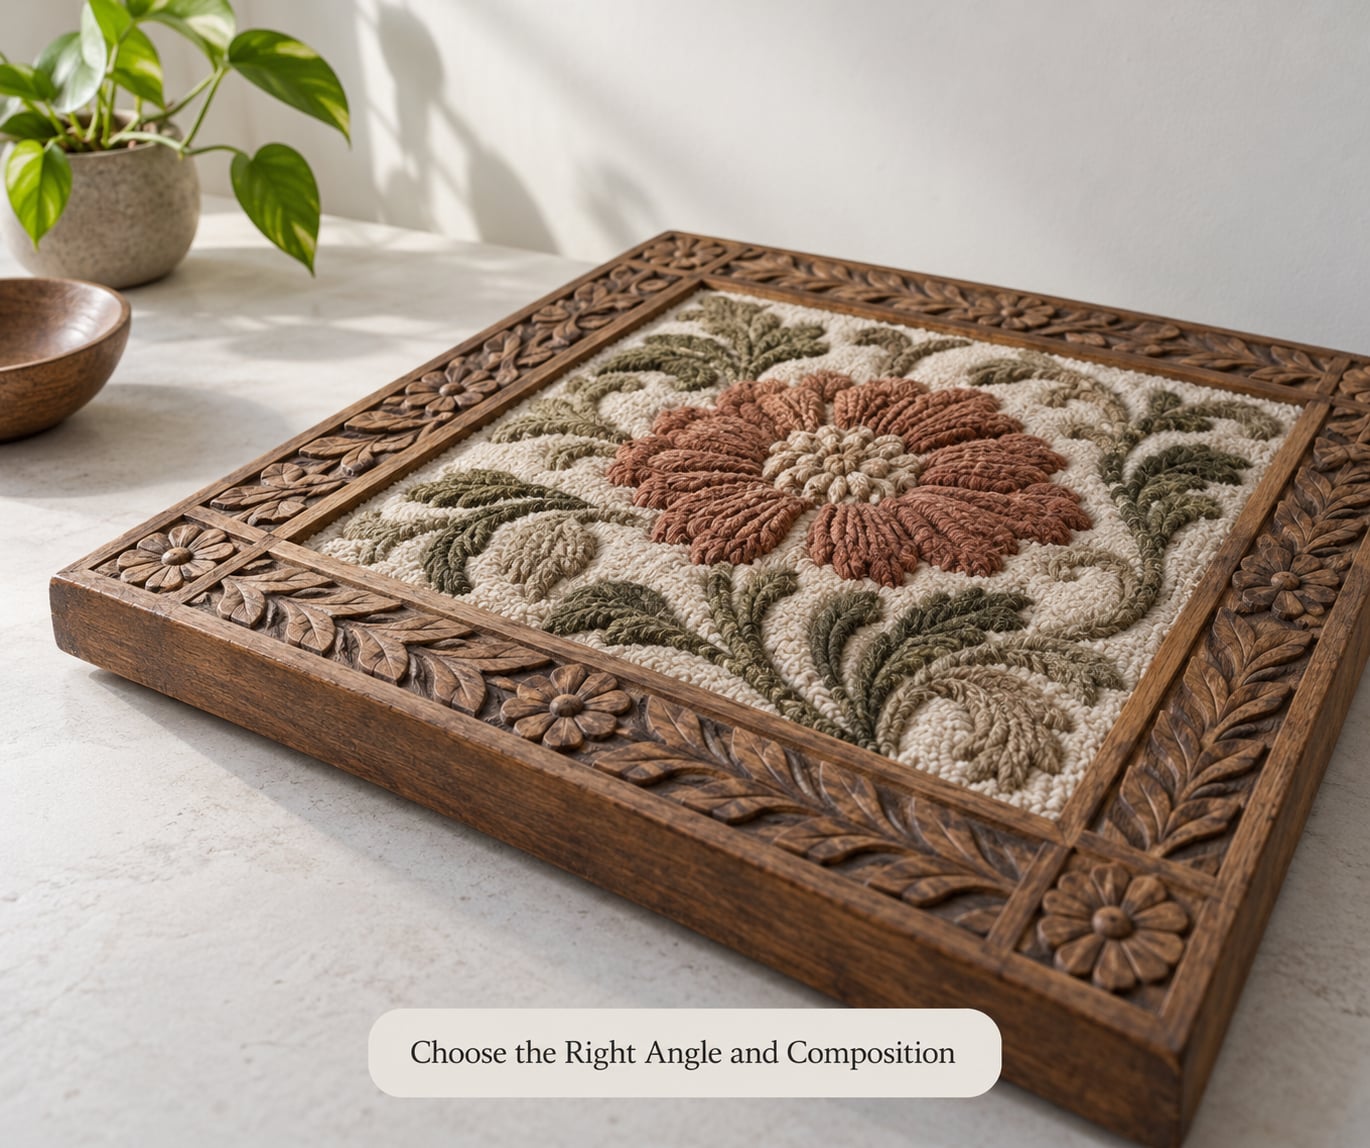
Two angles, two purposes. The straight-on view documents the composition and gives you an honest colour reference, with the camera sensor as close to parallel to the artwork as you can manage. The low three-quarter view communicates depth, and it is the frame that makes a buyer understand the piece has physical presence rather than printed surface.
To keep the straight-on frame clean, stand directly in front of the centre of the piece and check the edges in the preview. If one edge is taller than the others, move the camera, not the zoom, and move it closer to square. Perspective from a wide lens plus an off-centre position is the usual reason a perfectly rectangular painting looks bowed in a listing photo.
Then handle glare, which is the other reason a texture shot fails. Gloss varnish, glass frames and glossy media all throw a bright window-shaped reflection straight back at the lens. The cheapest fix is a small tilt: rotate the camera or the frame 5 to 10 degrees on one axis and the reflection slides off to the side. If the work is behind glass, shoot it out of the frame.
For anything metallic or iridescent, resist the cross-polarising filter that solves glare so beautifully elsewhere. Polarising light kills the sparkle and colour shift that mica and interference pigments are there to produce, so those pieces are better lit evenly and left alone.
Then take an angle sweep. Keeping the camera fixed, walk the light around the piece in roughly 45 degree steps and take a frame at each position. Five or six frames take two minutes and guarantee you have found the angle where the relief reads best, instead of guessing once and hoping.
5. Check, Refine, and Save Your Images
Zoom in on the screen at full size before you move anything. Check the ridge peaks for softness and check the shadows for clipped black, since raking light makes it easy to lose detail on the dark side of every mark. If either is wrong, fix the shot rather than fixing it later in software.
Edit conservatively, in a fixed order. Set white balance first, using the grey card frame if you shot one. Lift the shadows just enough to bring back texture that the raking light pushed into black. Dodge and burn very lightly if you want to accent a specific passage. Sharpen last and sparingly, because aggressive sharpening on high-frequency texture produces crunchy micro-contrast and bright halos along every edge, which looks worse than no sharpening at all.
The temptation is to add texture that was never there. Resist it. A buyer who receives the piece and finds the surface smoother than the listing photo will remember it, and the review will outlast the sale.
Export two versions. A full resolution file at 300 pixels per inch for print sales and licensing, and a smaller sRGB file for portfolios, marketplace listings and social. Keeping the documentation copy unedited and untouched is what makes an archive record worth anything years later.
Common Mistakes
Almost every disappointing artwork photo traces back to light position or camera alignment, not to the camera itself.
| Mistake | What it does | Correction |
|---|---|---|
| Direct flash | Flattened texture, hot spots, blown colour | Turn the flash off and use the diffused lamp at 30 degrees |
| Mixed light sources | Half the painting warm, half cool | One source per frame, same temperature, same session |
| Wide-angle lens up close | Bowed edges, stretched corners | Back up and use the 2x or a normal lens |
| Camera not parallel to the piece | Keystoning and false proportions | Step back until the frame matches the artwork |
| Open aperture for depth of field | Ridge peaks sharp, back of the piece soft | Stop down to f/11 or stack focus |
| Automatic white balance | Frames shift yellow, then cool | Fix it manually or lock it on a grey card |
| Hanging close to a wall | Bounce light fills the shadows back in | Leave 30 cm or more behind the work |
| Cross-polarising metallic work | The shimmer the pigment was bought for disappears | Even frontal light, no filter |
| Heavy sharpening in editing | Halos and crunchy false texture | Sharpen last, lightly, at low radius |
One habit covers more of these than anything else: take the shot twice, once straight on and once raking, every single time. The second frame is your insurance policy against a flat-looking image, and it takes one extra minute.
Frequently Asked Questions
Can I photograph textured artwork with a smartphone?
Yes, and most artists photographing work for listings never need more. Tap to focus, then long-press the screen to lock exposure and white balance, switch off portrait mode so the edges stay sharp, and use the 2x lens rather than the wide one so you can stand back far enough to keep the edges square. Raking light matters more than any camera setting, and a phone changes none of that.
Should textured artwork be photographed flat or at an angle?
Both, on purpose. Lay it flat for the straight-on frame that records the composition and colour, then shoot a second low three-quarter frame that shows the relief and the shadow between paint ridges. A single frame rarely carries both, because even light shows colour and raking light shows depth, and one setup cannot do both at once.
What is the best lighting for photographing raised or three-dimensional art?
One soft, diffused source placed at roughly a 30 degree angle to the surface, and nothing else switched on. The low angle throws small shadows into the valleys between raised areas, and that shadow is what the eye reads as depth. Diffuse the lamp so the shadows have soft edges, and add a second frame at a 45 to 60 degree angle for shallow surfaces such as scumbling and fine canvas weave.
How do I photograph textured artwork hanging on a wall without distortion?
Stand directly in front of the centre of the piece and step back until the artwork fills the frame evenly, with all four edges at the same height. Use a normal or short telephoto lens rather than a wide one, which bends the edges of a flat piece. Leave 30 cm or more of space behind the work so light bouncing off the wall does not fill the texture shadows back in.
How do I keep the colors accurate in photographs of quilts and mixed-media pieces?
Shoot one frame with a grey card or colour checker in the scene, set white balance manually instead of leaving it on auto, and keep the light source at one colour temperature for the whole session. Dye lots in a single quilt rarely match, and an uncorrected white balance exaggerates the difference. Mixed daylight and lamps is the single most common cause of a colour cast.
Should I edit a textured artwork photo to make the texture more visible?
Lightly, and only to recover what the camera missed. Correct white balance first, lift shadows that the raking light pushed to black, then sharpen at low radius and low amount at the very end. Do not add texture that was not there. Buyers notice when the listing shows more surface than the piece has, and oversharpening a textured surface produces halos along every edge.
Start with one extra frame
Photograph your next piece twice: once flat and evenly lit for colour, once with a single diffused lamp at a 30 degree angle for texture. That second frame is the whole difference between a listing that reads as a flat print and one that shows the surface you spent three days building. Everything else in this guide is refinement on top of that habit, and it costs you about a minute.