Rust dyeing stains natural fabric with the iron that leaches out of corroding metal, and doing it safely comes down to three habits: work outside or in a well-ventilated room, keep rusty metal away from bare skin, and rinse the cloth properly before it ever meets a washing machine. The whole process is slow rather than difficult, which is exactly why it suits a weekend.
Most beginners spend their first session on a strip of old cotton, not a finished panel. That single habit catches almost every avoidable problem, from a bath that has stopped reacting to fibre that was never going to hold colour. The steps below follow the order that actually works, and each one tells you what a good result looks like.
Table of Contents
- What You Need
- Step-by-Step
- Step 1: Choose and Test Your Fabric
- Step 2: Set Up a Safe Workspace
- Step 3: Make or Prepare the Rust Bath
- Step 4: Apply the Rust and Create the Pattern
- Step 5: Layer, Heat, and Monitor the Dye
- Step 6: Rinse, Dry, and Seal the Fabric
- Common Mistakes
- Frequently Asked Questions
- Can I rust dye fabric indoors?
- What fabric works best for rust dyeing?
- Will rust dye bleed or wash out after dyeing?
- How do I stop rust dye from feeling stiff after drying?
- Can I use rusty metal instead of steel wool?
- How should I dispose of used rust-dyeing liquid?
- Conclusion
What You Need
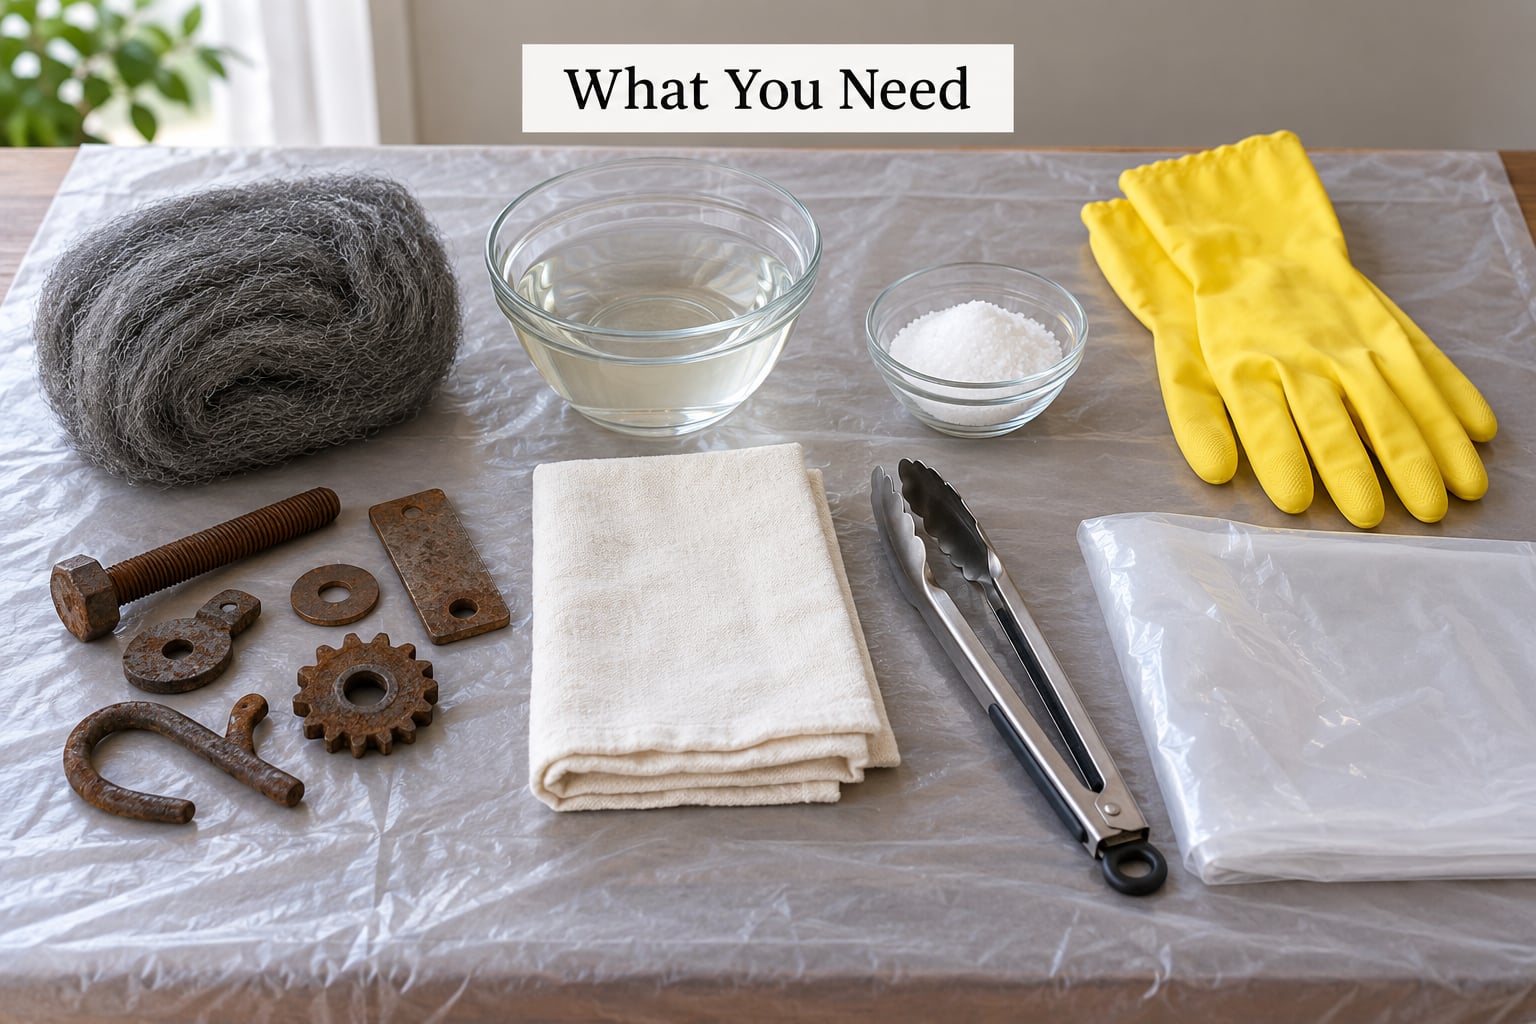
Gather everything before you start, because the moment you have wet fabric in front of you, hunting for a glove is how you end up with orange fingers and a rust print on your sleeve.
- Rust source. Steel wool, rusty nails, bolts, sheet metal offcuts, or a piece of old chain. The steel wool gives fast, even colour; chunky hardware gives you printed shapes and a slower, blotchier mark.
- Plain white vinegar. This does the dissolving. Do not dilute a finished bath with water, and do not rely on old vinegar that has been sitting open for a year.
- Kosher salt. For the fix bath at the end, and it also encourages rust to move into the fibre.
- Pre-washed natural fabric. Cotton and linen are the reliable choices. Lightweight muslin and heavier canvas both work; they just behave differently.
- Binding wire or waxed string. To wrap bundles tight. Rubber bands tear wet cloth.
- Spray bottle and plastic sheeting or bags. For keeping bundles damp without soaking the floor.
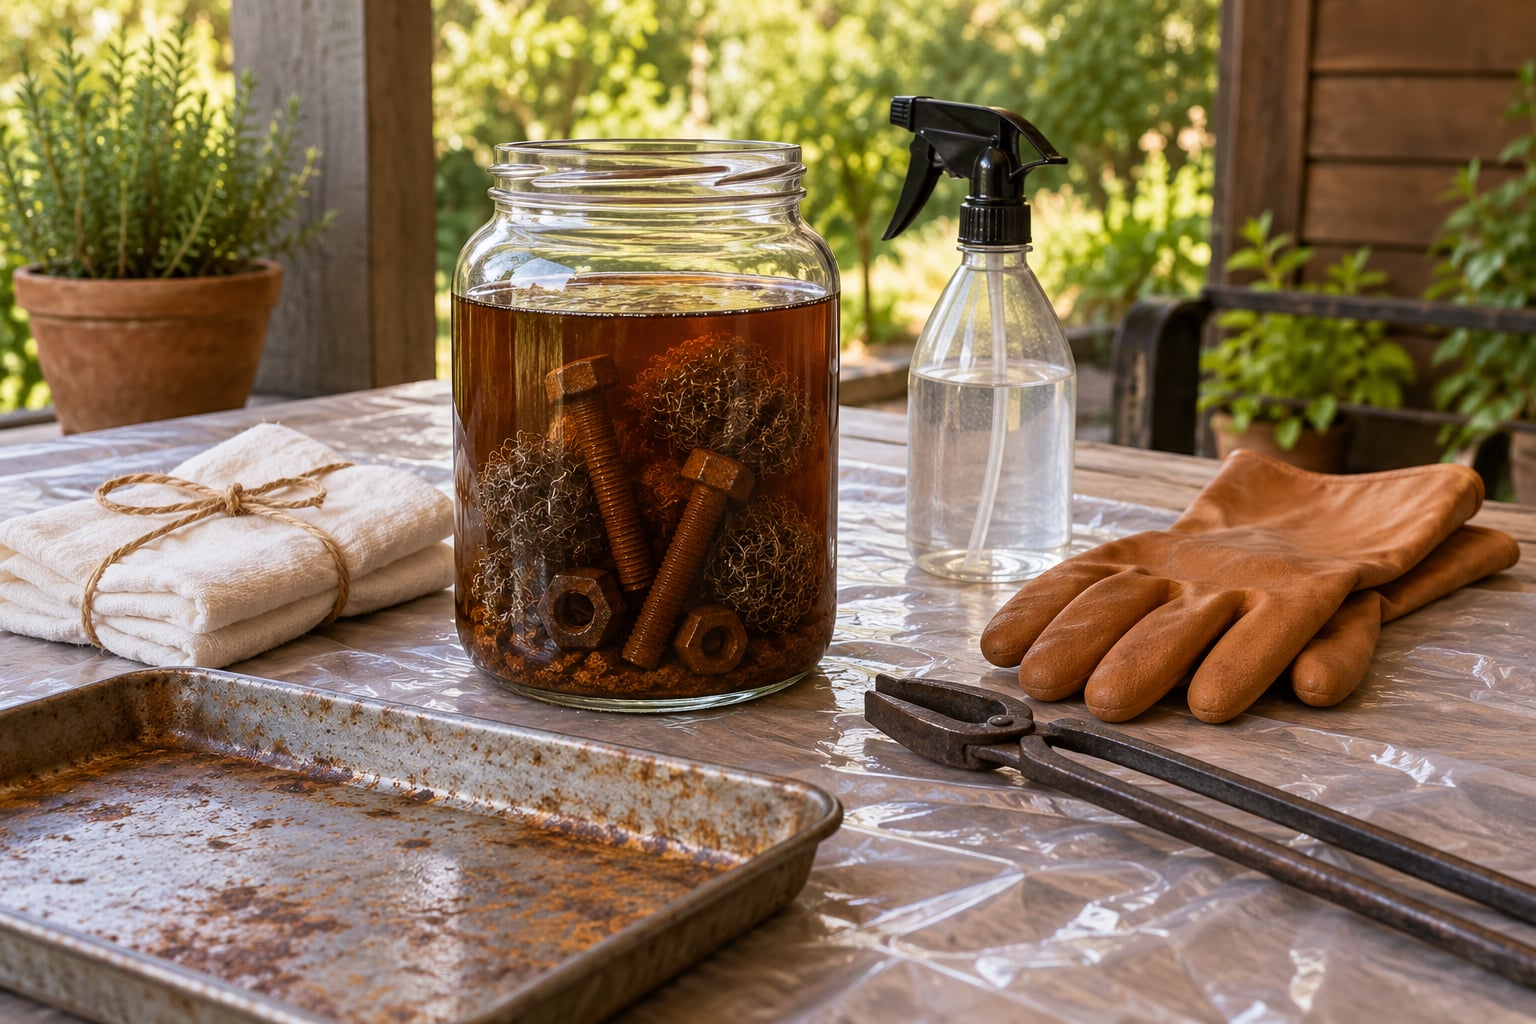
- A jar or bucket with a lid. A wide-mouth glass jar is ideal for making rust water, since you want to see what is happening inside.
- Long tongs. Your hands should not go into the bath.
- Rubber or nitrile gloves, and eye protection. Non-negotiable for anyone handling loose steel wool or rusty dust.
Choose containers you never intend to cook with. A dedicated bucket costs almost nothing and saves you from having to scrub orange out of a stockpot later. The same goes for the spoons and tongs that stir or lift fabric.
Step-by-Step
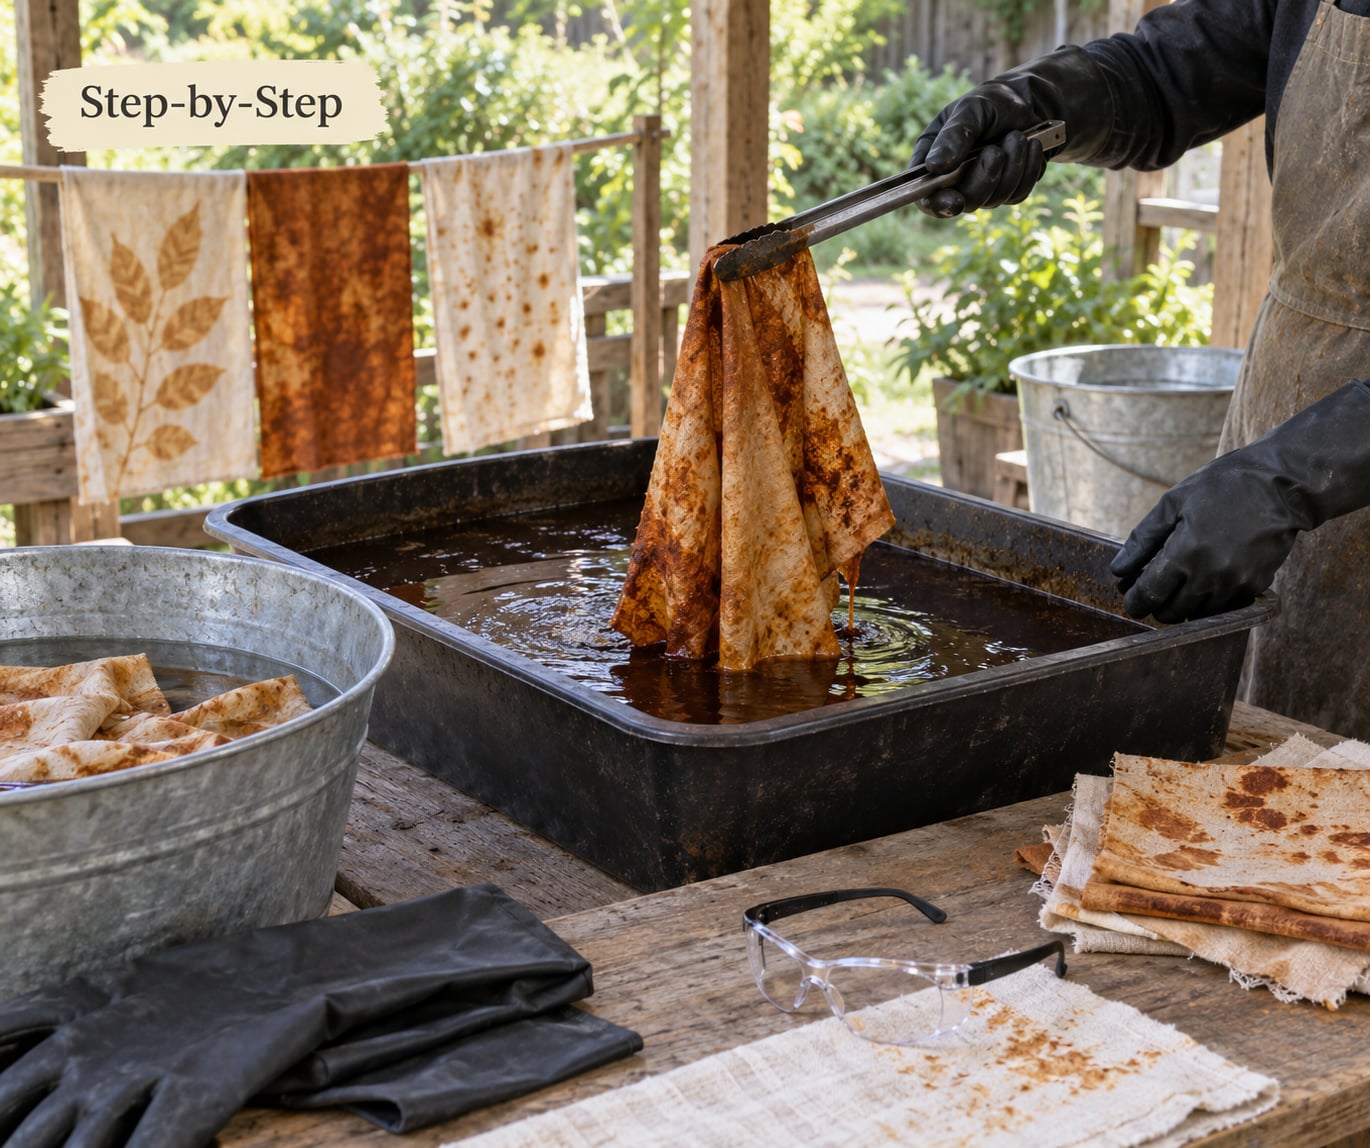
Step 1: Choose and Test Your Fabric
Wash the fabric first, ideally twice, with a pH-neutral detergent. Factory sizing sits on the surface of new cloth and blocks iron from reaching the fibre, and that is the single most common reason a print comes out pale and streaky.
Composition matters more than colour. Cotton and linen are cellulose fibres and hold rust marks well. Silk and wool are protein fibres and take colour beautifully but can degrade faster when iron is left in them. Polyester and other synthetics will not hold iron staining at all.
Cut a palm-sized swatch from the same bolt you plan to use, run the whole test, and compare it with your main piece under the same light. You are looking for colour on the fabric and print that stays put in the middle of the cloth rather than only at the edges.
Step 2: Set Up a Safe Workspace
Work outdoors on a dry day if you can. Indoors, choose a room with an open window and a fan, and set up near a sink or shower so drips are not a problem.
Cover your surface with a plastic sheet or a cheap shower curtain, and tape the edges down. Iron solution finds every seam and will stain wood, counters, and floors permanently. Do not work over a carpet, a rug, or anything you would be upset to lose.
Wear gloves whenever you touch the bath, the wet fabric, or loose steel wool. Add eye protection when you handle rusty material that sheds dust, and step outside or wear a dust mask if you are grinding or breaking up rusty metal. Keep a water source and clean towels within reach, and wash your hands before you touch anything related to food.
Pick up nails, screws, and sheet metal edges carefully. A cut from rusty sheet metal is the one genuinely sharp risk in this process, and it is also the most preventable. Handle the small flat pieces with tongs rather than your fingers.
Step 3: Make or Prepare the Rust Bath
Put a handful of rusty material in a clean jar and cover it with vinegar. Many dyers use a 50/50 vinegar and water mix; others use straight vinegar and insist that added water raises the pH and drops iron out of solution. Straight vinegar or a heavy vinegar bias gives you more control.
Seal it and let it work. A usable bath can start in a few days, and the concentrated versions people let sit for two weeks smell sharp and look like strong tea. That colour tells you very little, which surprises people who expect a dark jar to mean a strong bath. Age and acidity do, not darkness.
Rather than diluting a bath that feels too strong, apply less of it, or apply it more thinly with a brush. If an old bath has stopped reacting, top it up with fresh vinegar and give it a few days before writing it off. The brown sludge at the bottom of the jar is normal and generally fine to use.
Skip improvised shortcuts. Do not boil a concentrated rust bath indoors, do not use a pressure cooker, and do not mix rust baths with any other cleaning product. Vinegar plus a chlorine-based cleaner releases gas, and a warm vinegar bath gives off strong acid fumes.
Step 4: Apply the Rust and Create the Pattern
Wet the fabric thoroughly, wring it out until it stops dripping, and lay it on your covered surface. A drop of pH-neutral detergent in the water helps it wet out evenly, which means fewer pale patches later.
Wrap fabric directly around rusty hardware for sharp, defined prints, or wrap hardware inside the fabric for soft, clouded marks. Bind tightly with wire or string; the tighter the bundle, the more the pattern stays put and the more white space you keep between the rust and the cloth.
For looser patterns, brush the bath on, drip it from a spoon, or sprinkle damp steel wool over the surface and leave it in place. Work from the middle outwards, and hold your drips over the fabric rather than over the floor.
Cover the finished bundles in plastic sheeting or a plastic bag, then move them off the table. A tray catches everything that runs, and it keeps a slick puddle from forming where somebody is about to step.
Step 5: Layer, Heat, and Monitor the Dye
Heat speeds things up. Setting the bundle on a sunny windowsill, on a warm stone floor, or near a radiator will develop colour in a few hours, while a shaded outdoor spot will take a day or two for the same result.
Warmth matters, but moisture matters more. Check the bundle daily and mist it with plain water whenever the cloth feels dry. Rust chemistry needs liquid to move through the fibre, and a bundle that dries out stops reacting until you re-wet it.
To check progress without ruining the pattern, lift one corner of the plastic and look at the fabric’s face. A faint warm orange on the first hour deepens to a strong orange-brown over several days, and a dark grey-brown mark usually means the iron is concentrated rather than a failure. Ten days to two weeks of steady dampness gives you the deep, weathered look that most people are chasing.
Step 6: Rinse, Dry, and Seal the Fabric
Unwrap outdoors or over the sink and shake off loose rust. The colour that rubs off as grey-brown dust in the first seconds is unbound iron, not your finished colour.
Rinse in cold water until it runs clear, then soak the fabric in a bath of warm water with a handful of salt for about 30 minutes. This salt fix sets the colour. Rinse again, and repeat the whole rinse cycle at least three times before the cloth goes anywhere near your laundry.
Dry in shade and out of direct sun. Sunlight is what fades iron marks fastest, so a piece hung on a line in full sun will look dull within a few weeks.
For a stiffer handle, a drop of conditioner in the final rinse helps. If you want a genuinely stable surface for collage or wall work, let the piece dry fully, then mist it with a pH-neutral textile sealer or a light iron-on interfacing on the reverse. A drop of neutral detergent in the last rinse softens the fibre, and a fabric softener is the wrong choice since it can leave a film that traps iron.
Spread a plastic sheet to catch the drips, let the spent metal dry on it, and scrape it into a sealed container for scrap disposal later.
Common Mistakes
The colour barely shows. The usual cause is sizing or a bath that has lost its acidity, not a lack of rust. Pro-wash the cloth, use fresher vinegar, and keep the bundle damp rather than soaking it. A jar left for a fortnight at two parts water to one part vinegar often reaches the end of its reaction entirely, which is the version of this problem beginners hit most often.
Blotchy, uneven staining. The fabric went in too dry, or the bath was applied too thickly in one spot. Mist rather than soak, keep bundles bunched tightly, and move the whole bundle to a new patch of plastic if the underside is pooling.
Colour bleeds onto everything else. You rinsed too few times. The dust that comes off early is unbound iron, and it transfers readily to cotton and to skin. Rinse until the water runs clear, then do the salt fix and rinse twice more.
The fabric feels brittle or the colour has gone dull yellow. You have over-mordanted, which usually means soaking a year-old jar of iron liquor into a whole pot at once. The fix is to flush the excess out with clean water. The piece stays usable, but excess iron shortens the life of the fibre, especially on silk and wool.
Small rust marks appear on other fabrics and surfaces. This is normal in a shared studio, and iron spotting on unrelated work is close to universal. What works in practice is keeping rust work away from your main laundry pile and hand-washing the dye pot instead of loading it.
The studio feels contaminated. Give tools, trays, and the work surface a rinse the moment you finish, while the iron is still in solution and lifts easily. Dried iron is much harder to shift.
Two habits cover most of the rest: keep a scrap of the same fabric on hand for every batch, and write down your ratios and timings. Rust is a slow, living reaction, and the only way to repeat a good result is to remember what you did last time.
Frequently Asked Questions
Can I rust dye fabric indoors?
Yes, with ventilation and protection. Work near an open window with a fan moving air outward, and lay a plastic sheet under everything you touch. A basement or closed garage is a poor choice, and boiling a concentrated bath indoors is not advisable. Outdoors on a dry, breezy day remains the simplest option, and you avoid most staining and odour complaints altogether.
What fabric works best for rust dyeing?
Pre-washed cotton and linen are the most reliable, because they are cellulose fibres that absorb iron evenly. Cotton muslin gives soft clouded marks, while canvas takes sharper, more permanent ones. Silk and wool accept colour but degrade faster when iron is left in them, so use a light touch and rinse thoroughly. Polyester, nylon, and other synthetics will not hold iron staining at all.
Will rust dye bleed or wash out after dyeing?
Some early bleeding is normal, and the brown dust that rubs off in the first rinse is unbound iron rather than your finished colour. Cold rinse until the water runs clear, then soak in warm water with salt for about 30 minutes and rinse twice more. Do not put the fabric in a washing machine until it has been rinsed at least three times, or you will stain the machine and everything else inside it.
How do I stop rust dye from feeling stiff after drying?
Two things help. Add a drop of pH-neutral detergent or a small amount of fabric conditioner to the final rinse, and do not over-dry the piece in direct sun. If you plan to mount the fabric for collage or wall work, a light spray of pH-neutral textile sealer on the dry surface keeps the fibres from snapping and locks the surface down.
Can I use rusty metal instead of steel wool?
Yes, and chunky rusty hardware is what gives you printed shapes. Steel wool works faster and colours more evenly, while nails, bolts, and sheet metal offcuts place a distinct print wherever they touch the cloth. Handle sharp edges with tongs, wear gloves, and keep the metal in a heavy vinegar bath rather than using fresh hardware straight from the garden.
How should I dispose of used rust-dyeing liquid?
Do not pour a concentrated rust bath straight down the drain, because the iron settles out and can stain plumbing and local water systems. Let the bath sit until the sludge settles, pour off most of the water, spread the remaining sludge on a plastic sheet outdoors to dry, and scrape it into a sealed container for scrap metal disposal. Rinse the container by hand, outdoors, and wash your hands afterwards.
Conclusion
Start with a palm-sized cotton or linen swatch, laid out outdoors or in a well-ventilated room over a covered surface, with gloves on and tongs in your hand. Adjust the amount of rust, the vinegar strength, the heat, and the damp time until that swatch gives you a mark you like, then repeat it on the real piece. The technique is forgiving on colour and unforgiving on shortcuts, so the swatch is doing most of the work for you.