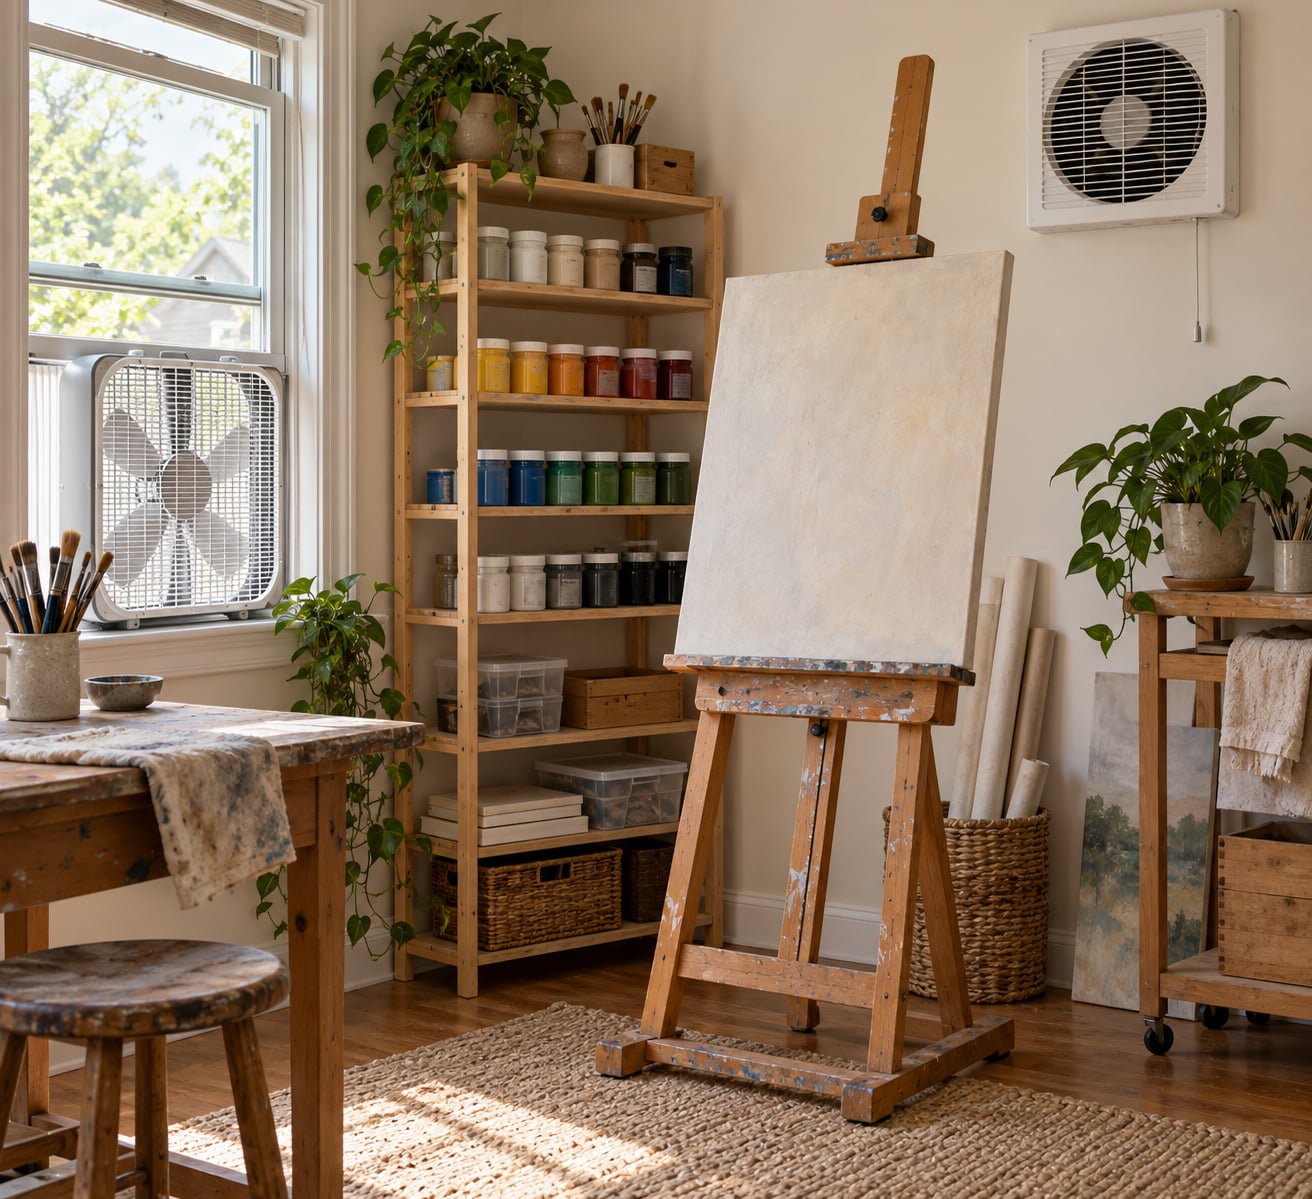
To ventilate a home art studio, move fresh air in through one opening and pull stale air out through another with a fan, so fumes, dust and heat travel across the room and out to the outdoors instead of collecting where you work. In a spare room, a window fan or box fan rigged against an open window plus a matching opening on the far wall will handle most materials. Solvent-heavy work, spray paint and kiln firing need capture at the source, not just a room fan.
Most studios fail for the same reason: air has nowhere to go. You open a window, the room goes slightly negative, and the furnace or water heater down the hall pulls combustion gases back through the flues. That is the failure mode to design around first, because it is the only one here that can hurt someone.
The Americans for the Arts and Center for Safety in the Arts framework puts it in a sensible order: source control first, then dilution ventilation for the room, then local exhaust ventilation at the source, and air cleaning devices as a supplement at the end rather than a substitute. Most home guides skip straight to buying a fan. The order matters more than the gear.
Table of Contents
- What You Need
- Step-by-Step
- 1. Identify the Main Sources of Dust, Fumes, and Humidity
- 2. Map Airflow so You Can Ventilate a Home Art Studio That Works
- 3. Improve Natural Ventilation Safely
- 4. Add Mechanical Airflow
- 5. Capture Fumes and Dust at the Source
- 6. Control Heat, Humidity, and Seasonal Comfort
- 7. Test and Maintain the System
- Common Mistakes
- Frequently Asked Questions
- Is a box fan in a window enough for an art studio?
- Where should I install an exhaust fan in a small studio?
- Is an air purifier the same as ventilation?
- Should I use a HEPA or activated carbon filter for paint fumes?
- How do I ventilate an art studio in winter without freezing?
- Do I need ventilation if I only use acrylic paint?
- Start With This Tonight
What You Need

Before you buy anything, walk the room and answer four questions: what materials do I actually use here, where do the fumes or dust originate, which walls face outside, and where are the combustion appliances in this house. Those answers decide the whole design.
- A rough floor plan. Mark every window, door, exterior wall, vent grille and the nearest furnace, water heater or gas appliance. Note which wall you work against.
- A materials list. Write down every medium, solvent, adhesive and dry material you use. Read the labels and pull the safety data sheet. The label tells you what ventilation the manufacturer expects, and it is the document to follow if anyone questions your setup later.
- An exhaust fan. A 20-inch box fan with a window mount, or a window exhaust fan rated for the opening. A bathroom or kitchen exhaust fan works as a make-up-air intake, not as the main exhaust.
- Sealing materials. Foam weatherstrip, painter’s tape and plastic sheeting to close gaps around the fan and any window you are not using as an inlet.
- Source-control supplies. Tight-fitting lids for solvents and mediums, a damp rag, a HEPA vacuum, a wet mop and a sponge mop head.
- A smoke pencil or a roll of tape. Cheap, and the only honest way to check whether air is actually moving where you think it is.
- A GFCI-protected outlet for any fan or purifier, and a timer or plug-in switch so the fan runs while you work and not after.
Add an activated carbon filter unit and a dehumidifier only after the airflow is right. Purifiers are the most commonly bought and most commonly misunderstood piece of studio equipment.
Step-by-Step
1. Identify the Main Sources of Dust, Fumes, and Humidity
Ventilation that suits a charcoal artist is wrong for someone airbrushing enamel, so the first step is matching your setup to the material. Group what you use into solvent vapours, pigment and process dust, combustion gases, and moisture.
| Material or process | What it releases | How urgently it needs capture | What to use |
|---|---|---|---|
| Oil paint, alkyd mediums, mineral spirits or Gamsol cleanup | Solvent vapour and additives that keep off-gassing for months | High | Cross-flow plus a carbon filter; exhaust during mixing and cleanup |
| Acrylic paint and mediums | Water-based binder with a small amount of VOC and preservatives; mist when sprayed | Low to moderate | Cross-flow and an open window are enough; spray application changes the answer |
| Spray paint, airbrushing, aerosols | Fine VOC-rich droplets and particles | Very high | Local exhaust or a filtered spray booth, exhaust filtered outdoors |
| Charcoal, pastel, chalk, dry pigment | Heavy particulate that settles fast but stays airborne in the breathing zone | Moderate | Wet methods, HEPA vacuum, source capture, no blowing dust off with your mouth |
| Epoxy, resin, silicone, solvent-based glues | Strong VOCs, some with sensitising effects | Very high | Local exhaust at the bench and closed storage; treat like spray work |
| Kiln firing, torch work, candle melting | Combustion gases, smoke, and heat | Very high | Dedicated ducted exhaust, never a room fan; a CO alarm nearby |
| Clay, glaze materials, wet work | Silica-bearing dust when dry, moisture while working | Moderate | Wet cleanup, HEPA vacuum, humidity control |
One row deserves a note. Oil paint skins over and feels dry long before the solvents have finished leaving the film, and the smell lingers in a jar of used rags for weeks. Treat cured oil paint as a slow, continuous source rather than a burst you ventilate once.
2. Map Airflow so You Can Ventilate a Home Art Studio That Works
Air needs a path. The single most common setup error is a fan pushing air around inside a sealed room, where it stirs paint smell in circles and never leaves.
Pick your exhaust opening and your inlet on opposite walls, as far apart as the room allows. Cross-flow gives every bit of air a path across the work area and out. Air entering and leaving through the same wall tends to short-circuit, taking the easy route from inlet to fan without ever crossing where you sit.
Then size it roughly. Multiply the room’s length by its width by its height for the volume in cubic feet. Divide that by 60 and multiply by your target air changes per hour to get the CFM you want to move. A 10 by 12 foot room with an 8 foot ceiling is 960 cubic feet; at 10 air changes per hour that works out to about 160 CFM of continuous airflow.
Real fans rarely deliver their advertised free-air number through a window kit or a run of flex duct, so treat the figure as a floor and pick a fan a size up. If you only have one exterior wall, use the window with the fan as the exhaust and a door into a hallway as the inlet, but seal the gaps around the door so air does not short-circuit back through it.
3. Improve Natural Ventilation Safely
Opening a window on each of two sides is free ventilation and often enough for acrylic painting, dry media and general studio dust. It works best when the outdoor air is cooler and calmer than indoor air, which for most of the year means mornings, evenings and shoulder seasons.
Cross-drafts are the problem. Air rushing between two openings picks up pigment dust from the floor and knocks it into your work, tips over water jars and blows wrapping paper off tables. Aim the natural flow across an empty part of the room rather than over your work surface, or use one opening as a controlled high and low vent instead of two full-height ones.
Natural ventilation stops being adequate the moment the source is a strong emitter. Persistent solvent vapour, spray paint and combustion need mechanical exhaust that runs on a schedule rather than depends on the weather.
4. Add Mechanical Airflow
The community-standard build is a box fan or window exhaust fan set against an open window, blowing directly out of the room. It is cheap, ugly and it works, which is why it turns up in nearly every forum thread on this question.
Set the fan in the window, face it outward, and close the window onto its frame so the fan seals rather than leaks. Run an extension cord to a GFCI outlet rather than leaving a sash resting on the fan’s plastic housing, which is how fans get destroyed and how people get shocked. Do not run the fan with the window glass closed against it unless the fan is rated for that.
Here is the part almost everyone forgets: the inlet has to be as open as the exhaust. An undersized intake chokes the fan, drops its delivered airflow and forces the fan to run harder and louder, while pulling the room negative. If your only other opening is a bedroom door, prop it wide and tape a sheet across the gap at the bottom to direct air high and across rather than straight through.
5. Capture Fumes and Dust at the Source
Room ventilation dilutes. Capture removes. For anything strong, the second one is doing the real work.
- Close everything. Solvent jars, mediums and rinse cups get lids that seal. Capping mediums reduce the vapour load more than any fan will.
- Cut the solvent. Fewer rinses and less cleanup means less vapour. Odourless or low-VOC substitutes, and water or brush soap where the paint allows it, are the cheapest control available.
- Work wet with dry media. Tap excess charcoal and pastel onto a scrap of paper rather than blowing it off, sponge water on chalk drawings, and wet-mop the floor. Sweeping dry pigment just relocates it.
- Vacuum with HEPA. A standard shop vac re-blows fine dust into the air it just collected. A HEPA vacuum keeps it in the canister.
- Use a hood when the source is a point. An enclosure around the bench, or an arm-mounted hood kept within a hand’s width of the work, pulls the contaminant in rather than letting it diffuse across the room. Two small hoods often beat one big one.
- Match filter media to the hazard. A HEPA filter traps particles and does essentially nothing for vapours. Activated carbon adsorbs solvent vapour and odour and does nothing for dust. Filters specified for one unit only fit that unit.
An ordinary household fan is not an air cleaner. It moves the same amount of contaminated air past your face as through the room, which is why fans pointed at a painting position make the smell more noticeable rather than less.
6. Control Heat, Humidity, and Seasonal Comfort
Cold is the real reason people stop ventilating. Exhausting room air in winter throws away heated air continuously, and a studio with one exterior wall can feel unworkable within minutes. In a garage the constraint is sharper still, since the door is the biggest opening you have and the reason most people shut everything in November.
A few approaches handle this. Run the fan only while you are mixing and cleaning, and switch it off while you paint, since most emission happens at the jar and the brush. Fit an insulated flexible duct through an exterior wall with a backdraft damper so the airflow path is short and the closing damper prevents reverse flow and heat loss when the fan is off. Place the damper where it closes to block outside air at low temperatures, and check it twice a year.
For humidity, a dehumidifier handles dampness and condensation that ventilation alone will not, and it belongs in a basement or garage studio more often than an upstairs room. Borrowed heat through an HRV or ERV unit recovers most of the outgoing heat and keeps paint moving, but that is a building-level decision rather than a weekend project.
If you add a dehumidifier or air conditioner, remember the pressure rule: every unit that removes air from the room needs a way to get it back, or it creates the same backdraft risk as an unbalanced fan.
7. Test and Maintain the System
Do not assume the setup works because the fan is running. Two checks tell you the truth in a few minutes.
The smoke pencil test: hold a smoking pencil or smouldering twisted paper near the edges of the room and near the work surface, and watch where the smoke goes. It should travel across the room toward the exhaust, not circle or drift back at you. Run it with your normal door and window setup, since it only tests the configuration you actually use.
The tissue test: tape a tissue strip to the frame near the inlet and one near the fan. Both should flutter, and both should move toward each other rather than one hanging limp. A motionless tissue at the inlet means the intake is choked.
Also check by nose and by ear. A faint persistent smell means the system is undersized, not that you have grown used to it. Loud or rattling airflow usually means a loose window fit or a duct that is too long or bent too sharply.
Then build a routine. Check the fan grille and intake screen for dust monthly. Wash or replace activated carbon filters on the maker’s schedule, and keep spare cartridges, because a saturated carbon filter is just an expensive grille. Look at flexible duct for crushed or sagging sections twice a year, confirm the backdraft damper still swings freely, wipe the window seals, and check that solvent containers still close tightly.
Common Mistakes
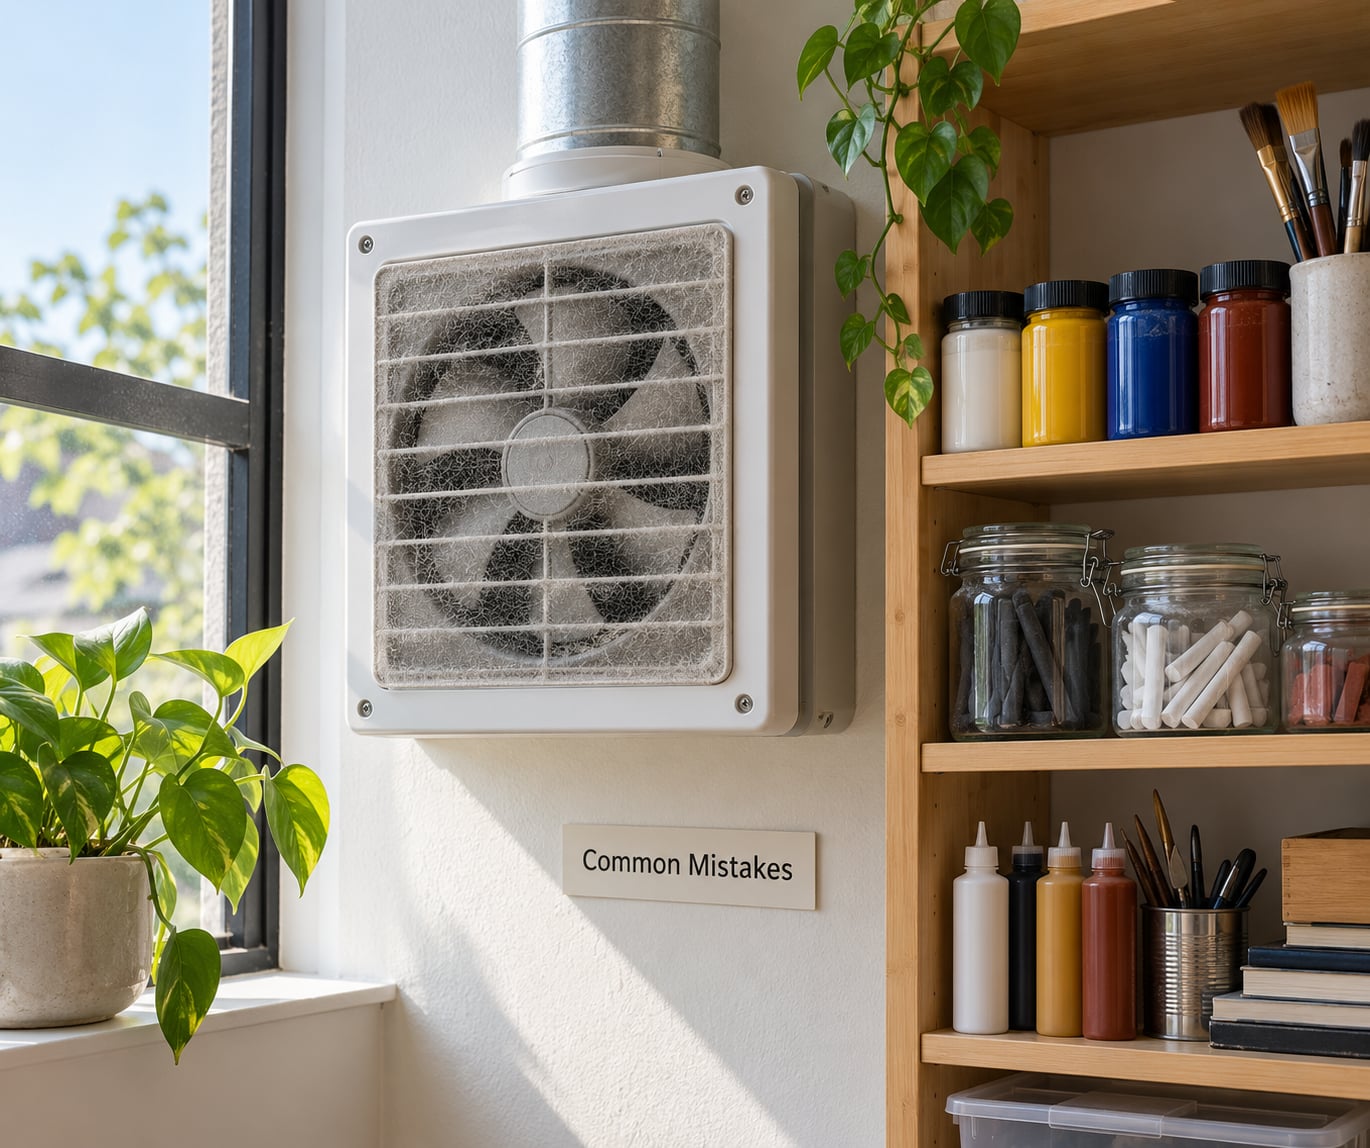
Running an exhaust fan in a sealed room. This is the serious one. If the room has a furnace, water heater, fireplace or gas appliance sharing the same duct system, sustained negative pressure can pull combustion gases back through the flue into living spaces, and those gases are carbon monoxide, which has no smell to warn you. Give the room an inlet roughly as large as the exhaust, install a backdraft damper on the exhaust, and put a working CO alarm near the bedrooms. If you cannot balance the airflow in a space with combustion appliances, use a spot exhaust hood that discharges outdoors and leave the room pressure alone.
Aiming the fan into the room. A fan pointed at your easel stirs fumes toward your face and pushes them back across the room. Turn it around so it pulls air out of the space.
Positioning the fan on the wrong wall. If the fan and the only other opening share a wall, air short-circuits and never crosses the room. Move the intake to the far side, or close the near door with a sealed sheet so air has to travel.
Exhausting where it should not go. Do not discharge into a neighbour’s yard, a shared walkway, near an air-conditioning intake, a bedroom window or a garage doorway where fumes roll back in. Check local rules for any duct penetration on an exterior wall.
Using the wrong filter. HEPA for dust, carbon for vapour, and the media the manufacturer specifies for your unit. Carbon filters lose capacity and need replacing on schedule.
Trusting an air cleaner to ventilate. An air purifier recirculates. It can reduce airborne particles and, with a carbon stage, some odour, but it never moves contaminated air outside. Owners of a good carbon unit often report satisfaction, and that is because the window fan was doing the ventilation the whole time.
Creating a permanent draft. Constant high-volume airflow stirs settled dust back into the air and blows supplies around. Most studios do better with a bigger exhaust and a lower setting, run only while a source is active.
Using an ioniser or ozone generator. These do not remove solvent vapour, and ozone is an irritant that makes the very problem worse.
Using ventilation as a licence for sloppy handling. No fan makes an open jar of solvent or a dry-mopping dusty floor acceptable.
Two studio-mate habits go further than any device: shrink the space you have to ventilate by shelving or curtaining off the corner you do not work in, and keep the wet and dry parts of your process separated so the dust-generating end is not next to the clean side.
Frequently Asked Questions
Is a box fan in a window enough for an art studio?
For acrylic painting, dry media and general dust, yes. A 20-inch box fan or window exhaust fan in one window, with a second opening on the opposite wall, moves plenty of air for a spare room. It stops being enough for oil and alkyd solvents used heavily, spray paint, airbrushing, epoxy or resin, and kiln firing, because those need capture at the source rather than dilution through the room.
Where should I install an exhaust fan in a small studio?
Put it in the opening farthest from your work surface so air crosses the space, with the fan pulling air out and blowing outdoors. Choose the largest opening that faces outside, seal around it so no fan capacity is wasted, and keep an inlet of similar size on the far wall or a propped door. If both openings are on one wall, seal the near alternatives with sheeting to stop air short-circuiting back to the fan.
Is an air purifier the same as ventilation?
No, and this is the most common misunderstanding in home studios. Ventilation means air leaves the room and is discharged outdoors. An air purifier recirculates air through a filter, so it can lower particles and, with an activated carbon stage, some odour, but the contaminated air never leaves the building. Treat a purifier as a supplement that polishes the air after an exhaust system has already done the real work.
Should I use a HEPA or activated carbon filter for paint fumes?
For paint fumes and solvent vapour you need activated carbon, which adsorbs gases and odour on a large surface. HEPA is built for particles, trapping charcoal, pastel and pigment dust, and does almost nothing for vapours. Many units stage both. Check that replacement cartridges are specified for your model, because carbon media is expensive, saturates faster than most owners expect and stops working when it is spent.
How do I ventilate an art studio in winter without freezing?
Stop exhausting during long painting sessions, since most emission happens while you mix mediums and clean brushes, and run the fan during those tasks only. Insulated flexible duct through an exterior wall with a backdraft damper keeps the run short and stops reverse flow and heat loss when the fan is off. A dehumidifier handles dampness that ventilation cannot. Above all, keep the room at neutral pressure so no combustion appliance is starved of makeup air.
Do I need ventilation if I only use acrylic paint?
Some, but far less than with oils. Acrylics are water-based, so they do not produce solvent vapour, and a window open on two sides is usually adequate for normal brush painting. They do contain small amounts of VOCs and preservatives, they can irritate sensitive eyes and throats, and the mist produced by a water-based sprayer behaves like any other spray mist. Keep the lids on mediums, do not sand acrylic layers without dust control, and ventilate whenever you spray rather than brush.
Start With This Tonight
Open a window on the wall opposite your work surface, seal a fan into it blowing outward, and open the door or a second window as the intake. Run the smoke pencil along the walls and watch whether the smoke crosses the room and leaves rather than curling back toward your chair.
Then spend the next ten minutes on source control: lid every solvent jar, cap every medium, and put a damp rag over anything still soaking. That habit does more for how your studio feels than any device on the wall, and it costs nothing.
If you are in a house with a furnace or water heater on the same system, add a backdraft damper to the exhaust before you run anything long, and check that a CO alarm is working near the bedrooms. Save the purifier purchase until the airflow is right, then choose carbon media for fumes and HEPA for dust.
That is how to ventilate a home art studio without a ducting project: get the air moving out on purpose, then cut down what you produce in the first place. Fix the flow this week and the source control habit will keep working long after the fan is switched off.