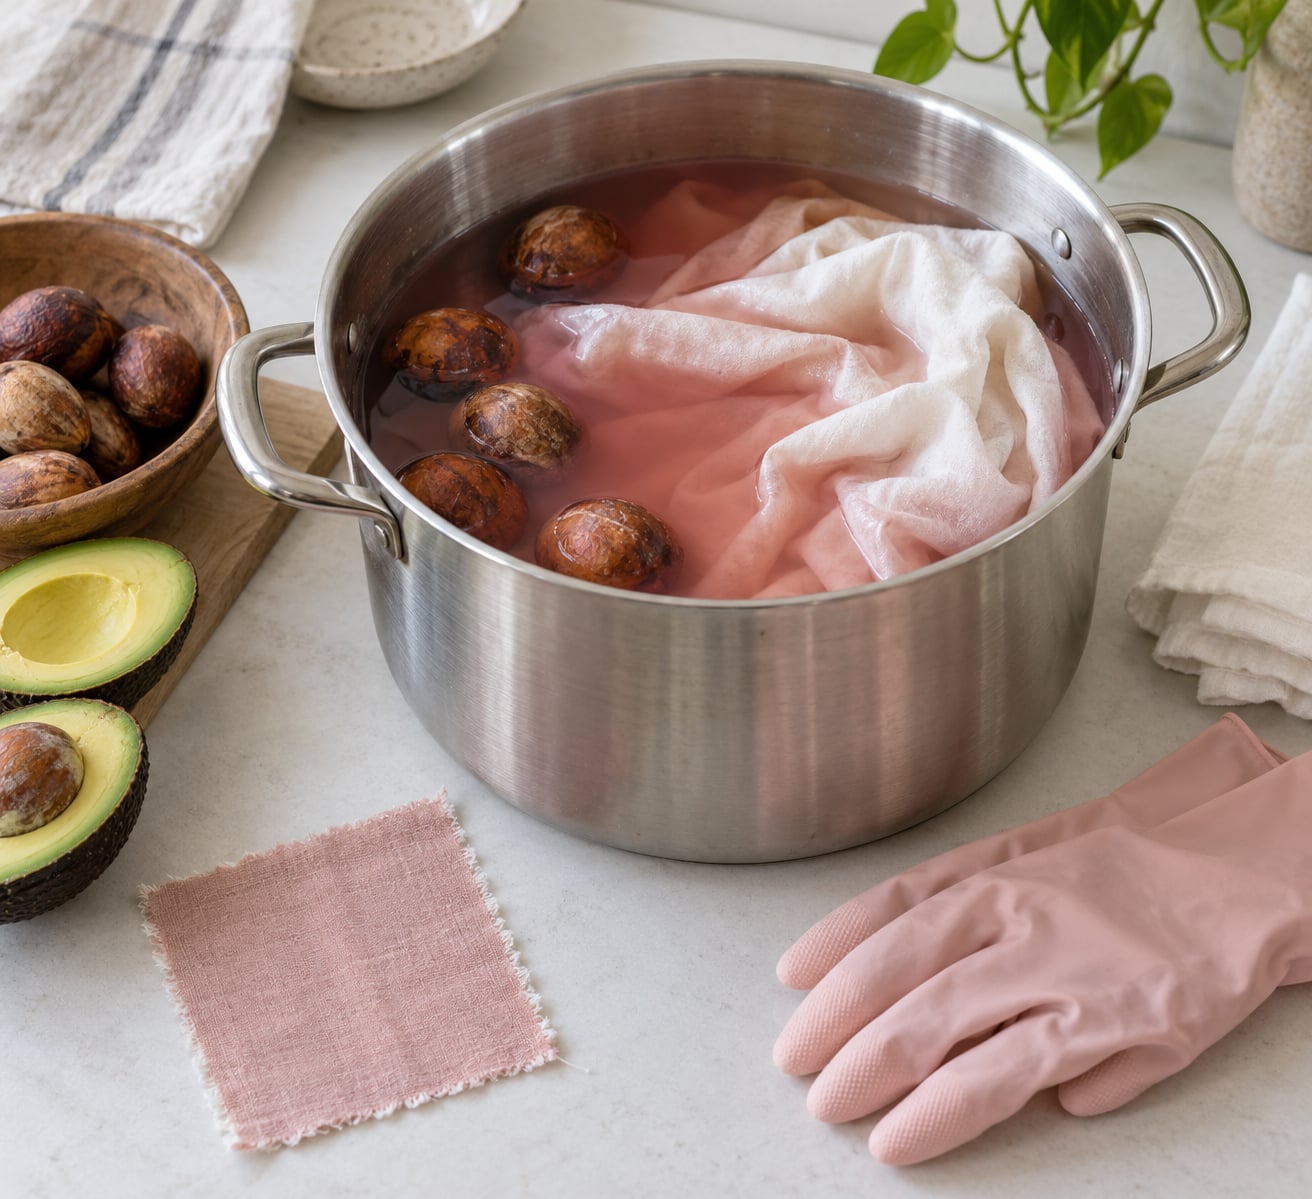
Avocado pits dye natural fabric a soft blush pink through dusty rose, and the colour keeps deepening after the fabric leaves the pot. You simmer scrubbed pits in water until the liquid turns tea-coloured, then soak pre-washed cotton, linen, wool or silk in it. A mordant is not strictly necessary because the pits are full of tannin, though alum makes the colour hold better. Give yourself an afternoon plus an overnight soak for the pits, and treat the shade as a pleasant surprise rather than a target you can hit twice.
Avocados do have tannins, and that is the whole trick. Tannin binds to fibre the way a mordant does, so the pits do double duty as dye and fixative. What they do not do is behave like a commercial dye. Water hardness, how ripe the fruit was, and how long you heat all nudge the final colour around.
Table of Contents
- What You Need
- Step-by-Step
- 1. Prepare the Fabric for Natural Dyeing
- 2. Rinse and Soak the Avocado Pits
- 3. Mix the Alum Mordant Bath
- 4. Heat the Avocado-Pit Dye Bath
- 5. Add the Mordanted Fabric
- 6. Remove, Rinse, and Air-Dry the Fabric
- 7. Test and Record the Final Color
- Common Mistakes
- Frequently Asked Questions
- What kind of fabric works best for avocado-pit dye?
- How long does it take to dye fabric with avocado pits?
- Can you reuse the avocado pits for a second dye bath?
- Why is my avocado-pit dyed fabric brown or gray instead of pink?
- Is fabric dyed with avocado pits safe to use or wear?
What You Need
- Pits, scrubbed clean — about 50% of the weight of your fabric, which works out to roughly five pits for half a pound of fibre.
- Dried skins, if you want warmer tones — about 100% of fabric weight, since skins are less dye-dense than pits.
- A stainless steel pot you will not cook food in, big enough that the fabric moves freely.
- Protein or cellulose fibre — 100% cotton, linen, silk, wool or hemp, pre-washed.
- Alum (aluminum potassium sulfate), optional, for a stronger, more even result.
- A strainer, tongs and a long spoon for lifting fabric out of a hot bath.
- Rubber gloves and a drying rack or line.
Skip synthetics. Polyester, nylon and acrylic will not take this dye in any useful amount, and no amount of soaking will change that. Unbleached synthetics are the worst case — they usually come out a faint beige that fades within a wash.
Save pits as you eat. Rinse them, scrub off every bit of green flesh, and freeze them in a bag; they keep for months and freezing stops mould. Leftover pits and skins go in the compost, where they break down fine.
Step-by-Step
1. Prepare the Fabric for Natural Dyeing
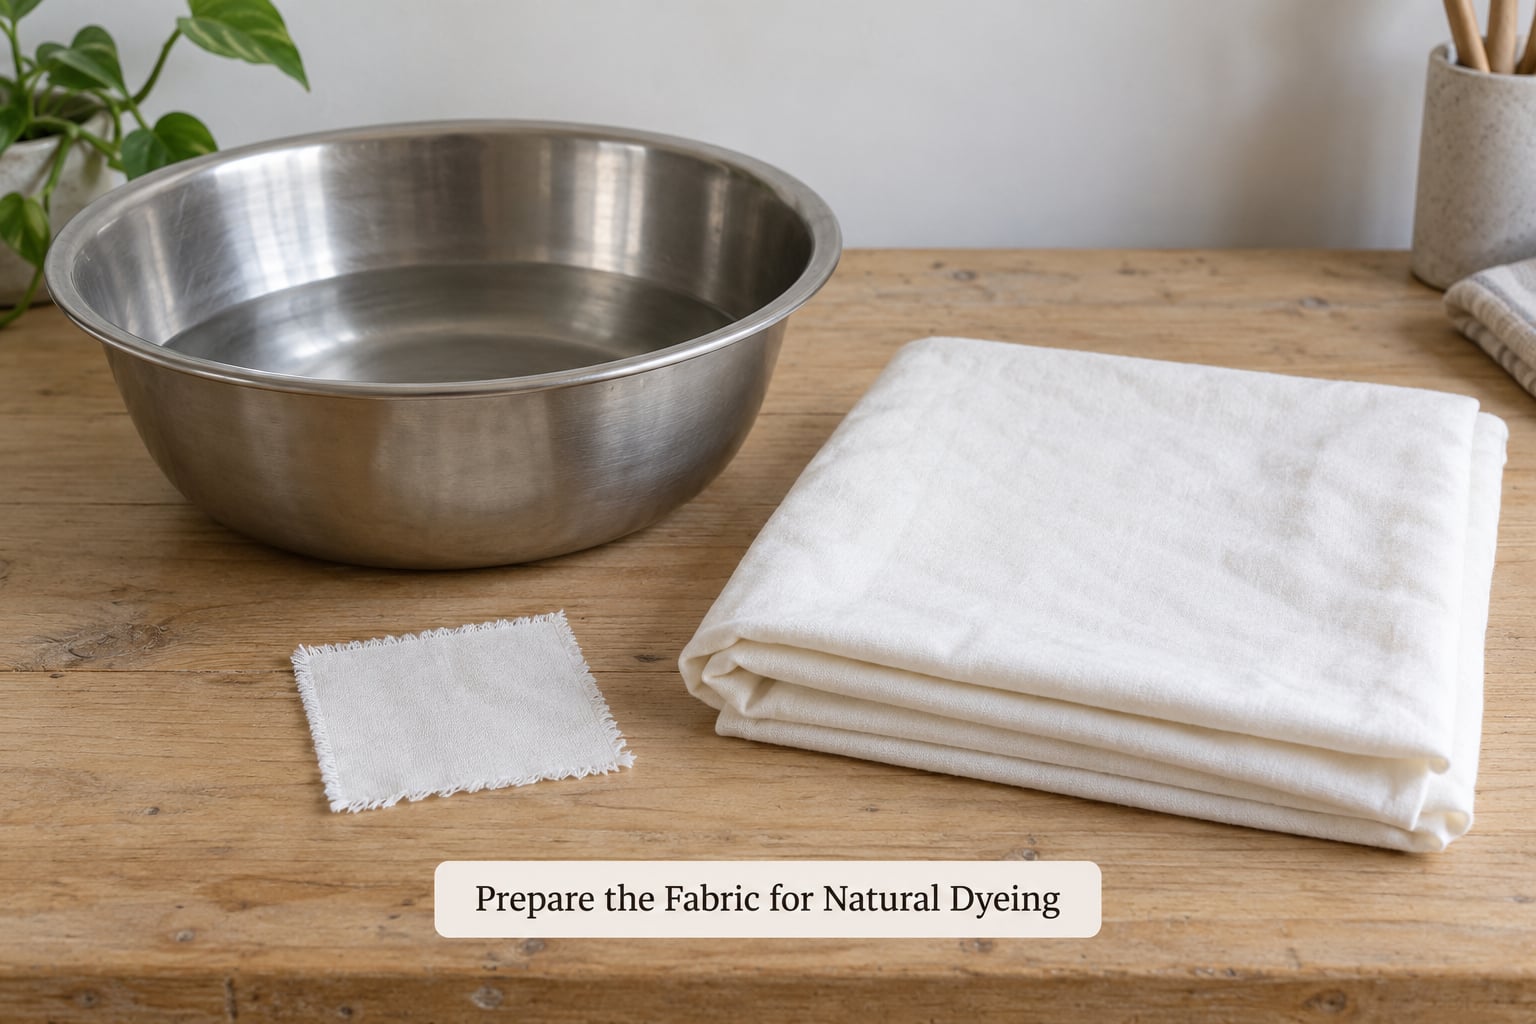
Wash your fabric the way you normally would, then dry it. Any factory finish, sizing or body oil left on the fibre will block the dye and give you a blotchy result.
A scouring soak helps when the cloth has not been washed in a while. Warm water, a small amount of soda ash, and an hour of soaking leaves the fibre more open and ready to take colour. Protein fibres such as wool and silk like a shorter, gentler version of the same treatment.
If you are working out how to dye fabric with avocado pits for the first time, cut one small test swatch from the same cloth and put it through the whole process before you commit a tea towel. Ten minutes now saves a whole afternoon later.
2. Rinse and Soak the Avocado Pits
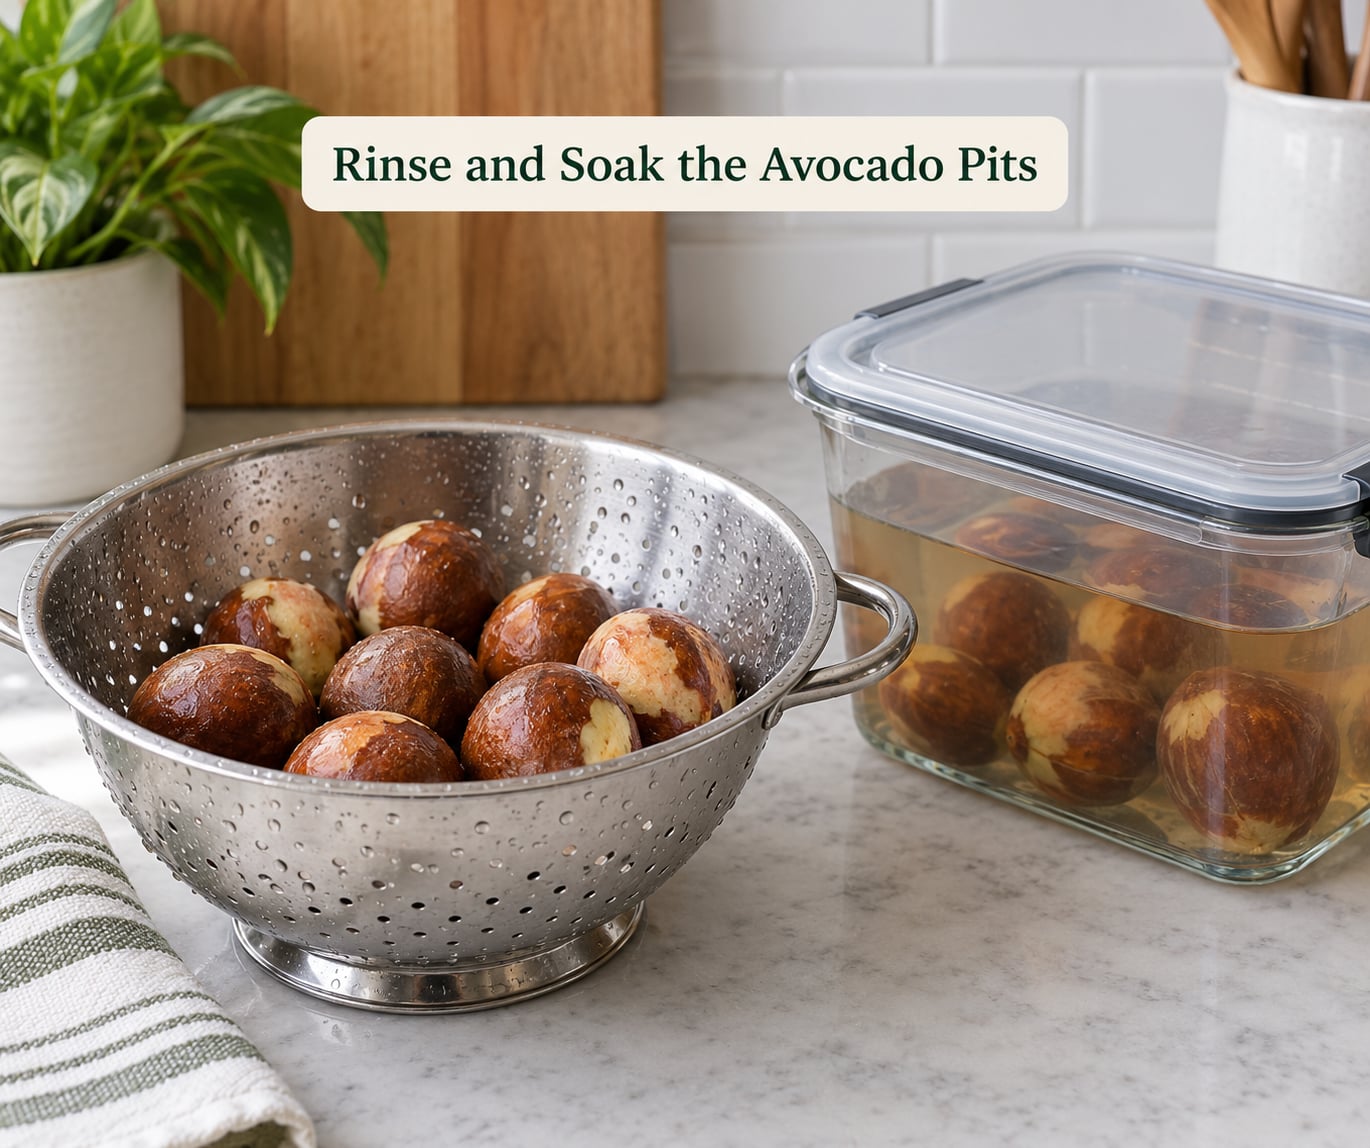
Scrub every pit under running water until no green or brown flesh remains. Those scraps stain, and the stain will not wash out later — it is the single most common complaint from first-timers.
Count enough pits to fill the pot about a third to a half full, or stick to the 50% weight-of-fibre guide if you have weighed your fabric. Cover them with cool water and soak overnight.
Soaking pulls dirt and loose residue off the surface, and the pits swell slightly, which gives the water more contact area. Cracking dried pits with a hammer inside an old towel speeds things up later, since fresh pits bruise and release colour faster.
3. Mix the Alum Mordant Bath
Alum is optional. Tannin already helps the colour cling, and plenty of people get a soft, lovely result without it, but mordanting first usually gives a deeper, more even and more wash-tolerant colour.
Follow the directions on your alum container for the amount per weight of fibre — the common figure is about 10% of fabric weight, though products differ. Dissolve it in warm water, add your damp fabric, and hold it warm for an hour or so before you dye.
Protein fibres, wool and silk especially, benefit from this step. Cellulose fibres like cotton and linen take more colour with alum than without, and it costs you one extra pot of warm water.
4. Heat the Avocado-Pit Dye Bath
Drain the soaking water off the pits and put them in your dyeing pot with fresh water. Bring it up gradually to a simmer, somewhere between 185 and 195F (85 to 90C), and hold it there for an hour or two.
Do not boil hard. A rolling boil dulls the colour, toughens protein fibres, and can scorch the fabric against the pot. A lazy bubble and an occasional stir is what you want.
Watch the water rather than a clock. It will move through clear, then pale gold, then a strong tea or rust brown. Stronger and longer does not reliably mean deeper or more repeatable, so resist the urge to triple the heat once it looks dark.
5. Add the Mordanted Fabric
Lower the strained pits out first if you want an even colour, or leave them in if you like the mottled texture they leave behind. Then add the damp fabric without packing the pot full; the cloth has to move in the bath or you get uneven patches.
Keep the temperature just under a boil and let the fabric sit in it for 30 to 60 minutes. You will see the water take on fabric colour and the cloth shift from wet-white to something warmer.
Leaving the fabric in the cooled bath overnight pulls more colour out. That is the simplest way to get a deeper pink, and it costs you nothing but waiting.
6. Remove, Rinse, and Air-Dry the Fabric
Turn off the heat and let the bath cool before you touch the fabric. Then lift it out and rinse under cool running water until the water runs clearer, working out the loose excess dye.
Hang it or lay it flat somewhere out of direct sunlight. Direct sun fades natural dye fast, and the wet cloth looks far darker and browner than it will once dry — this is normal and not a sign of failure.
Change the rinsing water a few times, then hold off on washing for about a week so the colour can fully oxidise and settle. After that, wash it on its own with cool water and mild detergent, and expect a small amount of fading with every wash from there on.
7. Test and Record the Final Color
Once the swatch is dry, compare it in neutral daylight rather than under a warm bulb. What you see wet in the pot is always darker and browner than the dried result.
Write down what you used: fibre type, mordant or none, pit quantity, soak time, water temperature and total dyeing time. Natural dye is experimental, and a notebook is the only thing that makes the second batch better than the first.
Test washfastness before you plan a big project. Rinse a corner of the swatch, let it dry, and see how much colour moves. Fabric that barely tints the water will hold up to a tablecloth; fabric that leaves your sink pink needs more mordant or a longer soak.
Common Mistakes
- Weak, washed-out colour — usually too little pit material or a bath that never got hot. Double your pits to 100% of fibre weight, hold the simmer closer to two hours, and leave the fabric in the cooled bath overnight.
- Blotchy, marbled patches — caused by crowding or by pit fragments pressing against the cloth. Strain the pits out, stir gently every 15 minutes, and dye a smaller load per pot.
- Uneven colour across pieces — the fabric was dry going in, or one piece sat on the pot bottom. Pre-wet everything so it goes in damp, and keep the fabric suspended rather than lying flat.
- Colour gone after washing — no mordant, or washed too soon. Mordant with alum before dyeing and wait about a week before the first wash.
- A grey or brown result instead of pink — hard water and an alkaline pot push the colour toward brown. Try softer water, and a spoonful of lemon juice in the bath to nudge it slightly more acidic and salmon.
- Green stains that will not rinse out — flesh left on the pits. Scrub harder next time and rinse under cold water.
My one piece of advice: start with white fabric, keep the heat gentle, and do not overpack the pot. Accept that two batches from the same bag of pits will not match exactly — that variation is the deal with a zero-waste dye made from kitchen scraps.
Frequently Asked Questions
What kind of fabric works best for avocado-pit dye?
Protein fibres take the most colour, so wool and silk come out the deepest and most even. Cellulose fibres like cotton, linen and hemp also work well, especially when mordanted with alum first. Avoid polyester, nylon, acrylic and anything blended with them. Unbleached synthetic fabric will barely tint, and the colour fades within a wash.
How long does it take to dye fabric with avocado pits?
Count on a day rather than an hour. Soaking the pits takes overnight, the mordant soak about an hour, and the dye bath itself one to two hours at a simmer. Add 30 to 60 minutes for the actual fabric soak, then another week before you wash the finished piece so the colour can fully settle.
Can you reuse the avocado pits for a second dye bath?
Yes, and most people do. After the first extraction, strain the pits, put them back in the pot with fresh water and simmer again. The second decoction gives a lighter, paler colour, so it suits small pieces, dip-dyed paper notecards or a second pale layer. Two baths usually use up most of the tannin in the pits.
Why is my avocado-pit dyed fabric brown or gray instead of pink?
Water chemistry is usually the reason. Hard water and an alkaline pot push the tannins toward brown and grey, while softer, slightly acidic water leans more salmon. If the fabric came out muted, the dye was also probably under-oxidised, so leaving it in the cooled bath overnight would have helped.
Is fabric dyed with avocado pits safe to use or wear?
Pigments from plant-based dyes are generally considered low risk, and avocado dye is commonly used on clothing and yarn. It is not food-safe dye, so do not use it on anything that touches food, and keep the dye bath out of reach of children and pets while it is hot. Rinse the finished fabric well and wash it separately for the first few washes.
Start with a single small test swatch of white cotton, half a pound of scrubbed pits, and one afternoon. When you understand how that one behaves, scale up — and write down what you did, because that notebook is the only thing that makes natural dyeing repeatable.